The Complete Guide to Integrate PayPal in Mobile Apps
"Do PayPal offer native app checkout?" is a question I have received from my readers recently. If you do a simple Google search, you will probably find PayPal's Android/iOS SDK, which has been deprecated since 2018.
However, many guides on the internet still publish outdated guides using this SDK and so, in this article, I will share the most complete and current guide on how to integrate PayPal in your mobile apps.
This article will show the code for Android apps but the integration pattern works for iOS too.
Before we begin
If your app is receiving payments to a US or Europe-based PayPal account, you may use the latest PayPal Mobile Checkout SDK to integrate PayPal. And you may leave this article :)
However, if your PayPal account is outside these 2 regions, this will be the guide for you.
Prerequisites
Intermediate to advanced knowledge in APIs, Android Development and Java
Android Studio (this guide uses Arctic Fox 2020.3.1)
Android API level 23+ (this guide uses 30)
PayPal Prerequisites
A PayPal Sandbox Business account to test the integration
A PayPal Sandbox Personal account to test the integration
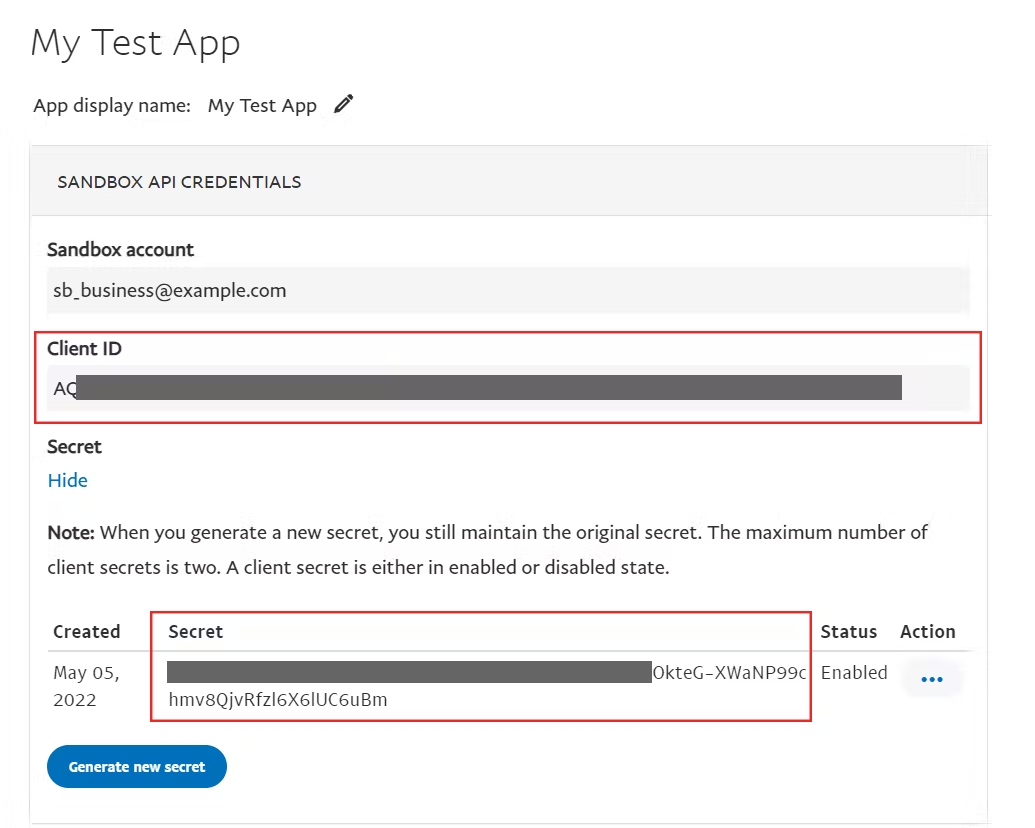
A PayPal Client ID and Secret from your REST App
You can check out my guide to set up these 3 prerequisites. Read up to Step 2 only.
What's the difference between a Personal and Business PayPal account?
Personal account: The buyer who will make a purchase
Business account: The merchant who will receive the payment
To test the integration, you will need to use a fake buyer using the sandbox personal account to make a purchase on your app. If the integration is successful, your sandbox business account will receive the payment.
Step 1: Import dependencies in build.gradle
First, let's import the following:
dependencies {
  //to make HTTP requests
  implementation 'com.loopj.android:android-async-http:1.4.11'
  //CCT
  implementation "androidx.browser:browser:1.3.0"
}
If your Android API level > 30, you may use v1.4.0 for
androidx.browser
Step 2: Create the layout for MainActivity
In this simple example, we can create a basic button in the activity_main.xml like so:
<?xml version="1.0" encoding="utf-8"?>
<androidx.constraintlayout.widget.ConstraintLayout xmlns:android="http://schemas.android.com/apk/res/android"
    xmlns:app="http://schemas.android.com/apk/res-auto"
    xmlns:tools="http://schemas.android.com/tools"
    android:layout_width="match_parent"
    android:layout_height="match_parent"
    tools:context=".MainActivity">

    <TextView
        android:id="@+id/textView"
        android:layout_width="wrap_content"
        android:layout_height="wrap_content"
        android:text="Hello! Let's make a $1 purchase!"
        android:textSize="20sp"
        app:layout_constraintBottom_toBottomOf="parent"
        app:layout_constraintLeft_toLeftOf="parent"
        app:layout_constraintRight_toRightOf="parent"
        app:layout_constraintTop_toTopOf="parent"
        app:layout_constraintVertical_bias="0.113" />

    <Button
        android:id="@+id/pp_btn"
        android:layout_width="wrap_content"
        android:layout_height="wrap_content"
        android:layout_marginTop="48dp"
        android:text="Pay with PayPal"
        app:layout_constraintEnd_toEndOf="parent"
        app:layout_constraintHorizontal_bias="0.497"
        app:layout_constraintStart_toStartOf="parent"
        app:layout_constraintTop_toBottomOf="@+id/textView" />


</androidx.constraintlayout.widget.ConstraintLayout>
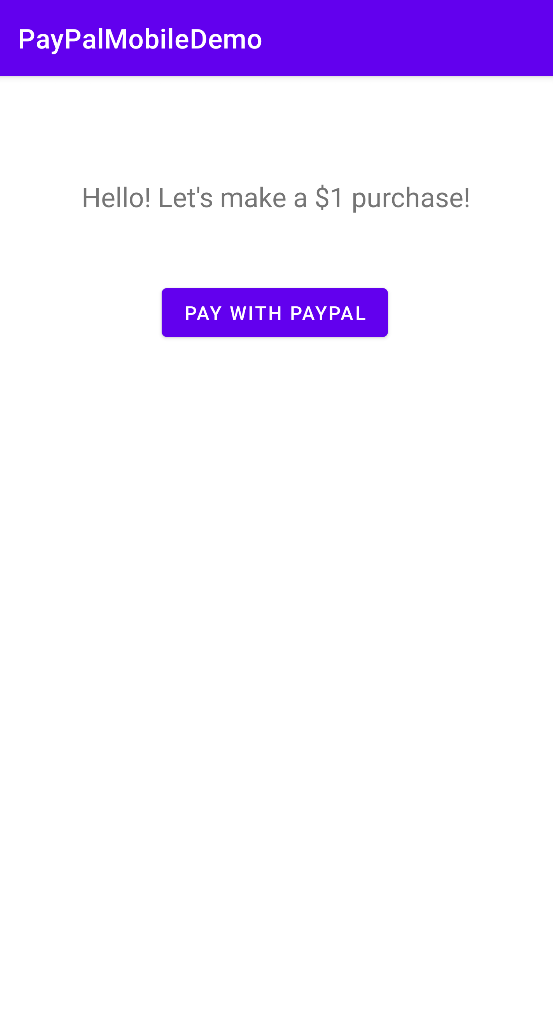
The UI will look like:
Step 3: getAccessToken in MainActivity
In order to use PayPal REST APIs, we first need to generate an access token using our Client ID and Secret, which you can get from your Developer Dashboard.
As seen from the official documentation, to generate an access token, we need to execute the following command:
curl -v -X POST "https://api-m.sandbox.paypal.com/v1/oauth2/token" \
    -u "<CLIENT_ID>:<CLIENT_SECRET>" \
    -H "Content-Type: application/x-www-form-urlencoded" \
    -d "grant_type=client_credentials"
In our MainActivity, we can execute it via Java code instead of cURL like so:
String encodeStringToBase64(){
    String input = "<CLIENT_ID>:<CLIENT_SECRET>";
    String encodedString = Base64.getEncoder().encodeToString(input.getBytes());
    return encodedString;
 }

void getAccessToken(){
    String AUTH = encodeStringToBase64();
    AsyncHttpClient client = new AsyncHttpClient();
    client.addHeader("Accept", "application/json");
    client.addHeader("Content-type", "application/x-www-form-urlencoded");
    client.addHeader("Authorization", "Basic "+ AUTH);
    String jsonString = "grant_type=client_credentials";

    HttpEntity entity = new StringEntity(jsonString, "utf-8");

    client.post(this, "https://api-m.sandbox.paypal.com/v1/oauth2/token", entity, "application/x-www-form-urlencoded",new TextHttpResponseHandler() {
        @Override
        public void onFailure(int statusCode, Header[] headers, String response, Throwable throwable) {
            Log.e("RESPONSE", response);
        }

        @Override
        public void onSuccess(int statusCode, Header[] headers, String response) {
            try {
                JSONObject jobj = new JSONObject(response);
                accessToken = jobj.getString("access_token");
            } catch (JSONException e) {
                e.printStackTrace();
            }
        }
    });
}
Step 4: onClick listener
Next, we want to attach an onClick listener to our checkout button on our app. Still in MainActivity, add the following code under the onCreate function:
Button payPalButton = findViewById(R.id.pp_btn);
payPalButton.setOnClickListener(new View.OnClickListener(){
    @Override
    public void onClick(View view) {
        createOrder(); //this will trigger the checkout flow
    }
});
As seen in the code above, when the buyer clicks the checkout button, the functioncreateOrder will call the PayPal Create Order API to start the checkout flow. Let's create that function now.
Step 5: createOrder function
To call the Create Order API, we need to pass our generated access token in the request header as:
"Authorization: Bearer <Access-Token>"
Then, in the request body, we have an order object like:
{
  "intent": "CAPTURE",
  "purchase_units": [
    {
      "amount": {
        "currency_code": "SGD",
        "value": "1.00"
      }
    }
  ]
}
Here's my example of implementing the createOrder function. Of course, please do not hard code anything in a live app. This is just an example.
void createOrder(){
    AsyncHttpClient client = new AsyncHttpClient();
    client.addHeader("Accept", "application/json");
    client.addHeader("Content-type", "application/json");
    client.addHeader("Authorization", "Bearer " + accessToken);

    String order = "{"
            + "\"intent\": \"CAPTURE\","
            + "\"purchase_units\": [\n" +
            "      {\n" +
            "        \"amount\": {\n" +
            "          \"currency_code\": \"SGD\",\n" +
            "          \"value\": \"1.00\"\n" +
            "        }\n" +
            "      }\n" +
            "    ]}";
    HttpEntity entity = new StringEntity(order, "utf-8");

    client.post(this, url+"/v2/checkout/orders", entity, "application/json",new TextHttpResponseHandler() {
        @Override
        public void onFailure(int statusCode, Header[] headers, String response, Throwable throwable) {
            Log.e("RESPONSE", response);
        }

        @Override
        public void onSuccess(int statusCode, Header[] headers, String response) {
            Log.i("RESPONSE", response);
        }
    });
}
If the request is successful, we should get an API response like this:
{
  "id": "7SK00420K5251910F",
  "status": "CREATED",
  "links": [
    {
      "href": "https://api.sandbox.paypal.com/v2/checkout/orders/7SK00420K5251910F",
      "rel": "self",
      "method": "GET"
    },
    {
      "href": "https://www.sandbox.paypal.com/checkoutnow?token=7SK00420K5251910F",
      "rel": "approve",
      "method": "GET"
    },
    {
      "href": "https://api.sandbox.paypal.com/v2/checkout/orders/7SK00420K5251910F",
      "rel": "update",
      "method": "PATCH"
    },
    {
      "href": "https://api.sandbox.paypal.com/v2/checkout/orders/7SK00420K5251910F/capture",
      "rel": "capture",
      "method": "POST"
    }
  ]
}
Step 6: Redirect to Login Page
The next step is to redirect the buyer to the PayPal Login page to make the payment using their PayPal account. To do that, from the API response, we get the href value in the object which has "rel": "approve". This is what we call the buyer approval link.
In the example API response above, the link we would redirect the buyer to will be:
https://www.sandbox.paypal.com/checkoutnow?token=7SK00420K5251910F
Important Note
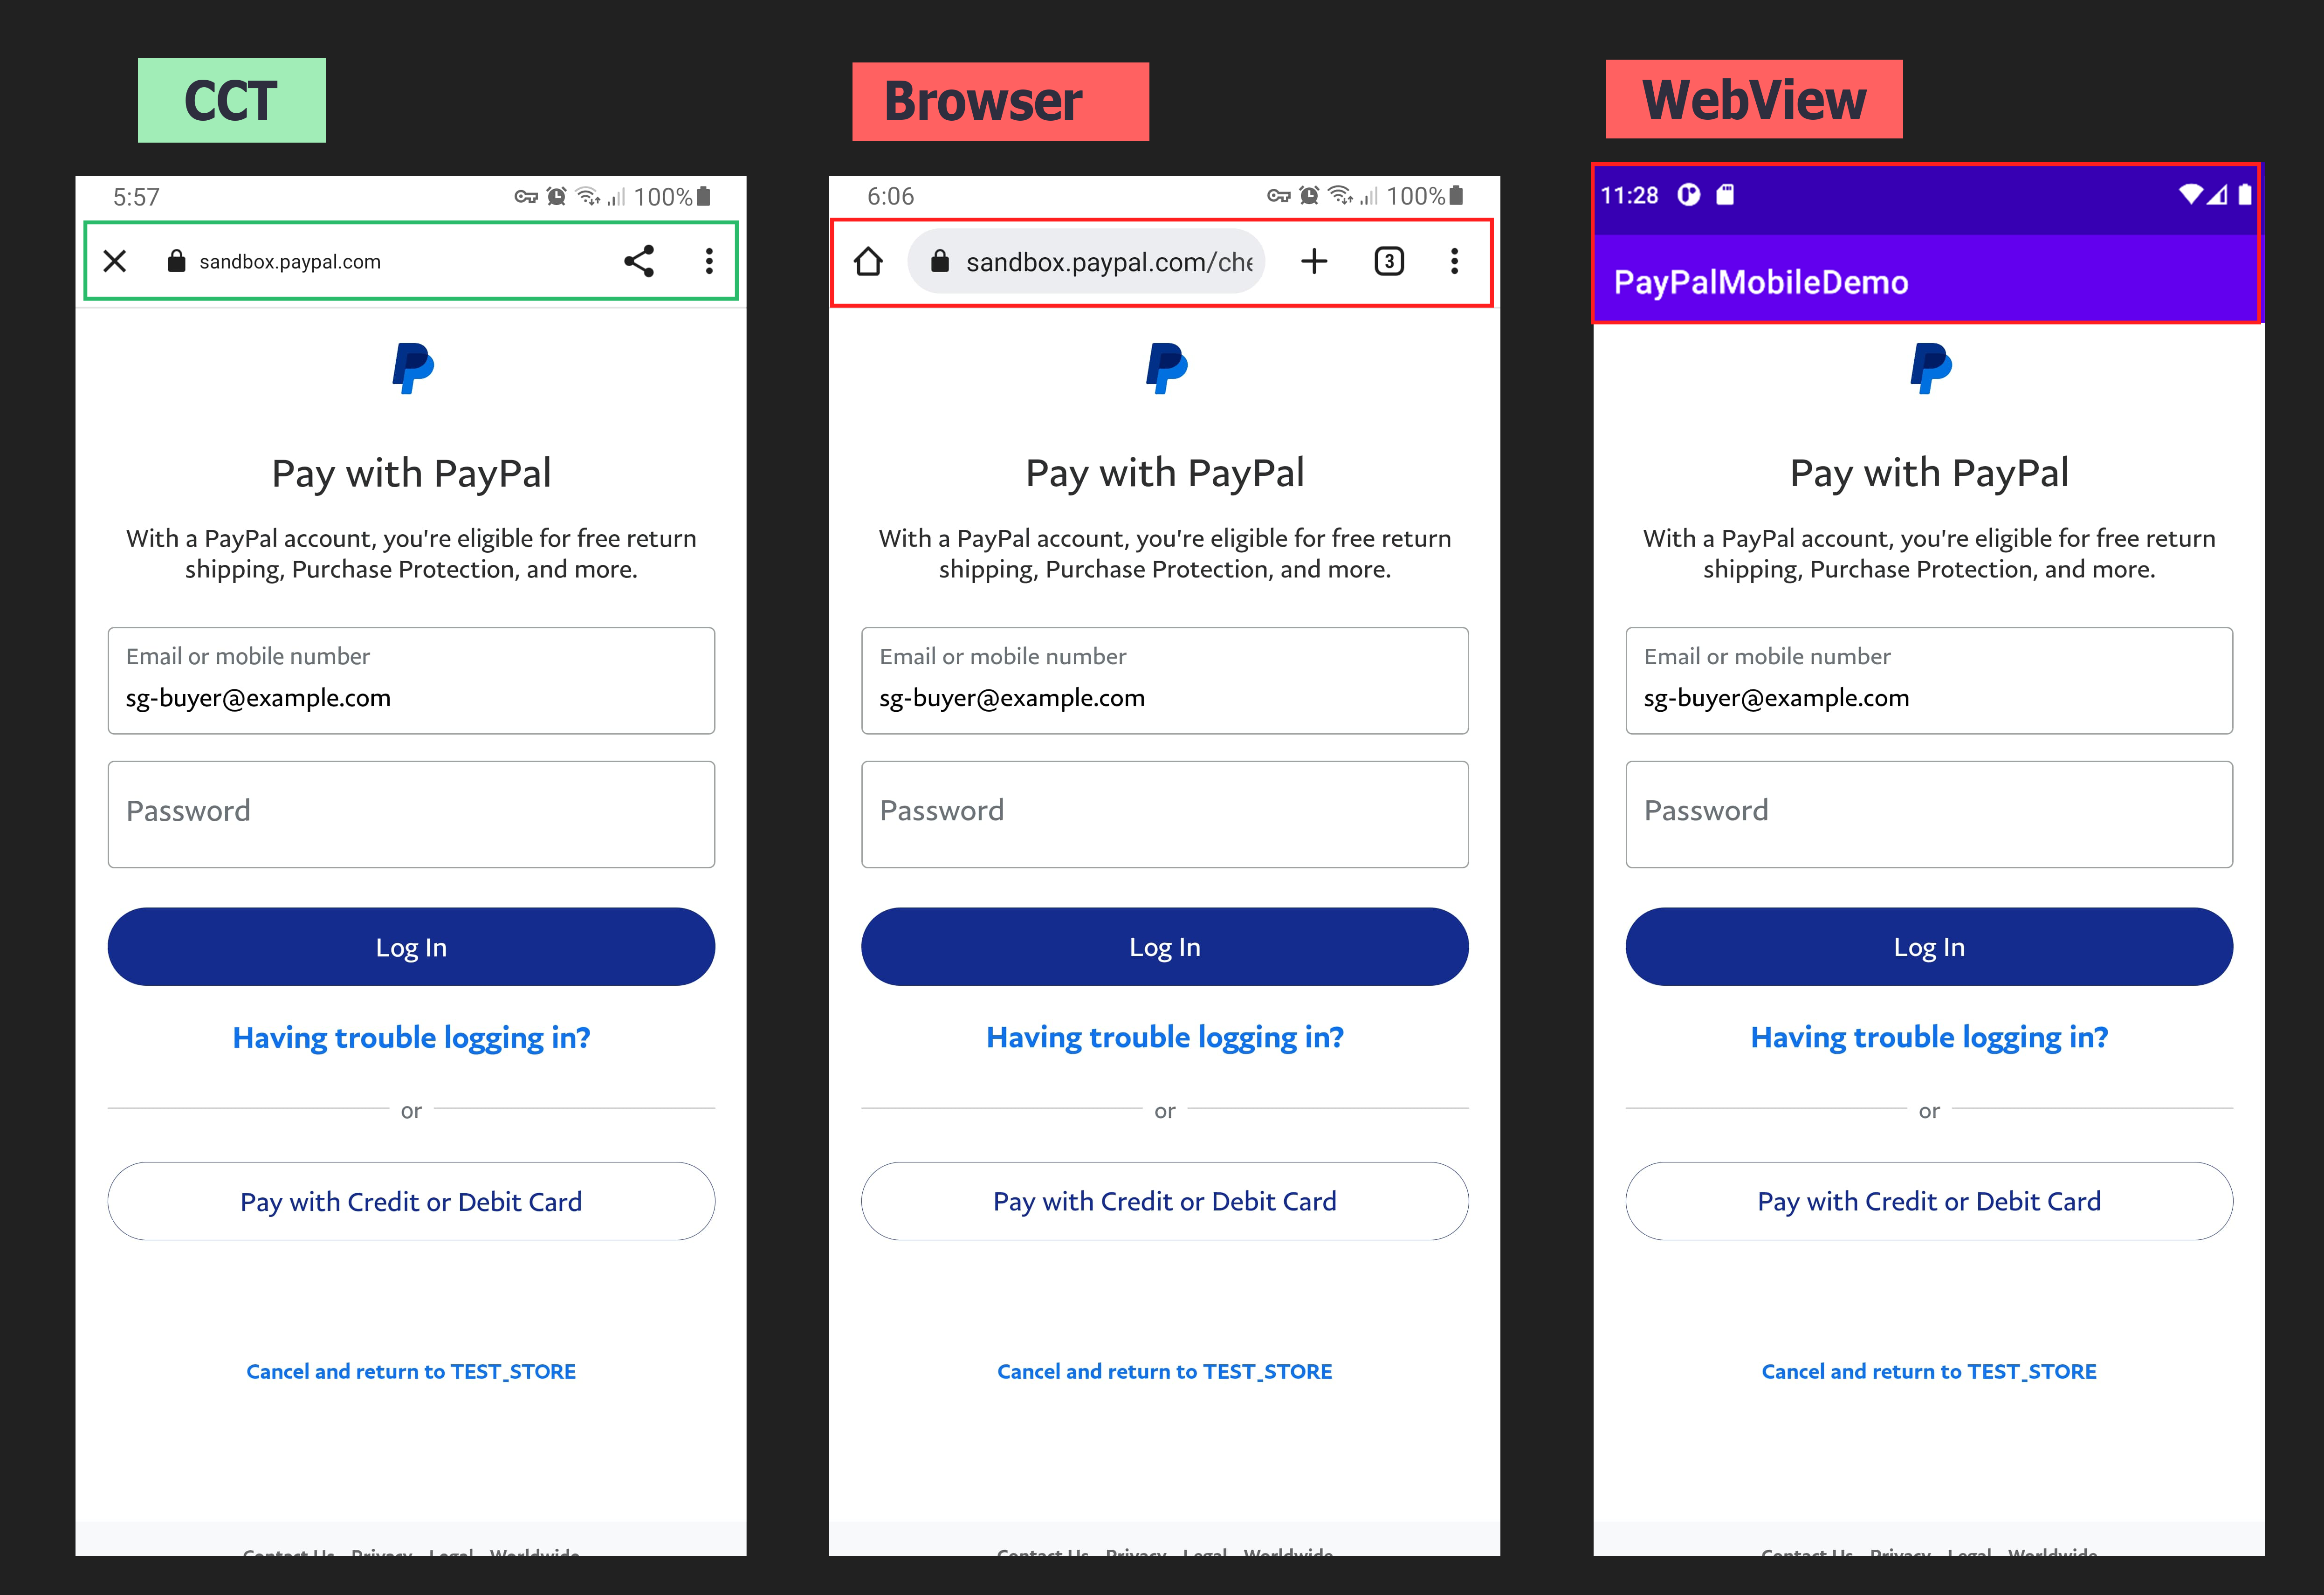
Due to PayPal's InfoSec policies, please do not open this buyer approval link in a WebView. Please open the link via CCT (Android) or ASWebAuthenticationSession (iOS). This article explains why we prefer CCT over WebView.
Glossary
CCT: Chrome Custom Tabs
ASWebAuthenticationSession: A session that an app uses to authenticate a user through a web service.
In the createOrder function, inside the onSuccess handler, let's add the redirection logic:
@Override
public void onSuccess(int statusCode, Header[] headers, String response) {
    try {
        JSONArray links = new JSONObject(response).getJSONArray("links");

        //iterate the array to get the approval link
        for (int i = 0; i < links.length(); ++i) {
            String rel = links.getJSONObject(i).getString("rel");
            if (rel.equals("approve")){
                String link = linkObj.getString("href");
                //redirect to this link via CCT
                 CustomTabsIntent.Builder builder = new CustomTabsIntent.Builder();
                 CustomTabsIntent customTabsIntent = builder.build();
                 customTabsIntent.launchUrl(MainActivity.this, Uri.parse(link));
            }
        }

    } catch (JSONException e) {
        e.printStackTrace();
    }
}
How do I know I'm using CCT?
The screenshot below shows the difference between opening the link via CCT or browser or WebView.
Step 7: Add Deep Links to Return to App
Currently, the GIF below should be the flow of the app. After selecting a payment method and clicking the 'Continue' button, notice that the page does not redirect back to the app. Instead, it just refreshed the page. That's because we haven't specified the return url.
To do that, we have to add it in our order object in Step 5. Update the order object:
String order = "{"
  + "\"intent\": \"CAPTURE\","
  + "\"purchase_units\": [\n" +
  "      {\n" +
  "        \"amount\": {\n" +
  "          \"currency_code\": \"SGD\",\n" +
  "          \"value\": \"1.00\"\n" +
  "        }\n" +
  "      }\n" +
  "    ],\"application_context\": {\n" +
  "        \"brand_name\": \"TEST_STORE\",\n" +
  "        \"return_url\": \"https://example.com\",\n" +
  "        \"cancel_url\": \"https://example.com\"\n" +
  "    }}";
This return_url is a hosted website that is a deep link, which will take the buyer back to the app, into a specific activity.
More details about deep links in this documentation.
We can set up our deep link in our AndroidManifest.xml. Let's say we want to redirect the buyer back to a CheckoutActivity to finalize the payment. Our AndroidManifest.xml will include:
<activity android:name=".CheckoutActivity">
    <intent-filter>
        <action android:name="android.intent.action.VIEW" />
        <category android:name="android.intent.category.DEFAULT" />
        <category android:name="android.intent.category.BROWSABLE" />
        <data
            android:scheme="https"
            android:host="www.example.com" />
    </intent-filter>
</activity>
This will instruct the deep link to redirect back to the CheckoutActivity after the PayPal Login.
Step 8: CheckoutActivity
And now, what we are going to do in CheckoutActivity is have a page where the buyer can review the order and press a 'Confirm' button to finalize the payment.
In the activity_checkout.xml, I designed a simple layout:
<?xml version="1.0" encoding="utf-8"?>
<androidx.constraintlayout.widget.ConstraintLayout xmlns:android="http://schemas.android.com/apk/res/android"
    xmlns:app="http://schemas.android.com/apk/res-auto"
    xmlns:tools="http://schemas.android.com/tools"
    android:layout_width="match_parent"
    android:layout_height="match_parent"
    tools:context=".CheckoutActivity">

    <TextView
        android:id="@+id/orderID"
        android:layout_width="wrap_content"
        android:layout_height="wrap_content"
        android:text="Order ID:"
        android:textSize="20sp"
        app:layout_constraintBottom_toBottomOf="parent"
        app:layout_constraintHorizontal_bias="0.498"
        app:layout_constraintLeft_toLeftOf="parent"
        app:layout_constraintRight_toRightOf="parent"
        app:layout_constraintTop_toTopOf="parent"
        app:layout_constraintVertical_bias="0.427" />

    <TextView
        android:id="@+id/amt"
        android:layout_width="wrap_content"
        android:layout_height="wrap_content"
        android:text="Amount: $1.00"
        android:textSize="20sp"
        app:layout_constraintBottom_toBottomOf="parent"
        app:layout_constraintHorizontal_bias="0.498"
        app:layout_constraintLeft_toLeftOf="parent"
        app:layout_constraintRight_toRightOf="parent"
        app:layout_constraintTop_toTopOf="parent"
        app:layout_constraintVertical_bias="0.319" />

    <Button
        android:id="@+id/confirm_btn"
        android:layout_width="wrap_content"
        android:layout_height="wrap_content"
        android:text="Confirm Payment"
        app:layout_constraintBottom_toBottomOf="parent"
        app:layout_constraintEnd_toEndOf="parent"
        app:layout_constraintStart_toStartOf="parent"
        app:layout_constraintTop_toBottomOf="@+id/orderID"
        app:layout_constraintVertical_bias="0.17" />

    <TextView
        android:id="@+id/title"
        android:layout_width="wrap_content"
        android:layout_height="wrap_content"
        android:text="Confirm Payment Page"
        android:textSize="20sp"
        app:layout_constraintBottom_toBottomOf="parent"
        app:layout_constraintHorizontal_bias="0.497"
        app:layout_constraintLeft_toLeftOf="parent"
        app:layout_constraintRight_toRightOf="parent"
        app:layout_constraintTop_toTopOf="parent"
        app:layout_constraintVertical_bias="0.174" />

</androidx.constraintlayout.widget.ConstraintLayout>
It looks something like this:
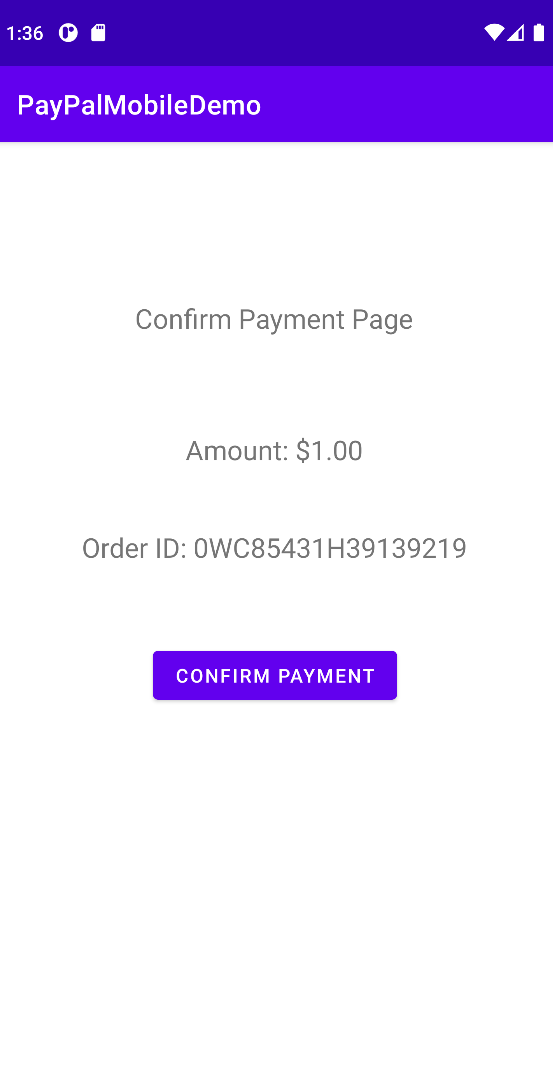
The OrderID will be a dynamic string generated by the API. We can retrieve it from the URL query parameter token in the deep link. Also, let's add an onClick listener to our confirm button. When the user clicks this button, the payment will be finalized.
Here's our CheckoutActivity to implement the points above:
TextView orderID_label;
Button confirm_btn;
String orderID;

@Override
protected void onCreate(Bundle savedInstanceState) {
    super.onCreate(savedInstanceState);
    setContentView(R.layout.activity_checkout);

    //get the orderID from the query parameter
    Uri redirectUri = getIntent().getData();
    orderID = redirectUri.getQueryParameter("token");

    //set the orderID string to the UI
    orderID_label = (TextView) findViewById(R.id.orderID);
    orderID_label.setText("Order ID: " +orderID);

    //add an onClick listener to the confirm button
    confirm_btn = findViewById(R.id.confirm_btn);
    confirm_btn.setOnClickListener(new View.OnClickListener(){
        @Override
        public void onClick(View view) {
            captureOrder(orderID); //function to finalize the payment
        }
    });
}
Now all that's left is to write the captureOrder function, which is called when the user clicks 'Confirm'. This function will call PayPal's Capture Order API to submit the order and finalize the payment.
Before we write the captureOrder function, we need to get the generated access token from the MainActivity. Let's simply create a function in MainActivity to return the accessToken variable.
//In MainActivity.java - to get accessToken from CheckoutActivity
public static String getMyAccessToken(){
    return accessToken;
}
Back in CheckoutActivity, we can now get this accessToken variable. Our captureOrder function will be:
void captureOrder(String orderID){
        //get the accessToken from MainActivity
        String accessToken = MainActivity.getMyAccessToken();

        AsyncHttpClient client = new AsyncHttpClient();
        client.addHeader("Accept", "application/json");
        client.addHeader("Content-type", "application/json");
        client.addHeader("Authorization", "Bearer " + accessToken);

        client.post("https://api-m.sandbox.paypal.com/v2/checkout/orders/"+orderID+"/capture", new TextHttpResponseHandler() {
            @Override
            public void onFailure(int statusCode, Header[] headers, String response, Throwable throwable) {
                Log.e("RESPONSE", response);
            }

            @Override
            public void onSuccess(int statusCode, Header[] headers, String response) {
                try {
                    JSONObject jobj = new JSONObject(response);
                    //redirect back to home page of app
                    Intent intent = new Intent(CheckoutActivity.this, MainActivity.class);
                    startActivity(intent);
                } catch (JSONException e) {
                    e.printStackTrace();
                }
            }
        });
    }
And there we have it! If the transaction is successful, the buyer will be redirected back to the MainActivity. Let's test the app!
Result
And we should now have a mobile app that can accept PayPal as a payment method!
Let's recap the entire flow:
In MainActivity, buyer clicks on the 'Pay with PayPal' button to start the checkout process
This calls the Create Order API, which returns the approval link
Open this link via CCT/SVC for buyer to login to their PayPal account
Buyer selects the payment method and clicks 'Continue'
This return_url is a deep link which redirects to the CheckoutActivity
In CheckoutActivity, buyer clicks the 'Confirm Payment' button to finalize payment
This calls the Capture Order API. If successful, the transaction is complete.
Once transaction is complete, redirect buyer back to home page (i.e. MainActivity)
Conclusion
Thanks for reading! I hope this guide has been helpful for integrating PayPal to your mobile apps that needs to accept payments!
Please note that all the code here are example codes, which is subject to revision and optimization. It is just for reference and for you to get familiar with the checkout flow. For a more secure integration, I suggest having a server to call the API endpoints.
If you have any questions, feel free to ask in the comments below. If you find this article helpful, don't forget to give a like and share. Cheers!


