Testing React Components and Apps with Enzyme

Testing front-end applications can be a pain and time-consuming to write. In this article, let's discuss Enzyme and how we can use it to make testing UI much easier.
First, What's Enzyme?
Enzyme is a JavaScript testing utility for React. It makes testing React components easy by asserting, manipulating, and traversing every components' output. Currently, it is open sourced and maintained by AirBnB.

Why Enzyme?
In terms of testing, you've probably heard of Mocha and Chai. This JavaScript test framework and assertion library are often used cohesively to write unit and functional tests.
But what about testing React components? Enzyme is the solution for the following reasons:
Intuitive and flexible API
Compatible with major and common test runners
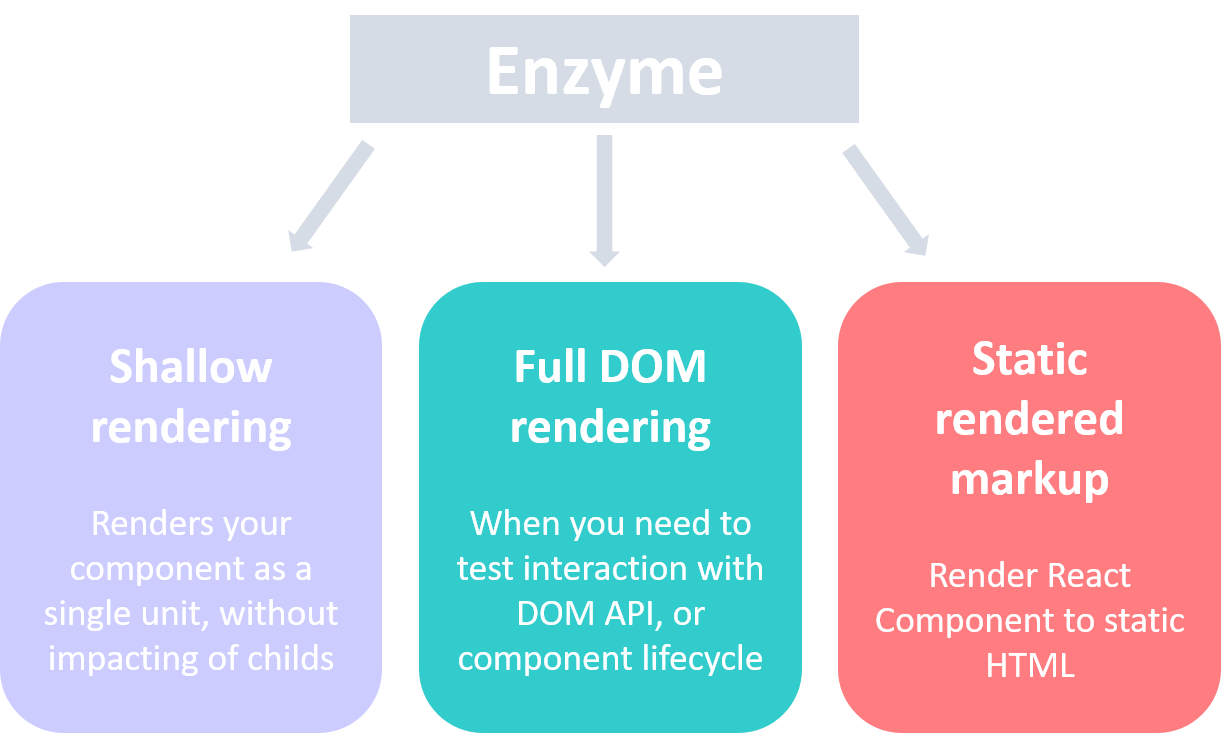
Supports shallow rendering, DOM rendering and static rendered markup

Enzyme Implementation
Now let's learn how we can use Enzyme with Jest, a test runner in React, to write tests.
Step 1: Install Enzyme
First we install the package:
npm install enzyme enzyme-adapter-react-16
Step 2: setupTests.js
When you create a new React app, there should be a setupTests.js file initialized by default.
Add the following code in that file to import Enzyme:
import { configure } from "enzyme";
import Adapter from "enzyme-adapter-react-16";
configure({ adapter: new Adapter() });
Step 3: App.test.js
In this example, let's test our App.js file. Jest, our test runner, will run test files automatically if the file is:
Any .js file in a folder named tests
Any .js file with a name like [name].spec.js
Any .js file with a name like [name].test.js
So let's have an App.test.js file to test our App.js. In that file, we'll write some simple test like so:
import React from "react";
import App from "./App";
import renderer from "react-test-renderer";
import { shallow } from "enzyme";

it("renders without crashing", () => {
  shallow(<App />);
});

it("renders correctly", () => {
  const rendered = renderer.create(<App />);
  expect(rendered.toJSON()).toMatchSnapshot();
});
In our first test, we use shallow rendering to isolate an individual component such as <App/> and make sure that it renders.
Our next test is a snapshot test to test if the UI renders correctly. According to Jest documentation,
A typical snapshot test case renders a UI component, takes a snapshot, then compares it to a reference snapshot file stored alongside the test.
Run Tests
With these 2 simple example tests, let's run them with:
npm test
If all tests passed, the terminal should show:

Automating your tests
So now we know how to write simple UI tests with Enzyme. For more details, visit their documentation.
It's always good to keep your test automated instead of manually running npm test every time. Buddy CI/CD is a tool I use to automate tests easily, and it works well for React apps.
Step 1: Add a Pipeline
To get started, simply create an account at buddy.works, and add your project by choosing the git provider you use.

Then, add a pipeline in which we can automate our tests in our React app. Ensure that 'Trigger Mode' is set to On Push and the branch as master so that our test will automatically run every time we made changes to our project.

Step 2: Add a Node action
Since we're using the command npm test to run our test, we can add a Node action to our pipeline.
In our action, we run the commands to install our package and run our test:
npm install
npm test

Step 3: Add Notifications
Finally, we can send an Email notification so that we know when the test has finished running.

Run Pipeline!
If we run our pipeline, our tests will be automated and run every time we pushed to our master branch.

Conclusion
Enzyme makes testing components and UI easy for React Apps. With writing tests, automating them can help detect errors early and save development time. Buddy CI/CD is a great tool for achieving that automation.
For more resources on how to create delivery pipelines for React apps with Buddy, please check out the following:
Thanks for reading! Cheers!


