A Look At React Hooks: useScrollPosition for Parallax Scrolling Effects

A Look At React Hooks: useScrollPosition for Parallax Scrolling Effects
Welcome to another article of A Look at React Hooks, a beginner-friendly series on React Hooks. In this article, let's learn how to create our own custom Hook.
For this tutorial, let's make a simple Hook called useScrollPosition to create any scrolling effect when a user enters a particular position on the page. With this, you can achieve a basic parallax scrolling effect, a fade effect, and more.
Here is the demo (using Pokémon to celebrate the new game release):
If you are still new to the concept of React Hooks, you may start with this article: Introduction to React Hooks first.
Step 1: useScrollPosition.js
Assuming you have a React app ready, let us start with our custom Hook: useScrollPosition.
The Hook takes in a scrollFactor as an argument. We will see what this scrollFactor does soon.
It has a position state, which is the value of our window.scrollY property. For those who needs more information, according to MDN Docs:
The scrollY property of the Window interface returns the number of pixels that the document is currently scrolled vertically.
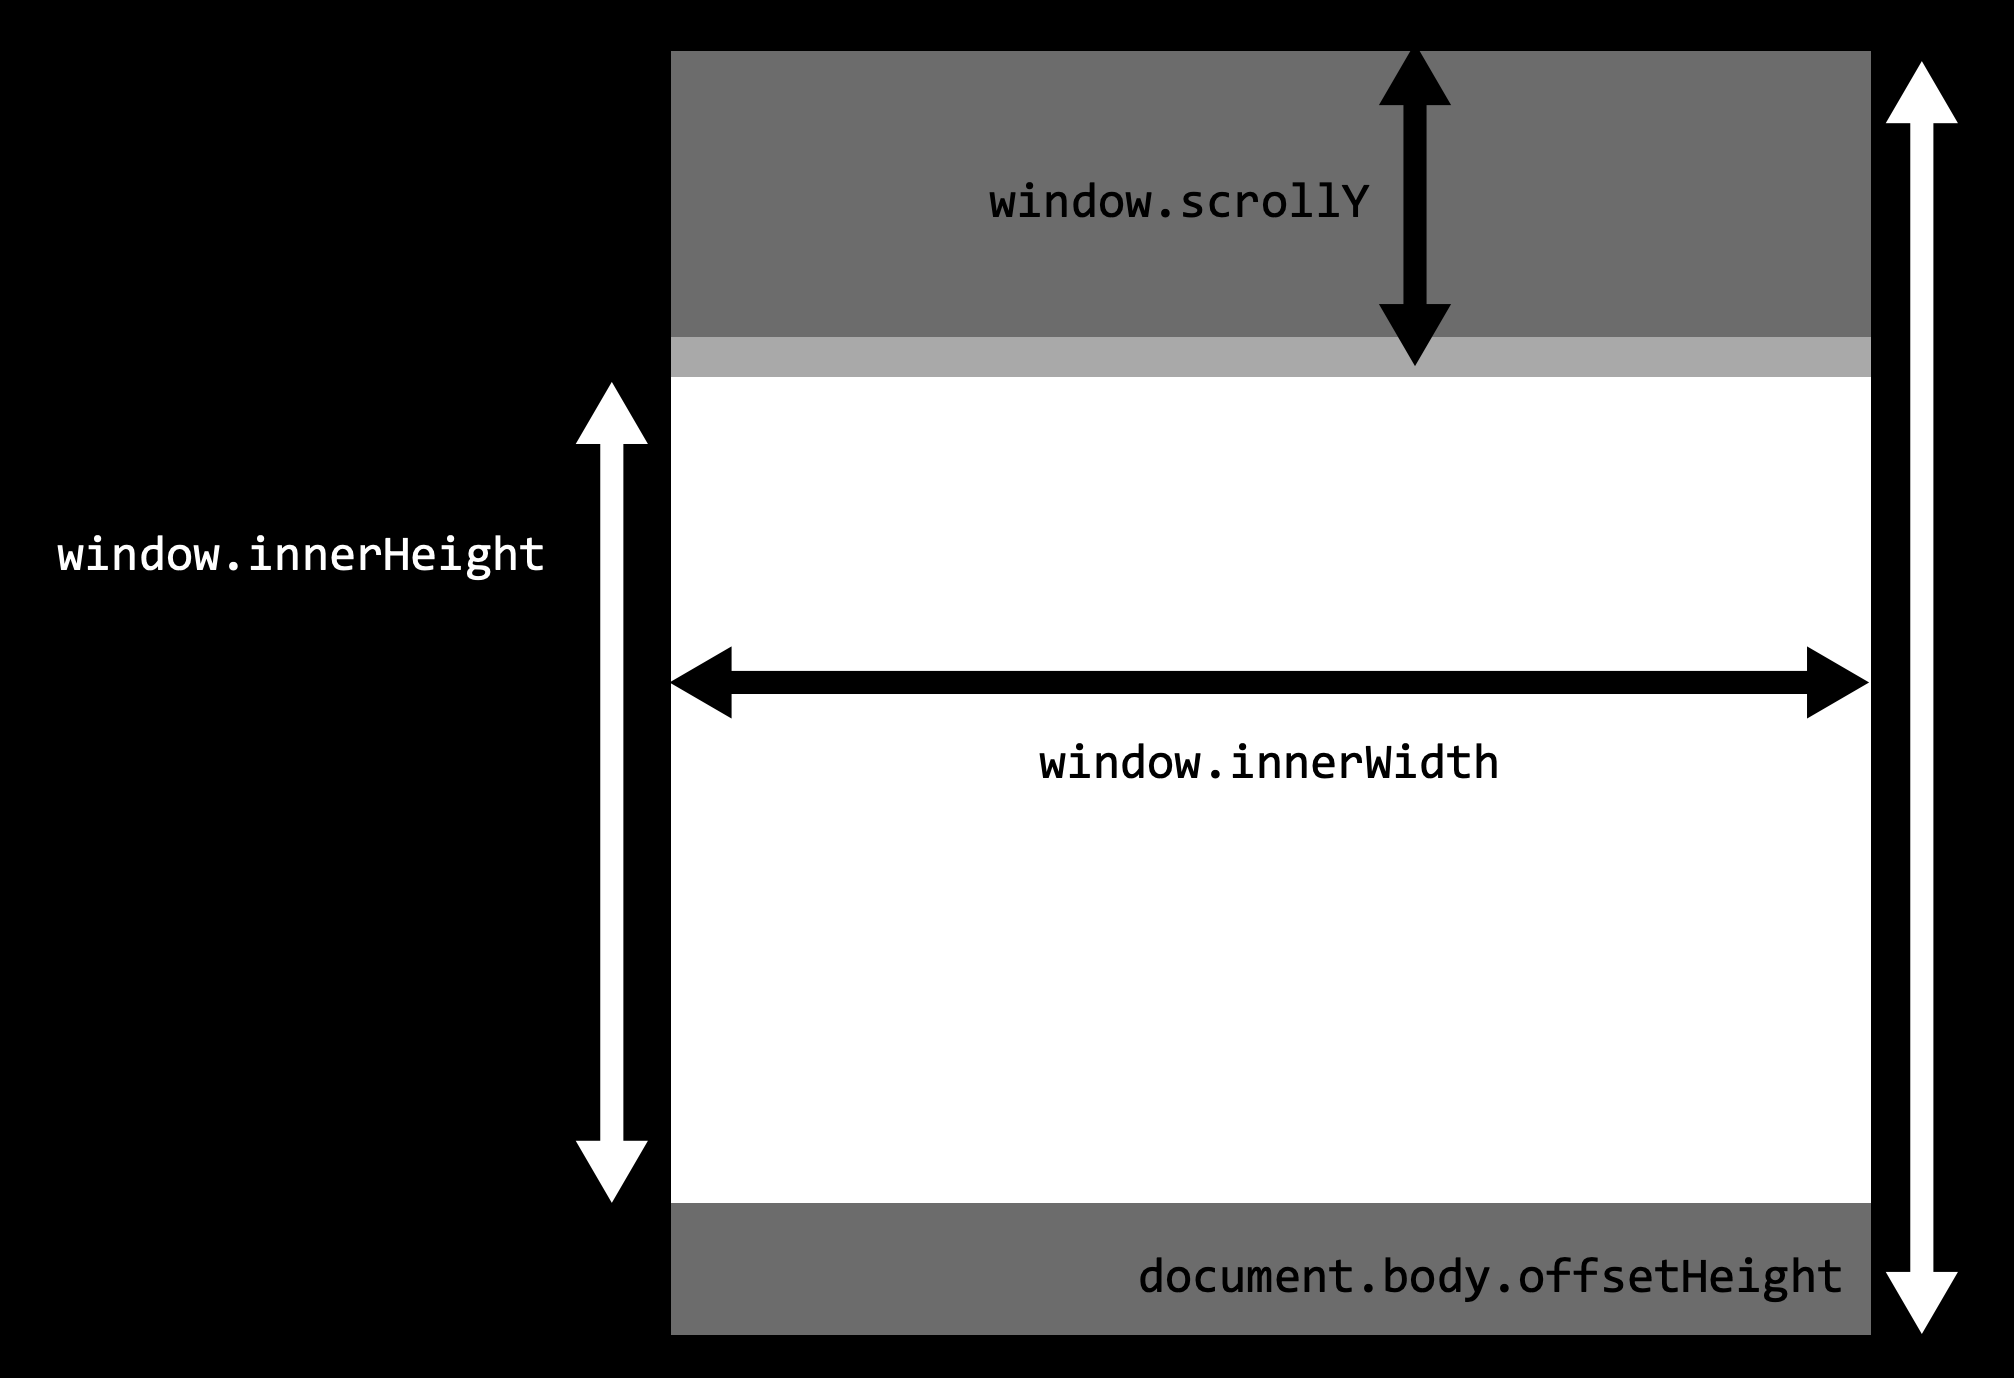
So the Hook will set position to the window.scrollY property's value. We use the useEffect Hook to add a scroll event listener so that the position value is updated every time the user scrolls. Finally, it returns the value of positon*scrollFactor. Below is the code.
import {useState, useEffect} from 'react';

export default function useScrollPosition(scrollFactor=0) {
  const [position, setPosition] = useState(0);

//this function will set the value of position when the page is scrolled
  function onScroll() {
    setPosition(window.scrollY);
  }

  useEffect(() => {
    window.addEventListener("scroll", onScroll);
    //removes the eventlistener when the component is unmounted
    return () => {
      window.removeEventListener("scroll", onScroll);
    };
  }, []);


  return position*scrollFactor;
}
Step 2: App.js
Now that we have our custom Hook, we can easily re-use this in any component in the app. For this simple example, I will use this Hook in my App.js.
As seen in step 1, our useScrollPosition will return the window.scrollY property multiplied by a scrollFactor. This scrollFactor can be used to control the parallax effect you want to achieve.
For example, let's use the Hook to get the current scrollY position and pass '0.5' as the scrollFactor value. We call this state pos. Then in our component, we set our backgroundPositionY to the value of pos.
const pos = useScrollPosition(0.5); //scrollY * 0.5

function MyComponent(){
      <div className="bg1" style={{ backgroundPositionY: pos }}>
        <img src={cynda} />
        <h1>Hello, my name is Cyndaquil.</h1>
      </div>
}
This means that the backdrop image Y position will always be 0.5 times the current scrollY position, creating an illusion of a parallax effect.

When scrollFactor = 0.5, the backdrop's Y pos is at 0.5 times the scrollY position.
As a recap, the backgroundPosition property refers to the values shown in the image below. The backgroundPositionY is the vertical value.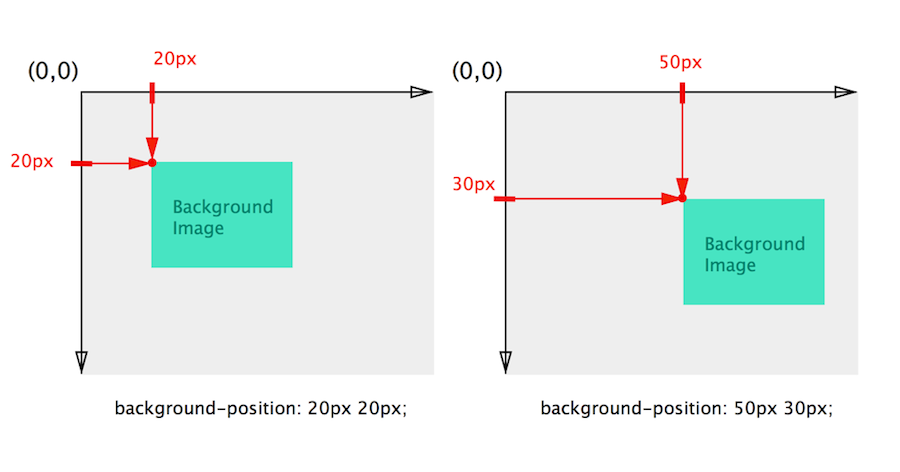
You can test different scrollFactor values to better understand how this works. If we give scrollFactor=0, then pos is always 0. So that means the backdrop would behave as normal, without any parallax effect.

When scrollFactor = 0, there's no parallax effect. The backgroundPosY becomes a fixed value.
So by using useScrollPosition, we can get the latest window.scrollY value at any time and multiply it by the scrollFactor, provided as an argument in the Hook. This can create any effect on a component while scrolling.
In the basic example above, we are using backgroundPositionY to achieve a basic parallax scrolling effect. We can also use other properties like opacity or backgroundPositionX to create other effects.
As seen in the code below, I used the Hook to produce 3 different effects on different sections in my App.js component.
import useScrollPosition from "./useScrollPosition";

function App() {
  const cyndaPosition = useScrollPosition(0.5); // parallax scroll effect
  const rowletPosition = useScrollPosition(0.001); // fade effect
  const oshawottPosition = useScrollPosition(1); // horizontal scroll effect

  return (
    <div className="App">
      <div className="bg1" style={{ backgroundPositionY: cyndaPosition }}>
        <img src={cynda} />
        <h1>Hello, my name is Cyndaquil.</h1>
      </div>
      <div className="bg2" style={{ opacity: rowletPosition }}>
        <h1>Hello, I am Rowlet.</h1>
        <img src={rowlet}/>
      </div>
      <div className="bg3" style={{ backgroundPositionX: oshawottPosition}}>
        <h1>Hello! This is Oshawott!</h1>
        <img src={oshawott}/>
      </div>
    </div>
  );
}
And the result...
When to create a custom Hook?
At this point, you might notice that this custom Hook useScrollPosition is simply a function. It takes an argument, and returns a value. So you may be asking: why should this be a Hook when it can just be a function in the App component?
Like this:
function App() {
  const [position, setPosition] = useState(0);

  function onScroll() {
    console.log(window.scrollY);
    setPosition(window.scrollY);
  }

  useEffect(() => {
    window.addEventListener("scroll", onScroll);

    //removes the eventlistener when the component is unmounted
    return () => {
      window.removeEventListener("scroll", onScroll);
    };
  }, []);

  return (
    <div className="App">
      <div className="bg bg1" style={{ backgroundPositionY: position*0.5 }}>
        <img src={cynda} />
        <h1>Hello, my name is Cyndaquil.</h1>
      </div>
      <div className="bg bg2" style={{ opacity: position*0.001 }}>
        <h1>Hello, I am Rowlet.</h1>
        <img src={rowlet}/>
      </div>
      <div className="bg bg3" style={{ backgroundPositionX: position*1}}>
        <h1>Hello! This is Oshawott!</h1>
        <img src={oshawott}/>
      </div>
    </div>
  );
}
In React, Hooks are essentially reusable pure functions that we want to use in any component without having to change the component hierarchy. Usually, you should create a custom Hook if you want to reuse a logic that uses various React Hooks.
For our useScrollPosition Hook, it consists of useState and useEffect Hooks. And I plan to implement simple parallax effects in other components, not just App.js. So instead of copying and pasting this function over and over into other components, extracting it into a custom Hook is a better design and practice.
Conclusion
In this article, we learn how to create a custom Hook, what they essentially are, and when to create them. I hope this helps you in your learning. If it does, be sure to like and share the article.
I got inspiration for this Hook when I watched a parallax scrolling video on YouTube (link in References section below). So thank you 코딩앙마 for the video.
If you want to learn more about React Hooks, do check out my series A Look at React Hooks, where I have covered all basic Hooks. Thanks for reading! Cheers!


