A Look at React Hooks: useNavigation

Welcome to another article of A Look at React Hooks, a beginner-friendly series on React Hooks. In this article, let's learn about the useNavigation Hook.
Note that this Hook is available for both React Native and React projects which uses React Router. But this article will only be exploring the one for React Router.
Quick Info: What is React Router?
When your single page React app needs page navigation or routing, it needs what is called client-side routing. React Router is the go-to client-side routing solution for React apps.
It enables the app to navigate to an URL without having to reload or request the server to load the page. It is what makes rendering the UI of the new page faster and more dynamic.
What is useNavigation?
useNavigation is a Hook available in React Router.
As stated in their official documentation, this Hook returns any information you need about a page navigation, such as:
Global loading indicators
Disabling forms while a mutation is happening
Adding busy indicators to submit buttons
Optimistically showing a new record while it's being created on the server
Optimistically showing the new state of a record while it's being updated
But let's be more specific. Let's see a simple useNavigation Hook implementation.
import { useNavigation } from "react-router-dom";

function App() {
  const navigation = useNavigation();
}
Note that useNavigation must be used with data routers only.
The const navigation can return the following:
navigation.state: The state of the page navigation. Can be
idle,submittingorloading.navigation.location: The page link user is navigating to
navigation.formData: The data from form submission
navigation.formAction: The url to which the form will be submitted
navigation.formMethod: The POST, PUT, PATCH, or DELETE
Example
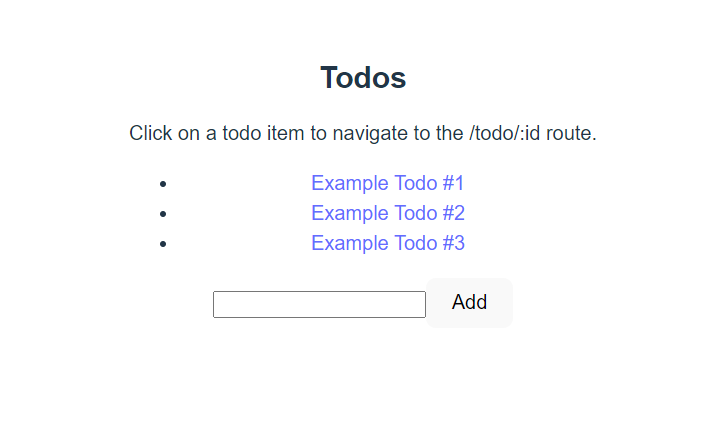
Now let's look at a simple example of the useNavigation Hook. In a React App, I have rendered a Todo list with an input form to add another Todo.
It looks something like this:
And below is the code for the App component.
export function App() {
  let navigation = useNavigation();
  let formRef = useRef(null);
  let [isAdding, setIsAdding] = useState(false);

  useEffect(() => {
    if (navigation.formData?.get('action') === 'add') {
      setIsAdding(true);
    } else if (navigation.state === 'idle') {
      setIsAdding(false);
      formRef.current?.reset();
    }
  }, [navigation]);

  return (
    <>
      <h2>Todos</h2>
      <p>
        Click on a todo item to navigate
        to the /todo/:id route.
      </p>
      <ul>
        {Object.entries(todos).map(([id, todo]) => (
          <li key={id}>
             <Link to={`/todo/${id}`}>{todo}</Link>
          </li>
        ))}
      </ul>
      <Form method="post" ref={formRef}>
      <input type="hidden" name="action" value="add" />
        <input name="todo"></input>
        <button type="submit" disabled={isAdding}>
          {isAdding ? 'Adding...' : 'Add'}
        </button>
      </Form>
    </>
  )
}
As seen from the code above, we are using the Hook to make the submit button disabled and with "Adding" written on it while the form is being submitted.
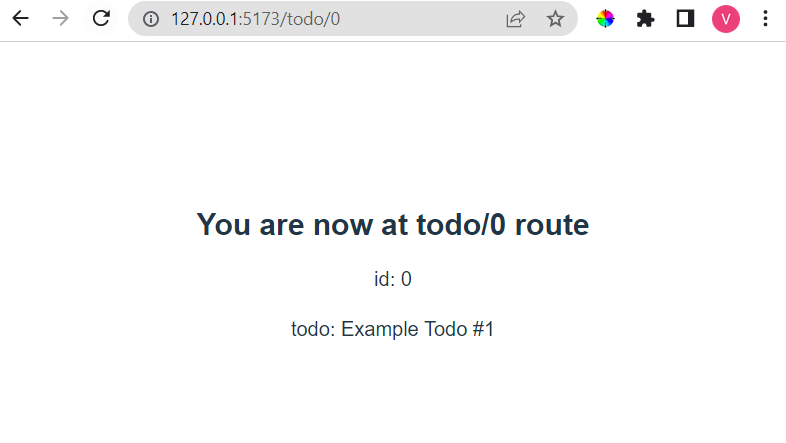
At the same time, once the new todo item is added, the page will be automatically redirected to a dynamic route /todo/:id. We can use the useParams Hook for dynamic routing to redirect to the Todo component.
If you need a refresher on useParams, feel free to read my Introduction to useParams article.
So here's an example our Todo component. todo/0 shows the first todo on the list. todo/1 will show the second one and so on.
export function Todo() {
  let params = useParams();
  return (
    <>
      <h2>You are now at todo/{params.id} route</h2>
      <p>id: {params.id}</p>
      <p>todo: {todos[params.id]}</p>
    </>
  )
}
Now, we setup the router in the main.jsx file. This will manage all the routes we need for navigation.
import {
  createBrowserRouter,
  createRoutesFromElements,
  Route,
  RouterProvider,
} from "react-router-dom";


let router = createBrowserRouter( createRoutesFromElements(
  <>
  <Route path="/" action={todosAction} element={<App />} />
  <Route path="/todo/:id" element={<Todo />} />
  </>
  ) )

ReactDOM.createRoot(document.getElementById("root")).render(
  <React.StrictMode>
     <RouterProvider router={router} />
  </React.StrictMode>
);
Finally, our todosAction will be in charge of adding new todo item to the list and redirect to the dynamic route.
export async function todosAction({ request }) {
  let formData = await request.formData();
  let todo = formData.get('todo');
  if (typeof todo === 'string') {
    addTodo(todo);
  }

  await new Promise((r) => setTimeout(r, 500)); //just to show submitting state
  return new Response(null, {
    status: 302,
    headers: { Location: `/todo/${Object.keys(todos).length-1}`},
  });
}
Result
Now we can see that when our form is submitting, the following things happen:
navigation.state= submittingnavigation.formDatacontainsactionandtodokeystodovalue is added to the list and then page is redirected totodo/:id

Conclusion
And that's all I have for this article! In this article, we learned about the useNavigation Hook, what it is used for and how to implement it. I hope this article has helped you understand this Hook better.
Thanks for reading! Please share and like the article if it has been a helpful read. Also, do share in the comments if you'd like me to write more useful applications of other React Hooks. Cheers!


