How to Increase Your Productivity with GitHub Codespaces

There is a lot to improve in making local development work well out of the box. Many teams take time to onboard new hires to set up their local instances.
In this article, let's discuss about Codespaces and how it can be used to increase development productivity while maintaining a secure, flexible environment for your team.
What is Codespaces?
In 2021, GitHub's core repository has over 1 million commits and onboarding can take almost half to a whole day. It is a fragile system, and GitHub recognized that a solution is needed for the future of development.
Hence, in late 2022, GitHub announced that personal GitHub account users can use Codespaces - a cloud-hosted development environment.
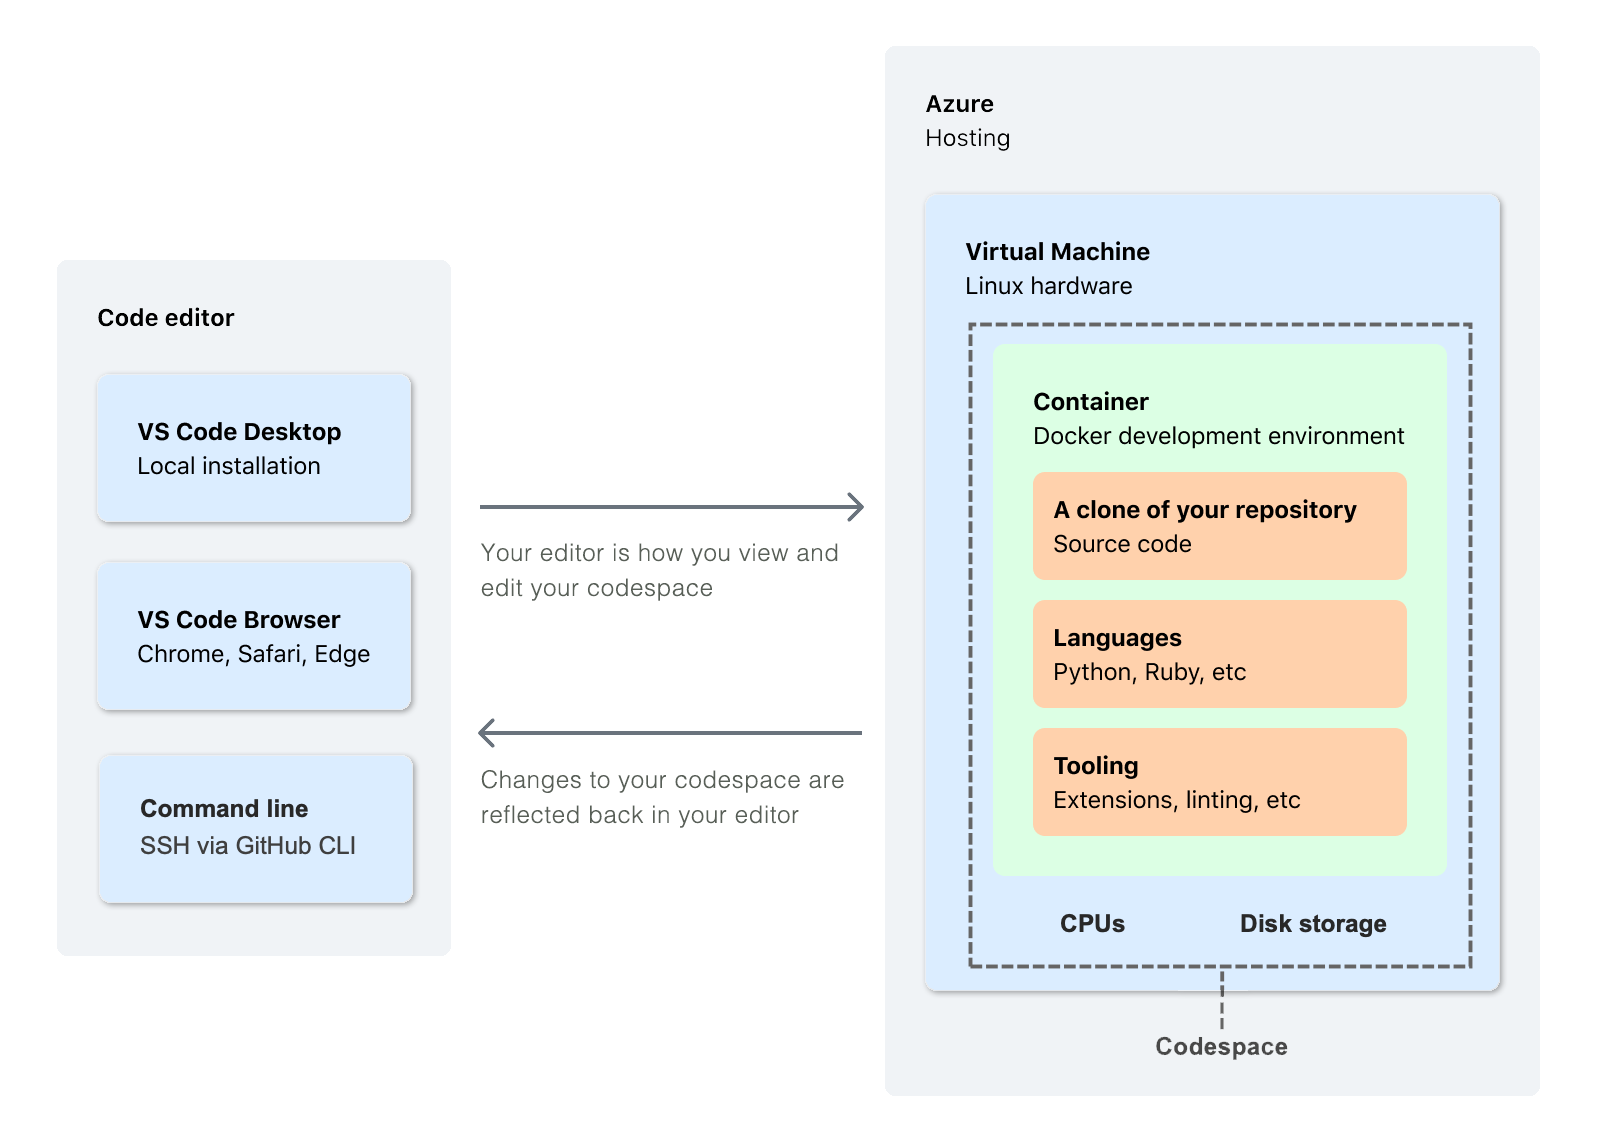
Using a Configuration-as-Code system, Codespaces allows developers to customize the development environment using configuration files to create a consistent environment for anyone working on the project.
GitHub hosts all these Codespaces in a Docker container, which can run up to 32 cores, 64 GB RAM, and 128 GB storage in the virtual machine.
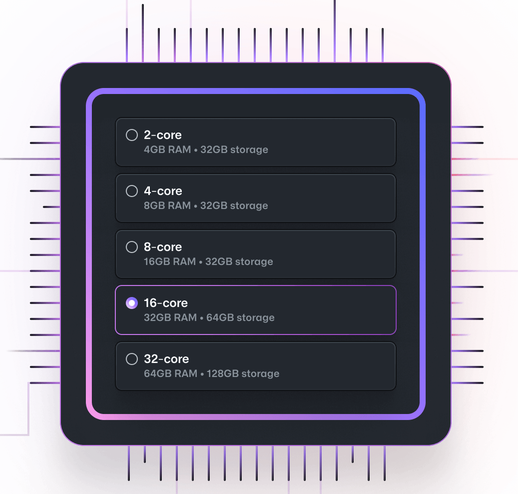
Any GitHub user can use Codespaces for 120-core hours for free (and 180-core hours on Pro accounts).
Benefits of using Codespaces
Leverage the cloud to host development environment
Visual Studio Code backend by high-performance VMs (Virtual Machines)
Standardize dependencies
Easy to spin up and tear down
How do I use Codespaces?
According to GitHub's official documentation, here are the ways you can access Codespaces from:
GitHub repository - from an existing repo, PR or new repo template
Visual Studio Code - see documentation
JetBrains IntelliJ - see documentation
Codespaces Example
Let's see how simple and fast setting up a Codespaces environment from a GitHub repository.
Start a Codespaces Environment
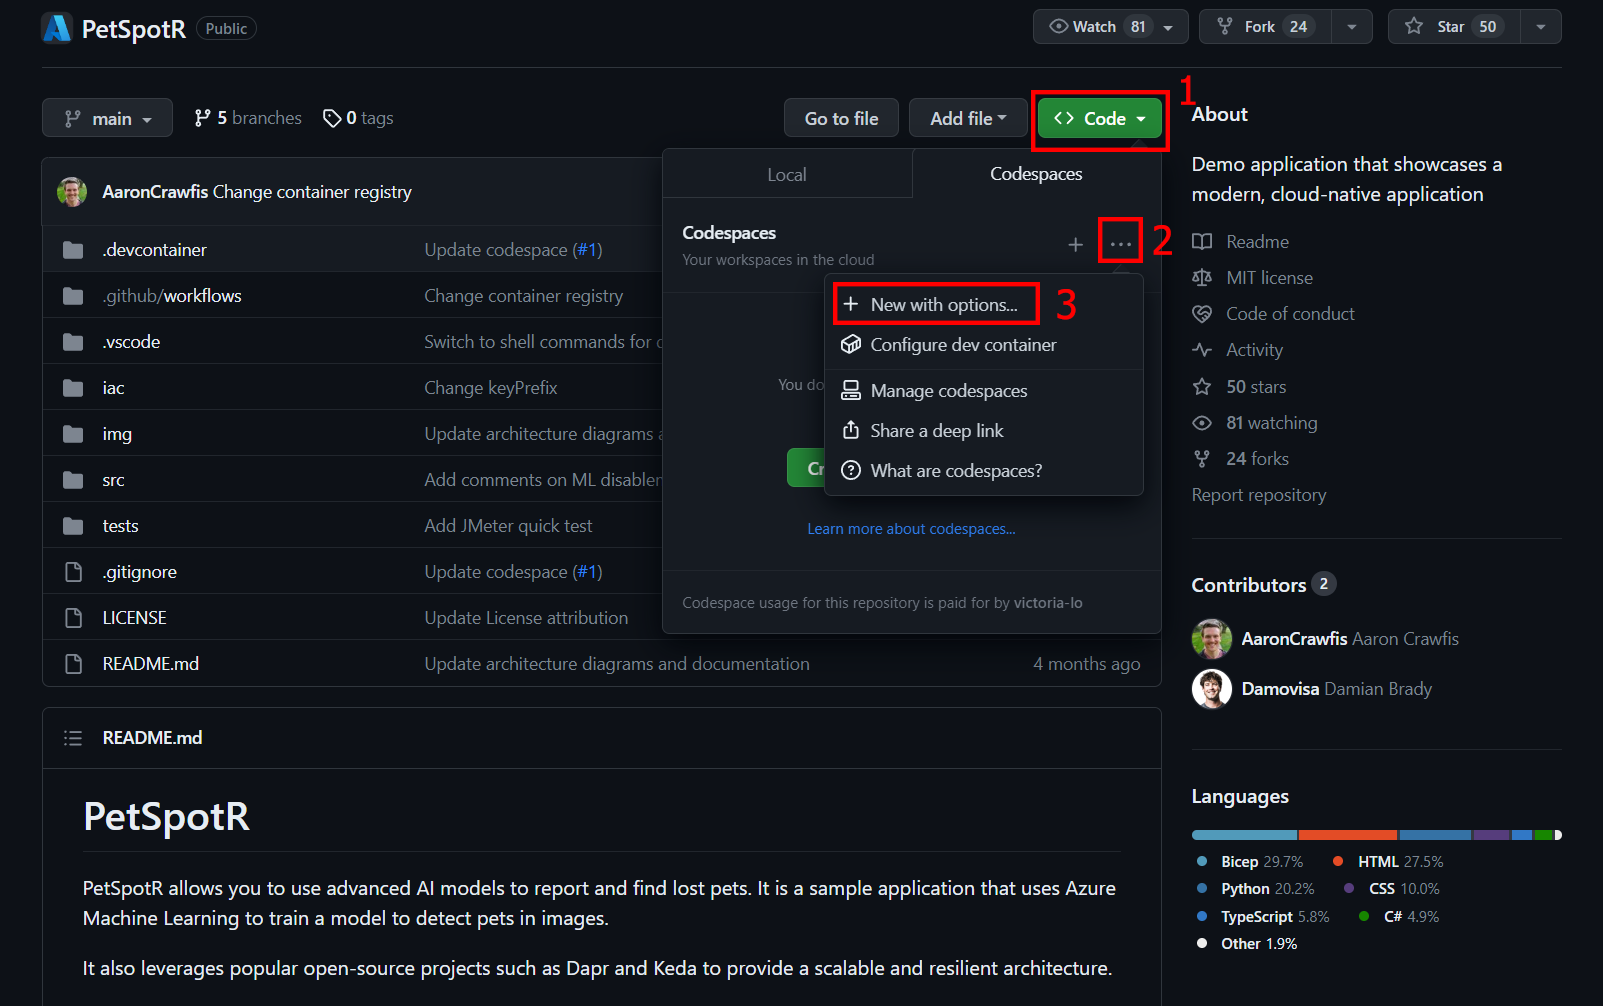
Let's say there is a repo you want to quickly spin up a development environment on. For this example, I will use this repo.
To start a Codespaces environment for this repo, follow the steps as shown in the screenshot below. First, click on the 'Code' button, then the three dots in the top-right corner and finally, click 'New with options'. This will spin up a Codespaces environment.
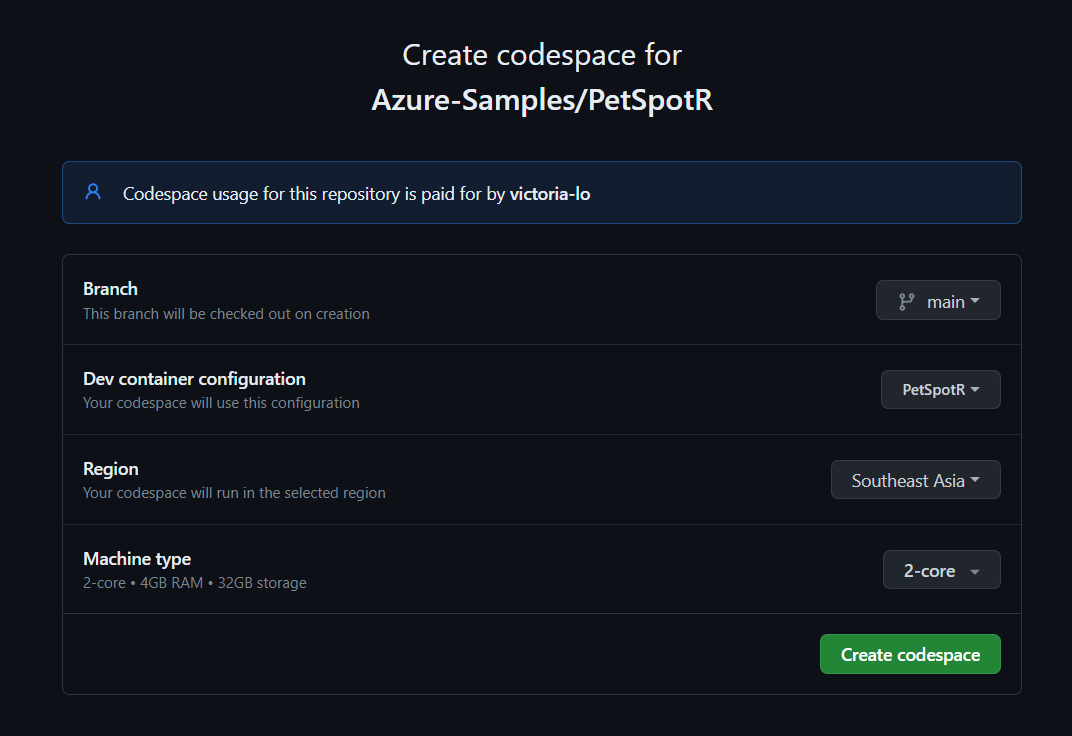
Once we're done, we will be taken to a page to configure our Codespaces. For this example, I'm leaving it as the default so let's click on the 'Create codespace' button. We will explore more about the 'Dev container configuration' in the next sections.
Running an App in Codespaces
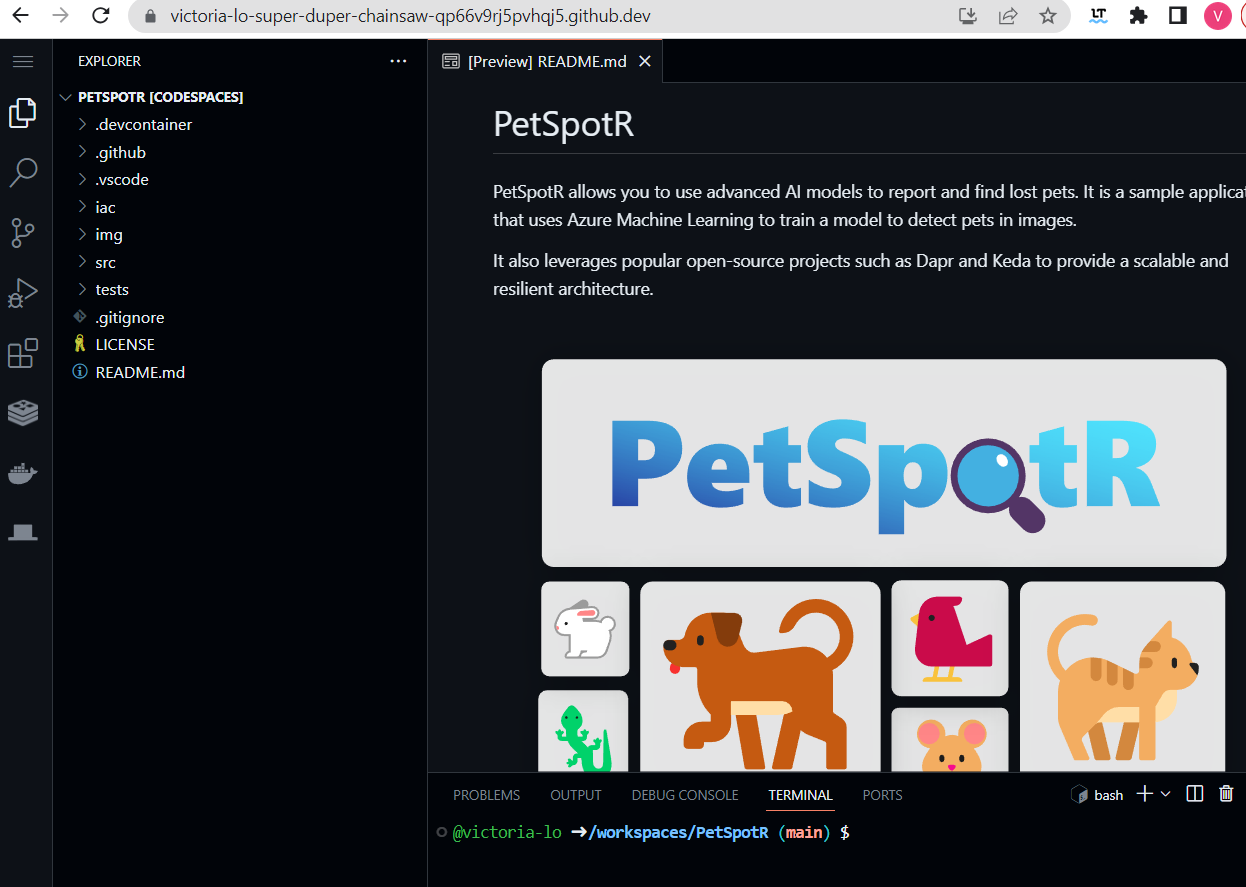
Once you have created the codespace, you will see something like the image below. It looks like Visual Studio Code is running on the web!
To run this project, simply click on the 'Run and debug' icon then the Run button as shown in the screenshot below.
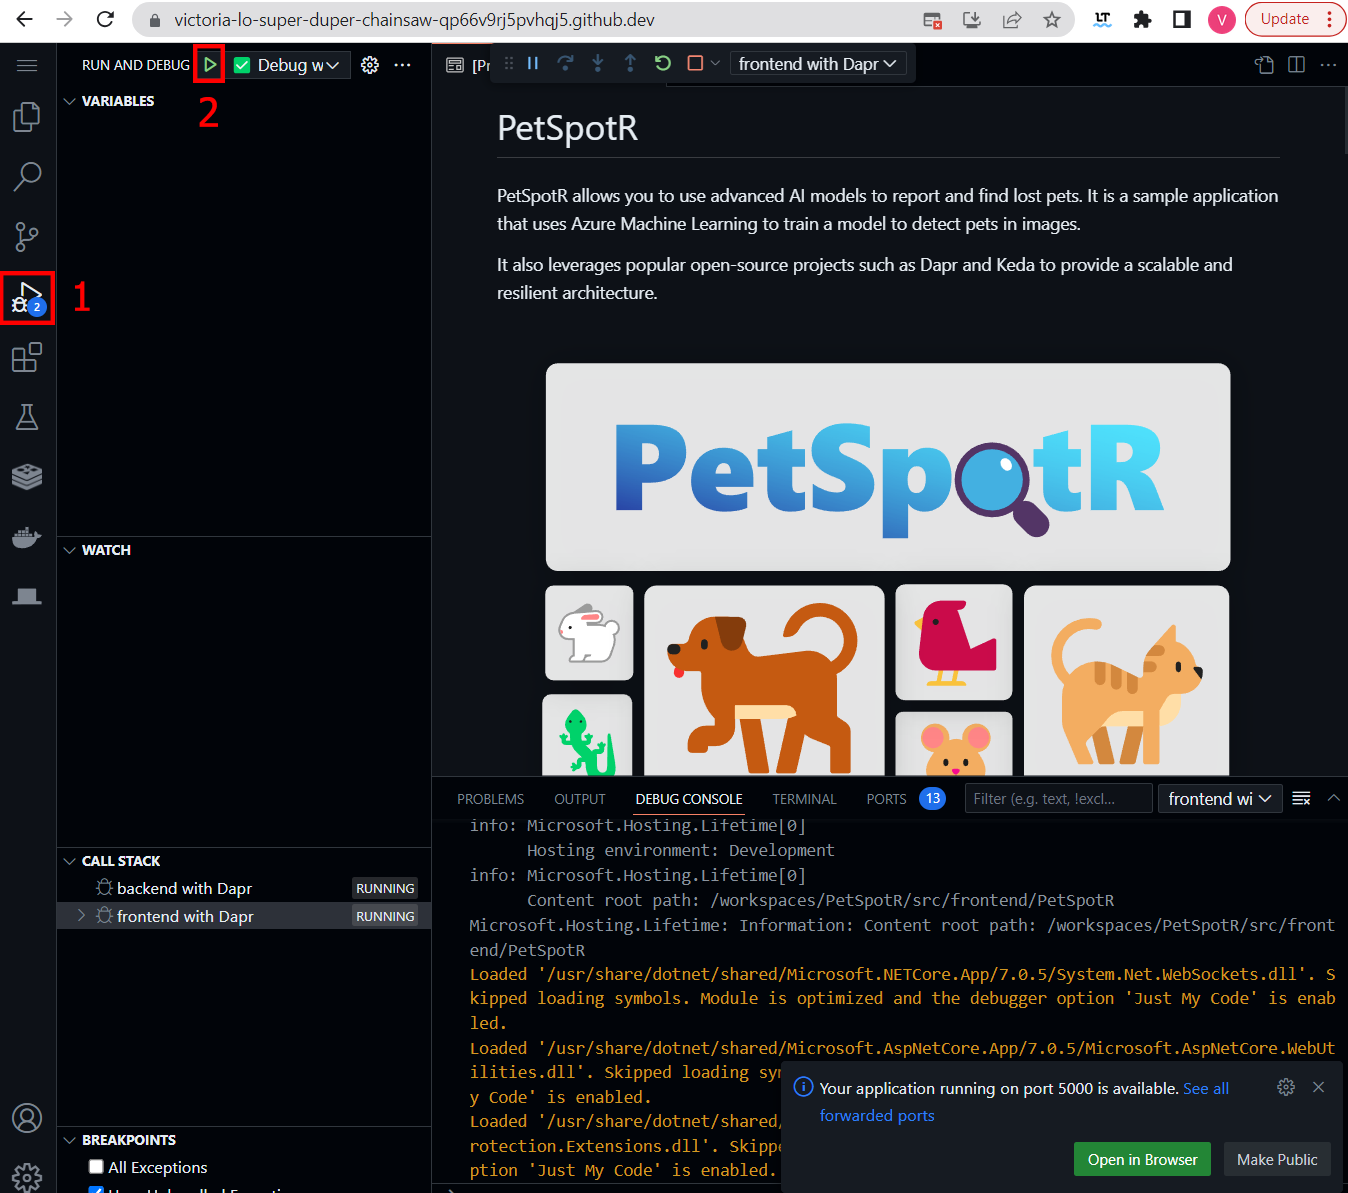
As you can see, launching a project is incredibly simple! Regardless of your machine, device, or setup, Codespaces runs the project on a virtual machine, eliminating any headaches associated with setting up projects for anyone.
Restarting a Codespace
A codespace environment will timeout after 30 minutes of inactivity by default. You can always adjust the timeout period, but keep in mind that you are billed for the duration a codespace remains active. If you know you'll be idle, it's best not to leave it running.
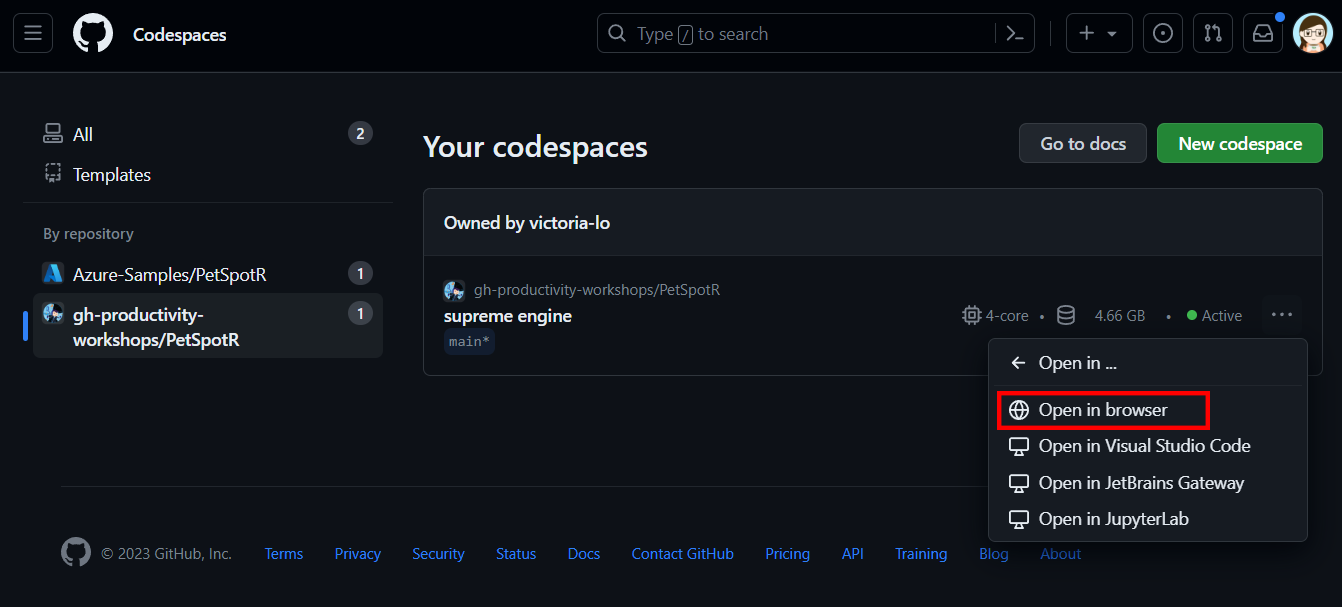
All codespaces you have created can be found under 'Your codespaces' page. Simply navigate to the page by clicking on your profile picture on the top-right on GitHub, then select 'Your codespaces'.

If you want to restart the codespace, you can click on the three dots next to the codespace name and click 'Open in browser'.
Deleting a Codespace
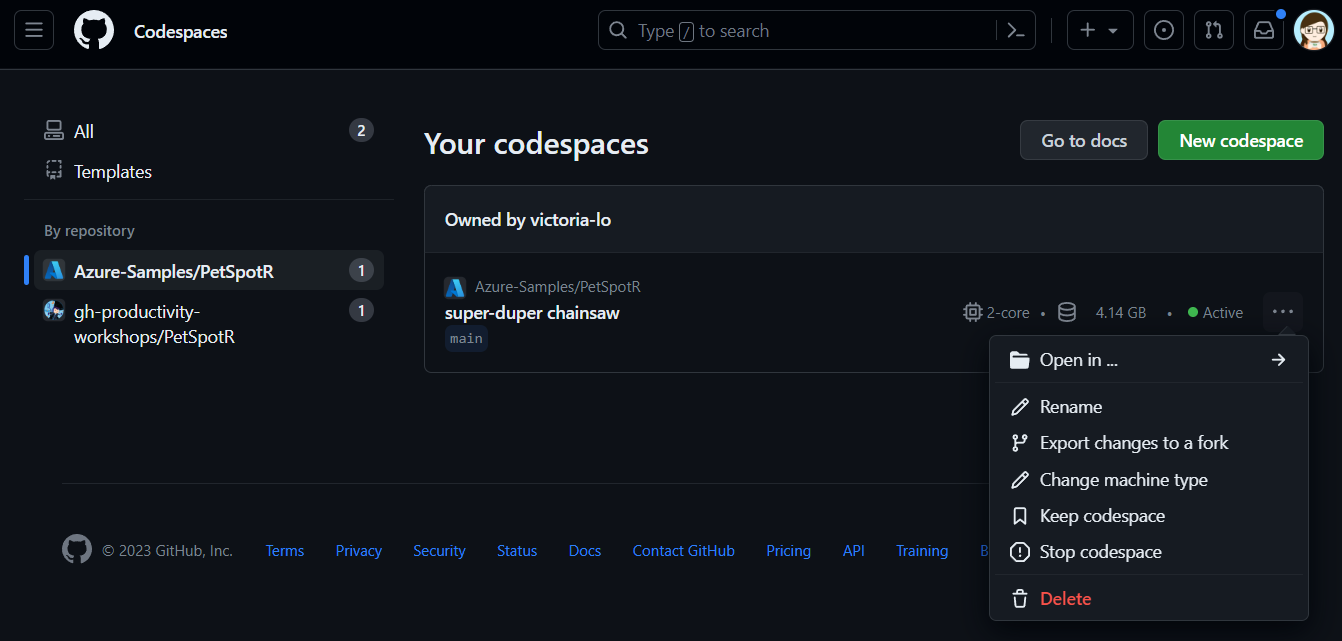
You should be able to find all your created codespaces and you can delete them by clicking on the three dots next to the name of the codespace. The screenshot below demonstrates how to delete a codespace.
Customizing your Codespaces using dev containers
One of the reasons Codespaces is so powerful is that it utilizes Configuration-as-Code to customize pre-built environments. The devcontainer.json is the file where you can specify certain requirements for the development environment of the codespace.
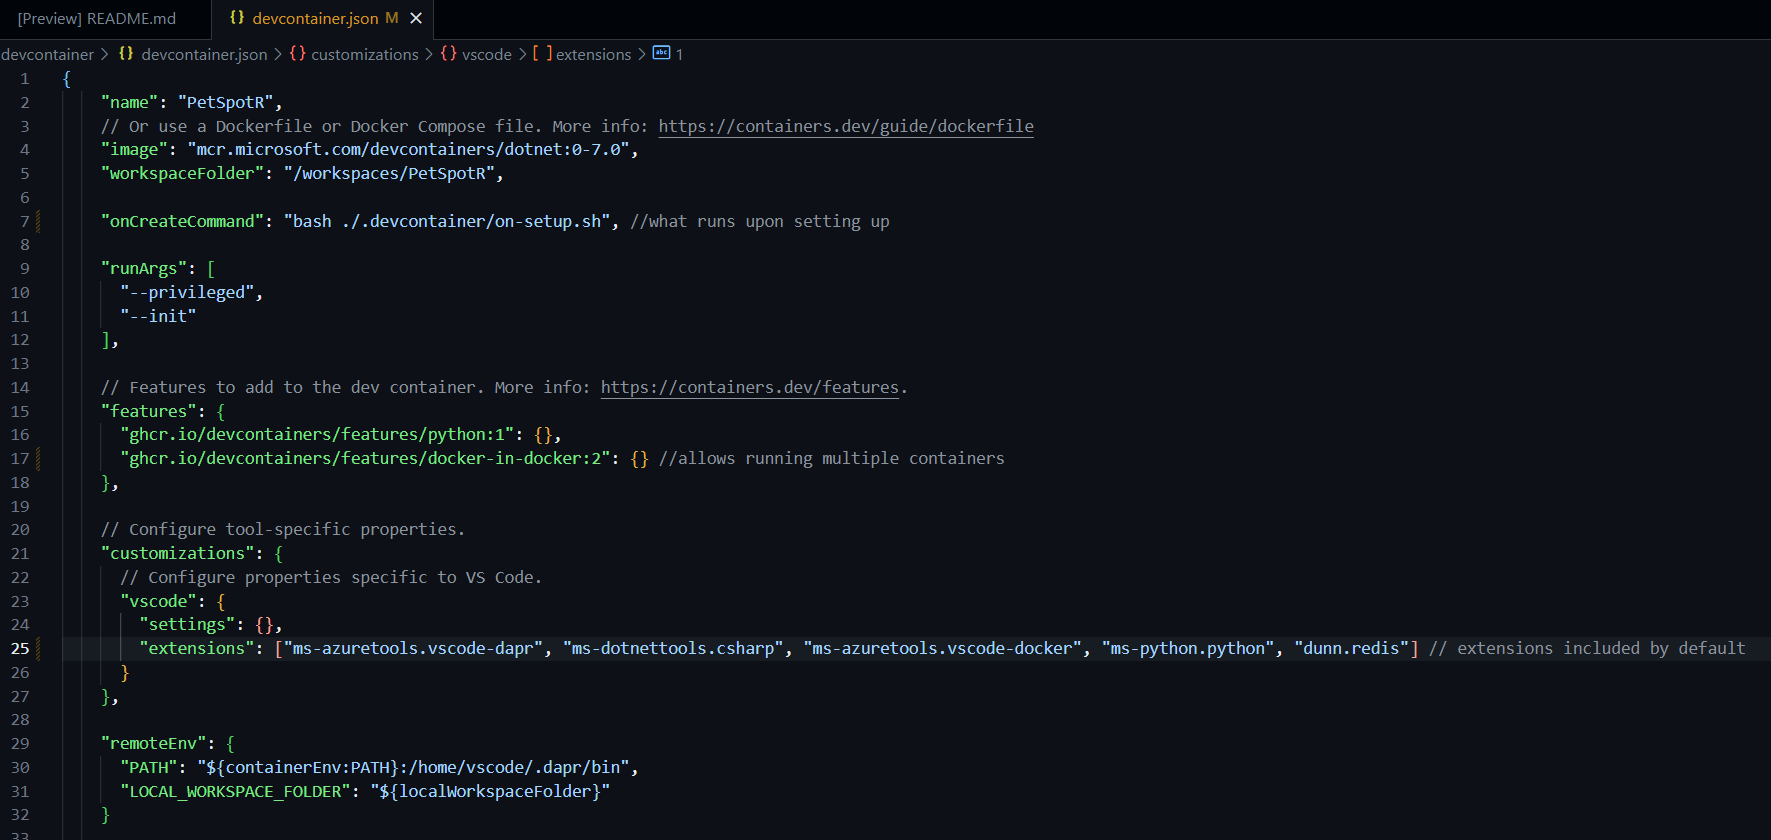
You can customize information such as frameworks, tools, extensions, and port forwarding.
Note that for dev containers, you should only include elements that are essential for everyone working on your codebase. This is because when you push code with the devcontainer, the entire team will have access to that configuration as well.
Once you customize your devcontainer.json, you can rebuild the project to see the changes reflected.
Conclusion
In conclusion, GitHub Codespaces offers a cloud-hosted development environment that simplifies onboarding, streamlines collaboration, and increases productivity.
By leveraging Configuration-as-Code and customizable dev containers, Codespaces ensures consistency across your team's development environments. With features like GitHub Copilot support, JetBrains plugin, and prebuilds, Codespaces is a powerful tool for modern development workflows.
I hope this article has been helpful for you in getting started with exploring Codespaces to level up your productivity! Thanks for reading! Cheers!


