How to Build a Guestbook with Firestore and Perspective API (Part 1)

It's always great to be able to customize your personal website. A guestbook is a classic and interactive way for visitors to leave their mark on your website. It's a virtual space where users can share their thoughts, feedback, or simply say hello. In this article, I'll guide you through a step-by-step of building a Guestbook feature for your Next.js website.
We'll be learning and using these following technologies to make this happen:
next-auth: A versatile authentication library for Next.js applications, simplifying the implementation of various authentication providers. Users must login to the website to sign on your guestbook.
Firebase Firestore: A NoSQL cloud database by Firebase, offering real-time data synchronization and scalability. Users can post and see other visitors' comments on the guestbook.
Perspective API: Google's machine learning-powered tool for content moderation, helping to maintain a positive and respectful user experience by filtering out potentially inappropriate content.
Prerequisites
Before you follow this tutorial, please make sure you have the following:
Node.js LTS or above installed in your machine
npm installed in your machine
Basic knowledge in Next.js/React
Code editor
Step 1: Create new project and install next-auth
Use create-next-app or your preferred method to set up a new Next.js project. Then install next-auth via running:
npm install next-auth
In this tutorial, I'm actually using Hashnode's Headless Starter Kit to quickly set up my blog on the Next.js framework!
Step 2: Set up Firebase Integration
Create a Firebase project by going to the Firebase Console. Click on "Add Project" and follow the prompts to set up a new Firebase project.
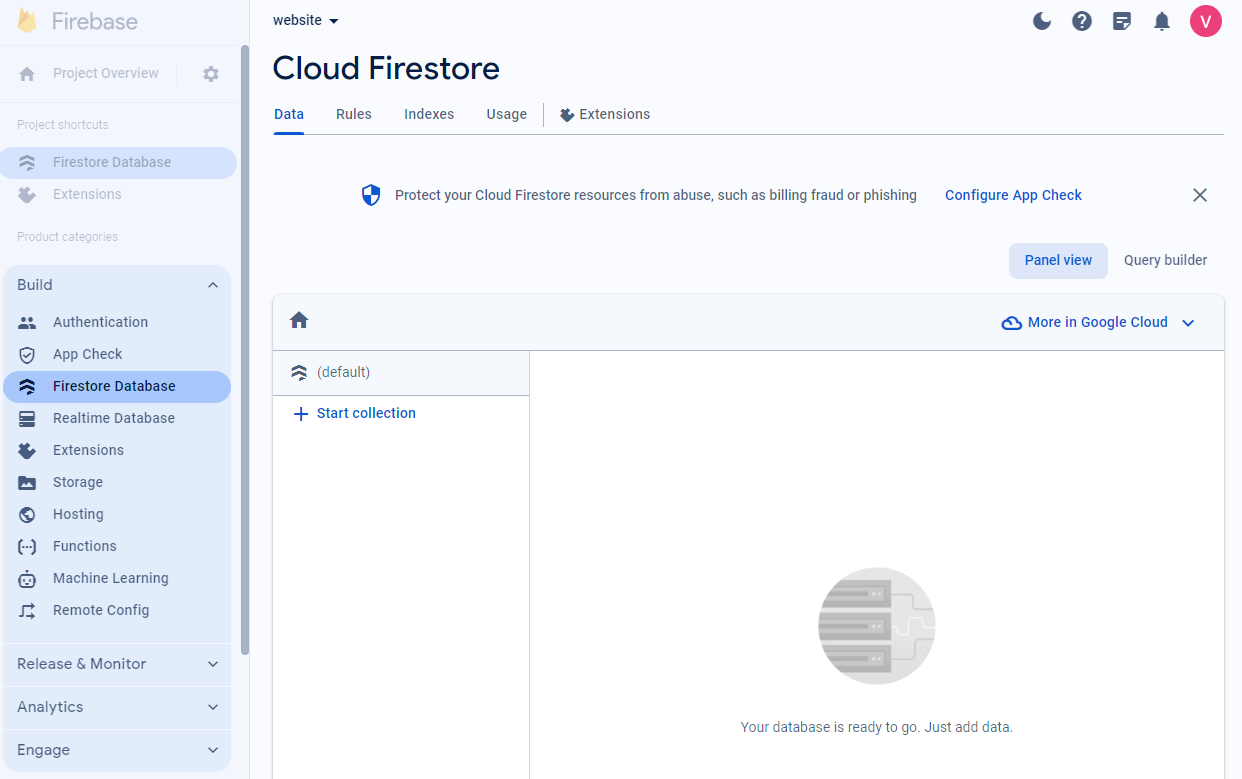
After creating the project, go to the Firebase console and select your project. In the left sidebar, click on "Firestore Database" as shown in the screenshot below. Click on "Create Database." You now have a new Firestore database ready!
Get your Firebase credentials
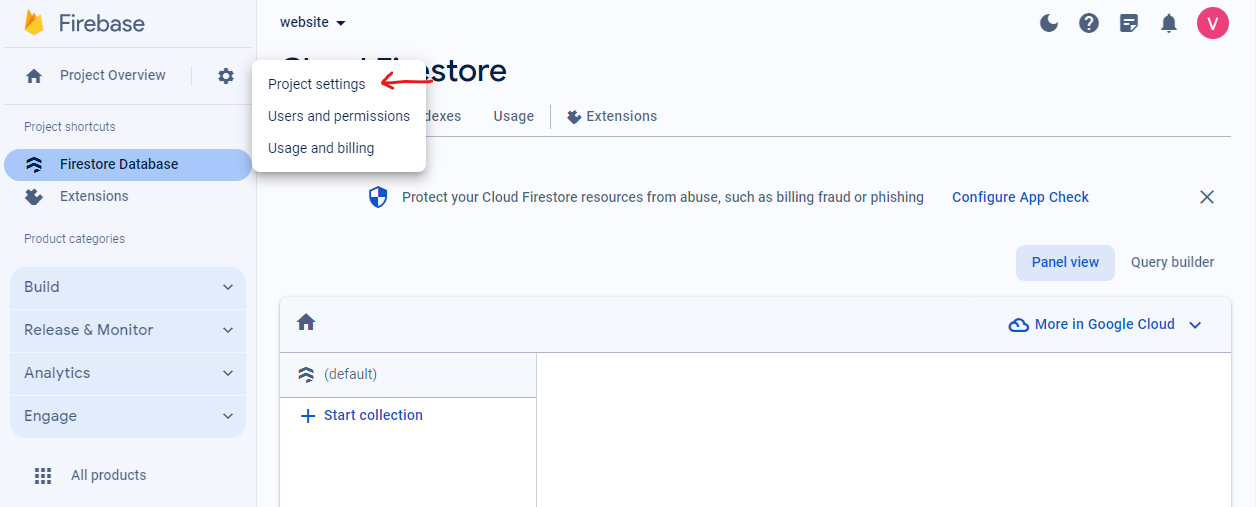
Go to Project settings by clicking on the gear icon in the left sidebar.
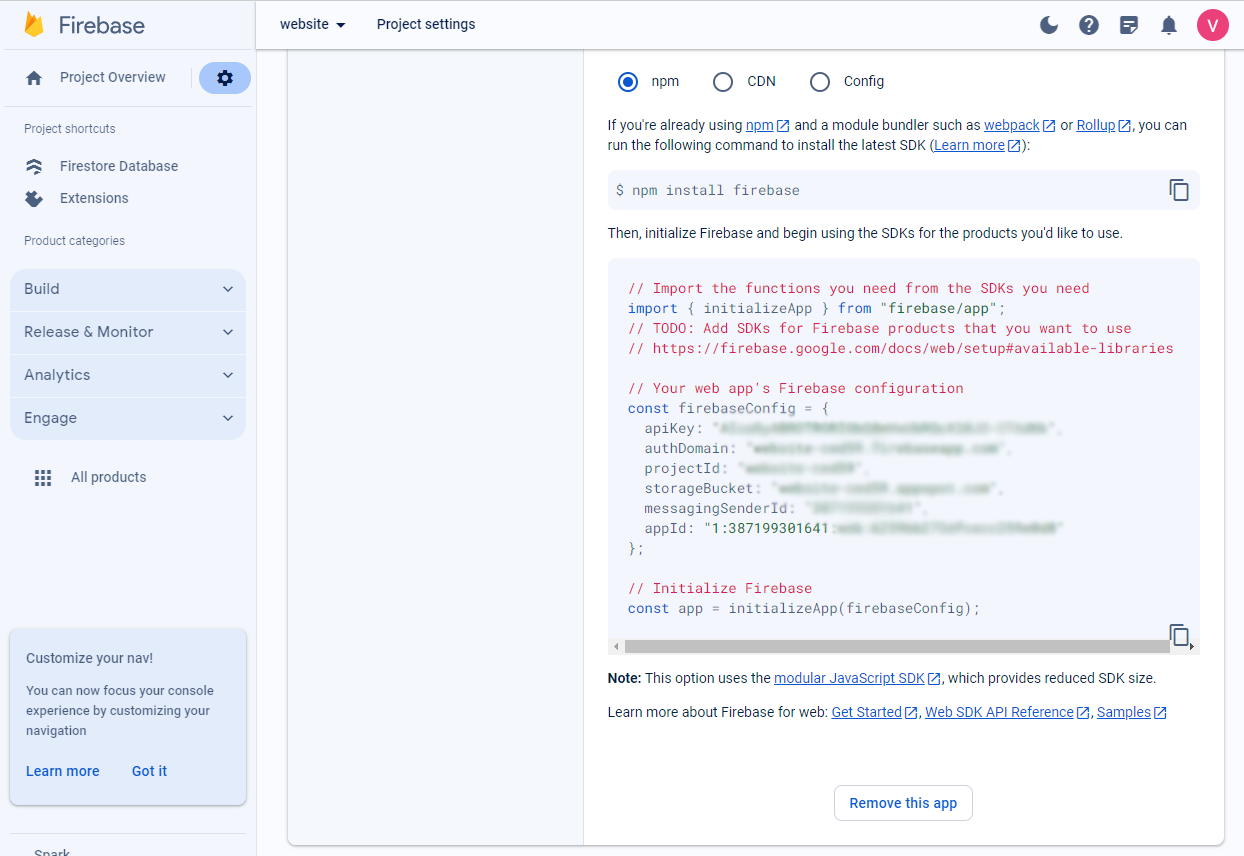
Under the "General" tab, scroll down to the "Your apps" section. Click on the Firebase SDK snippet, and choose "Config."
Copy the configuration object, which contains API keys and other settings.
Set up Firebase in your project
Install Firebase SDK in your project by running:
npm install firebase
Initialize Firebase in your app and configure it with your Firebase project credentials by creating a firebase.js file in a config folder. Paste the code copied from before into this file.
// config/firebase.js
import { initializeApp } from "firebase/app";

// Your web app's Firebase configuration
const firebaseConfig = {
  apiKey: process.env.REACT_APP_API_KEY,
  authDomain: process.env.REACT_APP_AUTH_DOMAIN,
  databaseURL: process.env.REACT_APP_DATABASE_URL,
  projectId: process.env.REACT_APP_PROJECT_ID,
  storageBucket: process.env.REACT_APP_STORAGE_BUCKET,
  messagingSenderId: process.env.REACT_APP_MESSAGING_SENDER_ID,
};

// Initialize Firebase
const app = initializeApp(firebaseConfig);
Step 3: Implement Firestore Integration
Now, let's set up functions to perform get and post operations using Firestore for the guestbook entries.
Fetch and display comments from Firestore
The get operation will be on the Guestbook.js file. First, let's import what we need:
//pages/Guestbook.js
import { useEffect, useState } from 'react';
import { getFirestore, collection, getDocs } from 'firebase/firestore';
import firebaseApp from '../config/firebase';
import Image from 'next/legacy/image';
To implement fetch the comments already submitted in Firestore and display in a list, we will use the useEffect hook to fetch data from Firestore collection called "comments" as soon as the page loads. We will examine the Firestore collection later to see its structure.
Then, we shall push all the retrieved data into the comments array.
const Guestbook = () => {
  const [comments, setComments] = useState([]);

  useEffect(() => {
    const fetchComments = async () => {
      const db = getFirestore(firebaseApp);
      // fetch data from the comments collections in firestore
      const commentsRef = collection(db, 'comments');
      const commentsSnapshot = await getDocs(commentsRef);

      const commentsData = [];

      commentsSnapshot.forEach((doc) => {
        const commentData = doc.data();
        //push retrieved data into comments array
        commentsData.push(commentData);
      });
      //set comments array as the data
      setComments(commentsData);
    };

    fetchComments();
  }, []);

  return (
    <div>
      <p>
        Feel free to sign on my guestbook and leave your mark! 👇
      </p>
        <div>
        {/* display all the comments in a list */}
        {comments.map((comment, index) => (
          <div key={index}>
              <div>
                <p>{comment}</p>
              </div>
          </div>
        ))}
      </div>
    </div>
  );
};

export default Guestbook;
Post User's comments to Firestore
Moving on to the next part, let us create a simple component that shows a "Sign In" button if a user is not authenticated and shows a textarea to submit a comment if a user is authenticated. Later, we will implement the authentication part with next-auth.
//components/Login.js
import { Button } from './custom-button';
import { useState } from 'react';

const LoginButton = ({ onCommentSubmit }) => {
  const [session, setSession] = useState(false); //temp "authentication"
  const [comment, setComment] = useState('');
  const [loading, setLoading] = useState(false);

  const handleWriteComment = async (e) => {
    e.preventDefault();
    try {
      const db = getFirestore(firebaseApp);
      const commentRef = collection(db, "comments");
      await addDoc(commentRef, {
        comment: comment
      })

      //call the function to update the UI with the new comment
      onCommentSubmit({
          comment: comment
        });

      window.alert("Comment submitted!")
      setComment('');
    } catch (error) {
      console.error("Error submitting: " + error)
    }
  };

  if (session) {
    return (
      <>
        <form onSubmit={handleWriteComment}>
          <textarea
            disabled={loading}
            placeholder="Write anything here ✍️"
            rows={4}
            cols={50}
            value={comment}
            onChange={(e) => setComment(e.target.value)}
          ></textarea>
          <div className="mt-2 flex items-center justify-between">
            <Button label={loading ? 'Submitting...' : 'Submit'} />
            <Button onClick={() => setSession(false)}>Sign Out<Button/>
          </div>
        </form>
      </>
    );
  }

  return (
    <>
      <Button onClick={() => setSession(true)}>Sign my guestbook!<Button/>
    </>
  );
};

export default LoginButton;
Now, import the Login component and return it in Guestbook.js
import Login from '../components/Login'; //add this line

const Guestbook = () => {
  const [comments, setComments] = useState([]);

  useEffect(() => {
    const fetchComments = async () => {
      const db = getFirestore(firebaseApp);
      const commentsRef = collection(db, 'comments');
      const commentsSnapshot = await getDocs(commentsRef);

      const commentsData = [];

      commentsSnapshot.forEach((doc) => {
        const commentData = doc.data();
        commentsData.push(commentData);
      });
      setComments(commentsData);
    };

    fetchComments();
  }, []);
  //Make sure the new comment submitted will show at the top
  const handleCommentSubmit = (newComment) => {
    setComments((prevComments) => [newComment, ...prevComments]);
  };

  return (
    <div>
      <p>
        Feel free to sign on my guestbook and leave your mark! 👇
      </p>
        <div>
        {/* add the Login component here */}
        <Login onCommentSubmit={handleCommentSubmit}/>
        {comments.map((comment, index) => (
          <div key={index}>
              <div>
                <p>{comment.comment}</p>
              </div>
          </div>
        ))}
      </div>
    </div>
  );
};

export default Guestbook;
At this point, your website should allow you to post comments to Firestore. Now, we want to add authentication so we can get the name, email and image of the user who signs on the guestbook.
[ADD GIF]
Step 4: Implement Authentication with next-auth
Install the package with:
npm install next-auth
Note: next-auth offers authentication options from various providers such as Google, GitHub, LinkedIn, and more. However, for the purpose of this tutorial, we will focus solely on GitHub.
Create an OAuth App on GitHub
To setup GitHub as our auth provider, follow these steps:
Go to GitHub Developer Settings.
Click on "New OAuth App."
Fill in the required information (Application name, Homepage URL, Authorization callback URL).
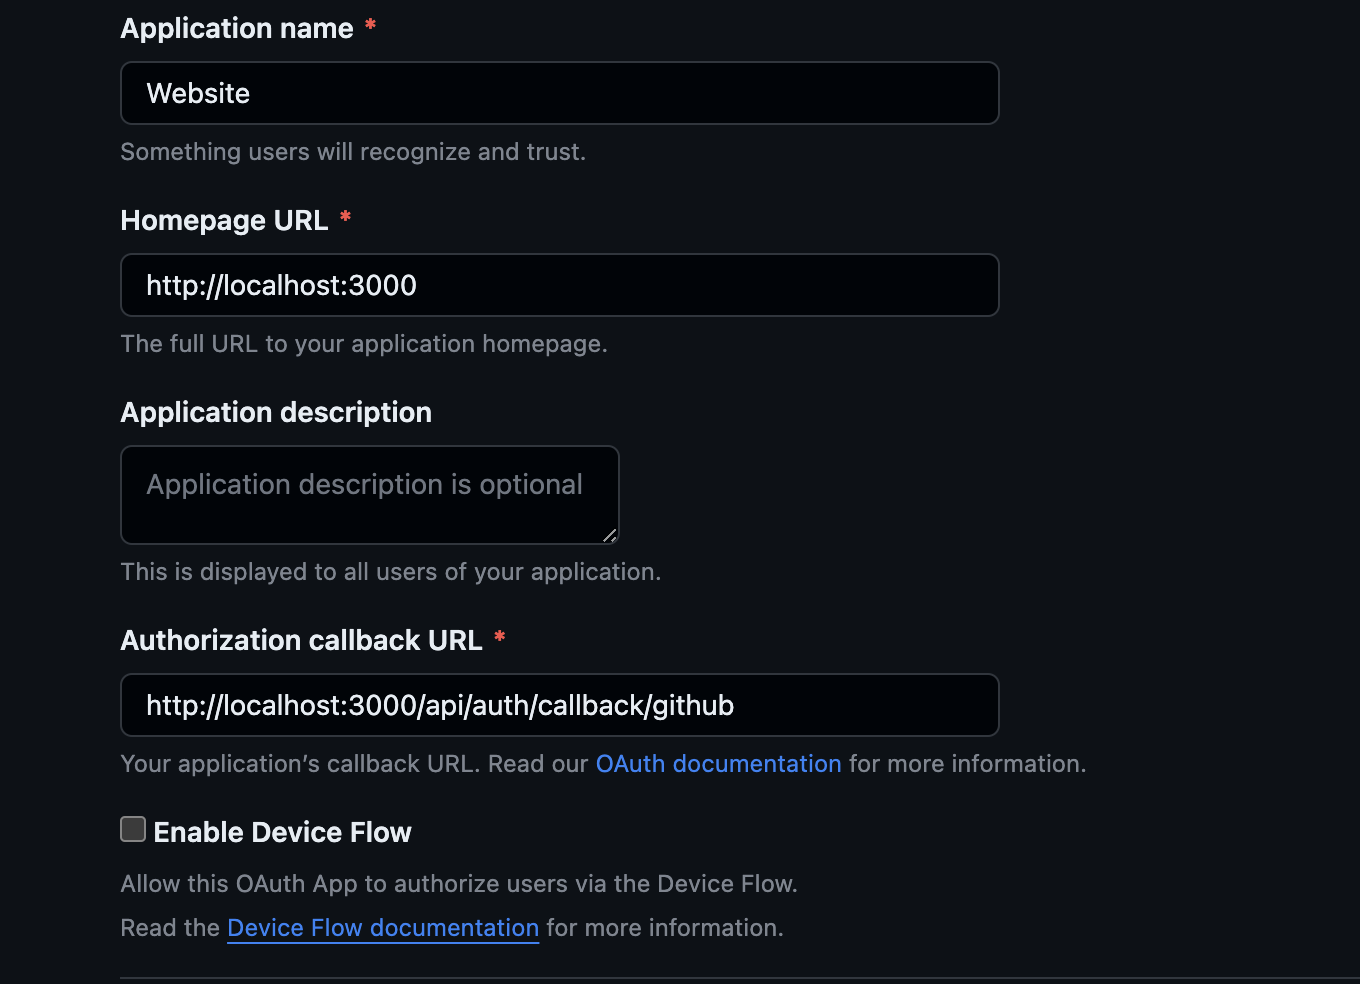
For the Authorization callback URL, use http://localhost:3000/api/auth/callback/github (or replace http://localhost:3000 with your actual development URL).
For production environment, you will have to create a new OAuth App for change these URLs to your production URLs
Adding Authentication
Now we are ready to add our authentication layer on our Login component!
//components/Login.js
import { useSession, signIn, signOut } from "next-auth/react" //add this line
import { Button } from './custom-button';
import { useState } from 'react';

const LoginButton = ({ onCommentSubmit }) => {
  const { data: session } = useSession(); //change to useSession
  const [comment, setComment] = useState('');
  const [loading, setLoading] = useState(false);

  const handleWriteComment = async (e) => {
    e.preventDefault();
    try {
      const db = getFirestore(firebaseApp);
      const commentRef = collection(db, "comments");
      //add the signed in user's name, email and image to the DB
      await addDoc(commentRef, {
        email: session?.user?.email,
		name: session?.user?.name,
		image: session?.user?.image,
        comment: comment
      })

      //add user's details when updating UI too
      onCommentSubmit({
          email: session?.user?.email,
		  name: session?.user?.name,
		  image: session?.user?.image,
          comment: comment
        });

      window.alert("Comment submitted!")
      setComment('');
    } catch (error) {
      console.error("Error submitting: " + error)
    }
  };

  if (session) {
    return (
      <>
        <form onSubmit={handleWriteComment}>
          <textarea
            disabled={loading}
            placeholder="Write anything here ✍️"
            rows={4}
            cols={50}
            value={comment}
            onChange={(e) => setComment(e.target.value)}
          ></textarea>
          <p>Sincerely from {session?.user?.name}</p>
          <div className="mt-2 flex items-center justify-between">
            <Button label={loading ? 'Submitting...' : 'Submit'} />
             {/*onClick function change to signOut*/}
            <Button onClick={() => signOut()}>Sign Out<Button/>
          </div>
        </form>
      </>
    );
  }

  return (
    <>
       {/*onClick function change to signIn*/}
      <Button onClick={() => signIn()}>Sign my guestbook!<Button/>
    </>
  );
};

export default LoginButton;
As seen from our code above, we made a few changes to our Login component. Now the session variable is not a boolean, but an object that will return the signed in user's details via the useSession Hook.
If someone is signed in, session will contain the following information.
{
  user: {
    name: string
    email: string
    image: string
  },
  expires: Date // This is the expiry of the session, not any of the tokens within the session
}
Next, we changed the button's onClick functions to be the signIn and signOut functions imported from next-auth .
Our authentication implementation is all done! Let's update our Guestbook.js to include the user's name and image with every comment now! In the return function, include comment.name and comment.image as shown below.
const Guestbook = () => {
  //...

  return (
    <div>
      <p>
        Feel free to sign on my guestbook and leave your mark! 👇
      </p>
        <div>
        <Login onCommentSubmit={handleCommentSubmit}/>
        {comments.map((comment, index) => (
          <div key={index}>
            <div>
              <div>
                {/* add image here */}
                <Image width={48} height={48} src={comment.image} />
                <div>
                  <p>{comment.name}</p> {/* add name here */}
                </div>
              </div>
              <div>
                <p>{comment.comment}</p>
              </div>
            </div>
          </div>
        ))}
      </div>
    </div>
  );
};

export default Guestbook;
Here's the current state of our implementation!
Conclusion
Let's recap what we did in Part 1 of this tutorial:
Set up Next.js website
Set up Firestore database in Firebase
Set up GitHub OAuth authentication
Implementation of fetching, displaying and posting comments
Implementation of authentication
In the next part, let us add some content moderation on this website with Perspective API! Before Part 2 is out, I encourage you to customize the styling of the website on your own and expand upon the guestbook feature to your specific needs. Do share in the comments below any questions or unique stuff you have added! Thanks for reading! Stay tuned and cheers!


