


React Cheat Sheet for Beginners
A quick and simple overview of React for beginners to get started


It might seem overwhelming for a beginner to learn the React framework. After all, it has gone through a lot of changes since it was first released around 2013. Here's a cheat sheet, not a full tutorial but a simple-to-understand and concise overview on what it takes to learn React.
Intro to React
What is React?
It is a JavaScript library designed to create single-page applications with reusable UI components.
How does it work?
React stores the information DOM by creating a virtual DOM in its memory. Before it renders the DOM nodes onto the browser, it checks for changes between its past and present virtual DOM. If there's a change (i.e. some text content updated), it will update its virtual DOM and then renders to the real DOM on the browser. See diagram below for visualization.
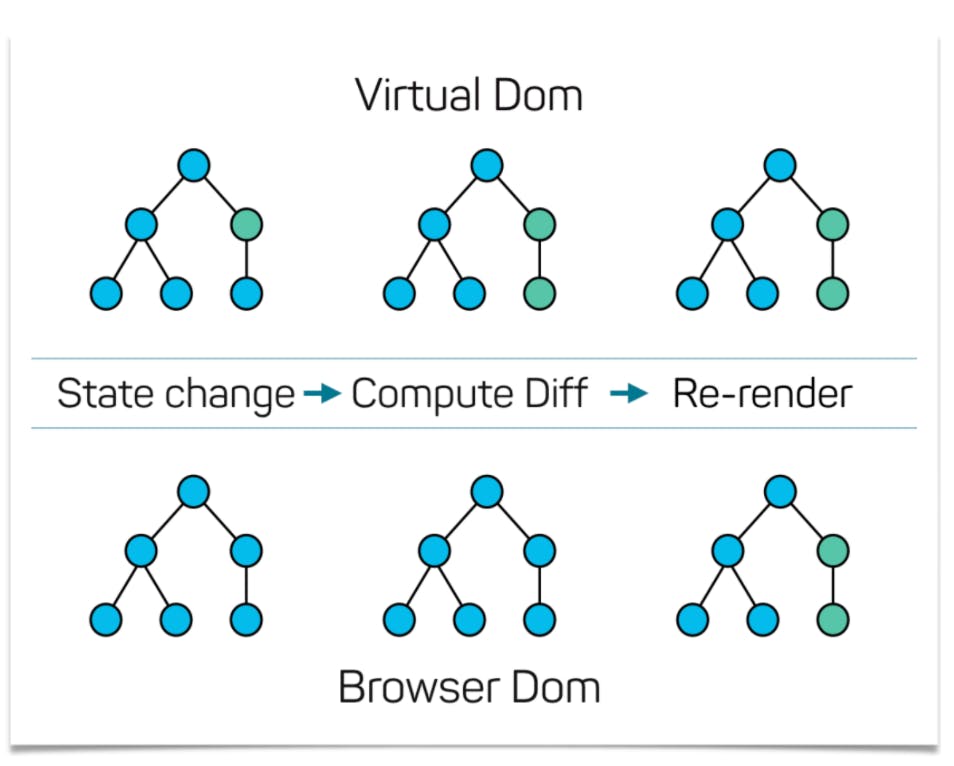
Because DOM manipulations can take a lot of time to load, React only changes the DOM nodes that need to be changed.
Intro to JSX
A very important concept to learn in React is JSX. It is short for JavaScript XML. Simply put, it allows you to write HTML in React code.
For example, take a look at these 2 code blocks (source):
//Using JSX
const myelement = <h1>I Love JSX!</h1>;
ReactDOM.render(myelement, document.getElementById('root'));
//Not using JSX
const myelement = React.createElement('h1', {}, 'I do not use JSX!');
ReactDOM.render(myelement, document.getElementById('root'));
As you can see, using JSX allows us to write HTML elements in React code more easily and faster.
ReactDOM.render()
Notice that there is a function: ReactDOM.render() at the bottom of the code blocks above. ReactDOM.render() is a function that takes 2 arguments: the HTML code and the HTML element to render the code in.
In React, the top node is known as the 'root' node. Therefore, we usually render our HTML code in it.
Components
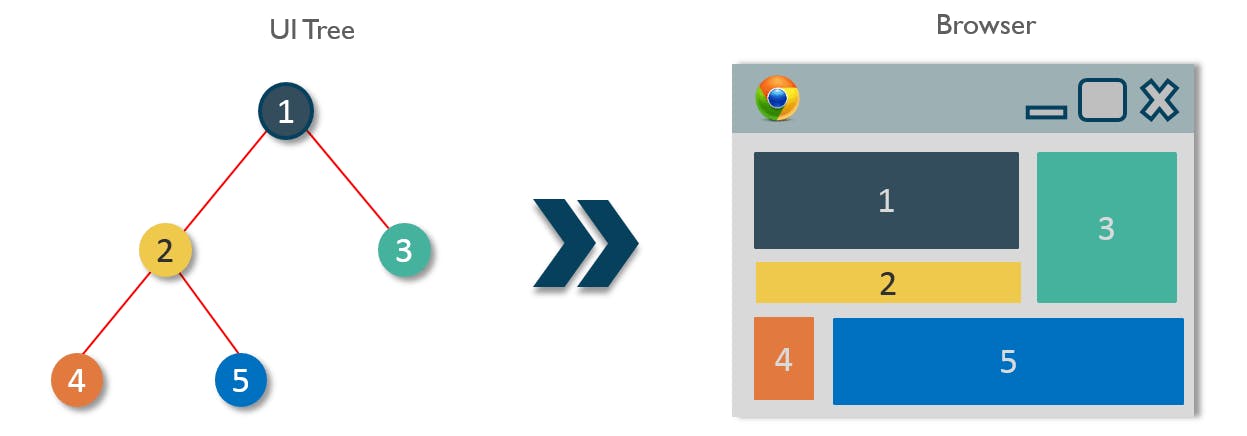
Components are one of the building blocks of a React App. They are basically React functions that returns an HTML element. Think of them as a large HTML blocks of code that independently does a certain function for the app. Like the navigation bar or the panels.
In React, all these components are structured as nodes in the Virtual DOM. They will then render onto the browser according to how we specify them to look like. See diagram for visualization.
There are 2 types of components currently in React: Class and Functional.
Class Components
As its name suggests, class components are basically classes written in the context of React. A rule in writing components is to always name the component with a capital letter.
Let's write a simple House class component.
- Import react and react-dom
- Write the class House
- Call the ReactDOM.render()
//1.
import React from 'react'
import ReactDOM from 'react-dom'
//2.
class House extends React.Component {
  render() {
    return (
      <div>
        <h2>This is a house</h2>
      </div>
    )
  }
}
//3.
ReactDOM.render(<House />, document.getElementById('root'));
To take it a step further, let's create a Door class and make it a child component of the House (since doors are inside houses).
First, we create the Door class.
class Door extends React.Component {
  render() {
    return (
      <div>
        <h3>This is a door</h3>
      </div>
    )
  }
}
Then we add it inside the House class to make it its child.
class House extends React.Component {
  render() {
    return (
      <div>
        <h2>This is a house</h2>
        <Door /> <!--here is the Door component-->
      </div>
    )
  }
}
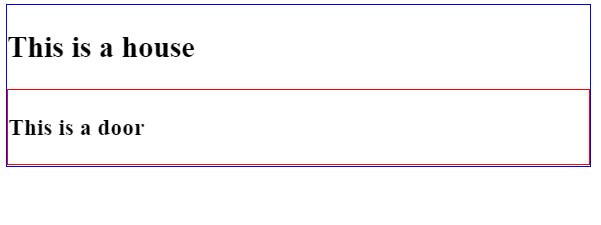
The image below shows what the app looks like in the browser. I went ahead and added outlines to each component to show them better. Both classes are displayed perfectly, with Door being the red outlined box being shown inside the House, as represented by the blue outlined box.
Function Components
The other type of component we can write in React is function components. Just like class components, they returned HTML codes and their names should start with capital letters.
Let's build the same House and Door as function components.
import React from "react";
import ReactDOM from "react-dom";

function House() {
  return (
    <div>
    <h2>This is a house</h2>
    <Door/> <!--add Door as child-->
  </div>
  );
}

function Door() {
  return (
    <div>
    <h3>This is a door</h3>
  </div>
  );
}

ReactDOM.render(<House />, document.getElementById("root"));
And that's it! They pretty much work the same and renders the same HTML elements. Note that for function components, you don't need to have the render() function before the return statement.
Props
React components can have props. And props are equivalent to what arguments are to a function or what attributes are to HTML.
Back to our House and Door, let's say we have many Door components inside the House. How do we distinguish one Door from another? How about giving each Door a title prop? To do that, simply add title in the Door component like so.
<Door title="front" />
Kind of similar to HTML attributes right? Then in the Door component, we can print out its prop as follows.
//pass props as argument first
function Door(props) {
  return (
    <div>
    <h3>This is the {props.title} door</h3>
  </div>
  );
}
And our app would print the title out as expected.
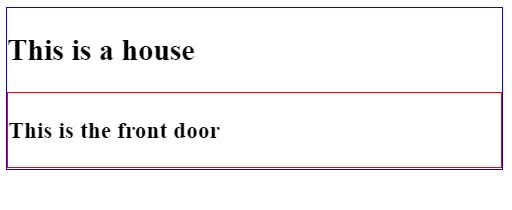
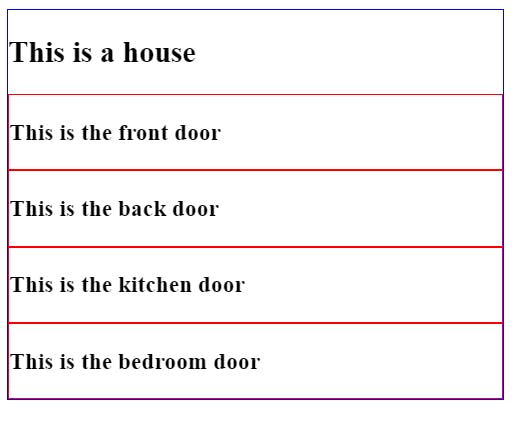
Now we can add lots of Door components inside House and have title to distinguish them.
function House() {
  return (
    <div>
    <h2>This is a house</h2>
    <Door title="front"/>
    <Door title="back"/>
    <Door title="kitchen"/>
    <Door title="bedroom"/>
  </div>
  );
}
Result would look like:
Just like arguments are to a function, props to Component are just read-only. A Component cannot change the value of the props passed into it.
States
Now let's briefly talk about states. In React, a state is an object in which variables are stored. These variables can only be accessed within its Component (unless of course you use some state management tools like Redux).
Let's add some states to decorate our House class component.
class House extends React.Component {
  constructor(props) {
       super(props);
       this.state = {
            color: "white",
            rooms: 4
       };
  }
  render() {
    return (
      <div>
        <h2>This is a {this.state.color} house with {this.state.rooms} rooms.</h2>
      </div>
    )
  }
}
In the code above, we add our state object in our constructor function. Then we edit the HTML element to return a sentence with the state color and rooms property. The result will be:

Basic React Hooks
In our previous example, we saw how to use states in our House class component. In function components, we can use something called React Hooks to manage our states.
I have a whole series called A Look at React Hooks on all the basic React Hooks. Let's take a look at some of them briefly.
useState()
This Hook allows function components to initialize and update states. Here's a simple example.
import React, { useState } from "react";
import ReactDOM from "react-dom";

function House() {
  const [color, setColor] = useState("white");
  return (
    <div>
      <h2>This is a {color} house</h2>
    </div>
  );
}
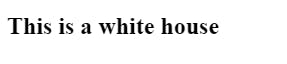
First, initialize the state as "white" inside the useState Hook. The Hook returns an array: the value of the state (i.e. color) and its set function, which is used to update the state (i.e. setColor).
Then simply include the value of the state in the return function, and the app will display the state.
For a more detailed explanation of this Hook, please read this article.
useEffect()
The next most useful Hook you will encounter is the useEffect Hook. It performs a function whenever a specified state has changed.
Back to our House component, we add another variable called door that will track how many doors this house have. In its useState Hook, initialized it to 0.
Then, we add a button that when onClick, will increase the value of door by 1. Finally, we have a useEffect Hook that will print the number of doors in the house every time the value of door is updated.
The code will look as follows:
function House() {
  const [color, setColor] = useState("white");
  const [door, setDoor] = useState(0); //initialize door as 0

//add 1 to the current value of door on every button click
  const addDoor = () => {
    setDoor(door + 1);
  };

//finally, trigger the function to print the door value whenever door is updated
  useEffect(() => {
    console.log(`Door count: ${door}`)
  }, [door]);

  return (
    <div>
      <h2>This is a {color} house</h2>
      <button onClick={addDoor}>Add a Door</button>
    </div>
  );
}
The result:

For a more detailed explanation of this Hook, please read this article.
Create React App
Now that we've covered the basic concepts of React, let's take a look at a typical React environment.
First, make sure you have npm and Node.js installed in your machine. If not, get them here.
The easiest way to create a new React app is to execute:
npx create-react-app my-app
Then, navigate to the app folder.
cd my-app
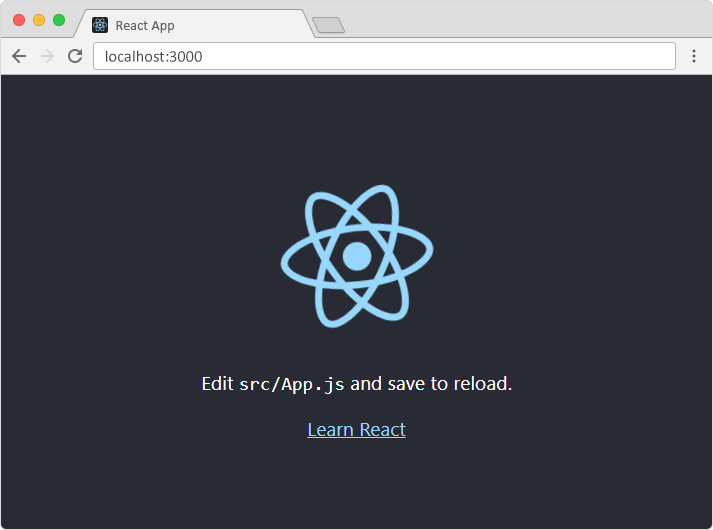
And run the following command to launch the app in localhost.
npm start
App Structure
A new Create React App will have the following folder structure.
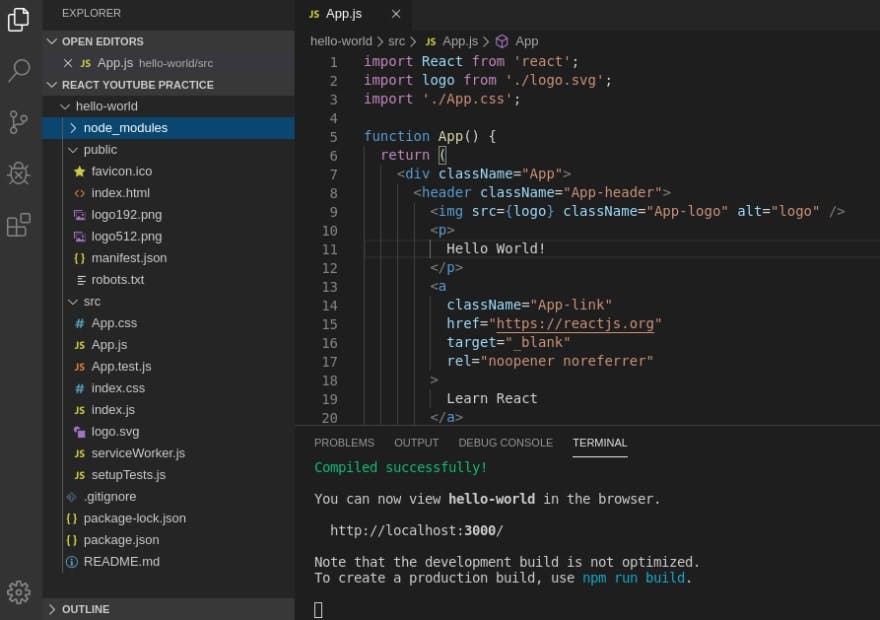
Let's briefly go through them one by one.
- package.json: shows the dependencies and the scripts used in the app.
- package-lock.json: make sure dependencies are installed.
- .gitignore: files that git will not include in every commit.
- Readme: an ordinary markdown file to describe your app.
- node_modules: where all your dependencies are installed.
- public folder: won't really touch these files during development.
- src folder: where most development will take place.
- src/index.js: specifies the 'root' element
- src/App.js: The App component. Edit this to see what gets rendered onto browser.
- src/App.css: Styling for App.js.
It may seem complex at first. If you are a beginner, try to focus on the src/App.js file first. Edit its HTML code, add some basic functions and get a feel on how it works. Once you are more familiar, you can add more files as components into the src folder. Like a Home.js for the Home component, a Login.js for the Login component and so on.
Styling
After creating some basic functions and components in your first React app, you may wonder how to customize and style the app for your own needs. In React, there are a few ways to add custom styles. The most common ways are inline styling and importing css modules.
Inline styling
As the name suggests, add the styling inside the HTML element. For example, let's add a border around our house. The border color depends on our color variable.
function House() {
  const [color, setColor] = useState("red");
  return (
    <div>
      <h2 style={{"border":`1px solid ${color}`}}>This is a {color} house</h2>
    </div>
  );
}
Since the value of color is initialized to red, the app will look like:

Alternatively, you can create a style object and pass it in the style attribute like so:
function House() {
  const [color, setColor] = useState("red");

//style obj contains the css
  const style={
    "border":`1px solid ${color}`
  }

  return (
    <div>
      <h2 style={style}>This is a {color} house</h2>
    </div>
  );
}
CSS modules
Another way to style is to create a .css file and import it to the React Component. I have created a simple styles.css file with the following styling:
h2 {
  font-family: "Gill Sans", "Gill Sans MT", Calibri, "Trebuchet MS", sans-serif;
  padding: 10px 5px;
  border-radius: 10px;
}
Then, in my House component file, import the file as shown below:
import React, { useState } from "react";
import ReactDOM from "react-dom";
import "./style.css"; //import here

//keep everything else the same
function House() {
  const [color, setColor] = useState("red");

  const style = {
    border: `1px solid ${color}`
  };

  return (
    <div>
      <h2 style={style}>This is a {color} house</h2>
    </div>
  );
}
Now our app will look like:

More to Learn!
And that's it for this React Cheat Sheet for beginners. Of course, this is just a very concised article so it cannot cover every single aspect of React. But I do hope it has been a great introduction to at least help anyone embark on a React journey without feeling intimidated or too overwhelmed.
As I always like to mention, practising and building projects will help anyone tolearn anything faster. To read more about React, check out my blog and my A Look At React Hook Series. A series dedicated for beginners to start learning about basic React Hooks and more.
Thanks for reading and if you find it helpful, please like and share this article around for more reach. Cheers!