


How to Make a React Library System using Firestore #2
Part 2: Integrating Firestore - Add and update books into the library


Welcome back to Part 2 of How to Make a React Library System using Firestore. In the previous article, we learned the basics of Firestore and how to configure it to a React app.
In this part, we will learn how to retrieve, add and delete data from our Firestore database to complete our Library app.
This tutorial will be implementing Firebase v9.
Side Note: 4 Articles in 4 Weeks!
Before we get started, I would like to quickly share that Hashnode is having a writeathon challenge: 4 Articles in 4 Weeks! Read more about it here.
It is always fun to do these challenges as a community. If you are a new blogger, I highly recommend doing this challenge for fun and to get you started developing good writing habits!
Step 1: addBook function
Recall that by the end of Part 1, we have created simple text fields and a button to add a new book into our Firestore database.
Now let's create the addBook function to add the book data provided by the user to our Firestore database.
In App.jsx, let's first import our database from config.js and 2 Firestore functions: collection and addDoc.
import { db } from "./config.js";
import { doc, setDoc } from "firebase/firestore";
doc: gets a reference to the document, if it doesn't exist, it will create a new collection and document with the provided namesetDoc: given a document reference, writes the provided data to it
To add the provided title, author and quantity data to a collection called "books", our addBook function will be as follows:
 const addBook = async () => {
    if (title !== "" && author !== "" && quantity !== "") {
      try {
        //add book data to collection called books
        await setDoc(doc(db, "books", title), {
          title,
          author,
          quantity,
        });
        //clear text fields
        setTitle("");
        setAuthor("");
        setQuantity("");
        alert("A new book has been added to the library!");
      } catch (e) {
        console.error("Error adding document: ", e);
      }
    } else alert("Missing fields");
  };
Then, we can add this function in the onClick handler of our 'Add Book' button:
<Button variant="contained" onClick={addBook}>
   Add Book
</Button>
Let's Test!
We can simulate a simple test to check if we can add data to our Firestore database.

Once we added data from our app, if we check our database, we should see that the data has been properly added.
Step 2: getBooks function
Next, our app should get all the book data from the database and display it in the table below the add book fields.
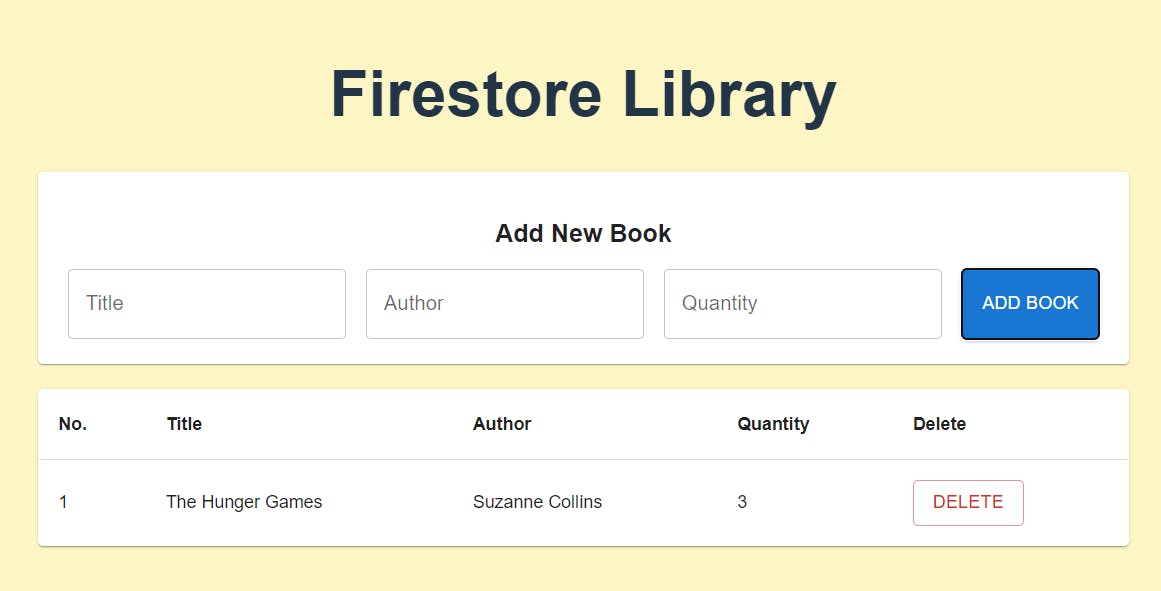
Recall that in Part 1, we have a Books.jsx component to show our table using mock data.
export default function Books() {
  // Mock data
  const rows = [
    {
      title: "The Hunger Games",
      author: "Suzanne Collins",
      quantity: 3,
    },
  ];
  return (
    <TableContainer component={Paper}>
      <Table sx={{ minWidth: 750 }} aria-label="simple table">
        <TableHead>
          <TableRow>
            <TableCell>No.</TableCell>
            <TableCell>Title</TableCell>
            <TableCell>Author</TableCell>
            <TableCell>Quantity</TableCell>
            <TableCell>Delete</TableCell>
          </TableRow>
        </TableHead>
        <TableBody>
          {rows.map((row, index) => (
            <TableRow
              key={index}
              sx={{ "&:last-child td, &:last-child th": { border: 0 } }}
            >
              <TableCell component="th" scope="row">
                {index + 1}
              </TableCell>
              <TableCell>{row.title}</TableCell>
              <TableCell>{row.author}</TableCell>
              <TableCell>{row.quantity}</TableCell>
              <TableCell>
                <Button variant="outlined" color="error">
                  Delete
                </Button>
              </TableCell>
            </TableRow>
          ))}
        </TableBody>
      </Table>
    </TableContainer>
  );
}
Now we just need to replace this mock data with real-time data fetched from our Firestore database. Let's start by importing the functions we need to Books.jsx.
import { useState, useEffect } from "react";
import { db } from "./config.js";
import { collection, query, onSnapshot } from "firebase/firestore";
query: used to construct a query for onSnapshotonSnapshot: attaches a listener so that our app will constantly display the real-time data whenever a book is added or removed
//our table will display whatever data is in 'rows'
const [rows, setRows] = useState([]);

//getBooks functions to attach a listener and fetch book data
const getBooks = () => {
    const q = query(collection(db, "books"));
    onSnapshot(q, (querySnapshot) => {
      const rows = [];
      querySnapshot.forEach((doc) => {
        rows.push(doc.data())
      });
      setRows(rows);
    });
  };

//call getBooks when app is loaded
useEffect(() => {
    getBooks();
  },[]);
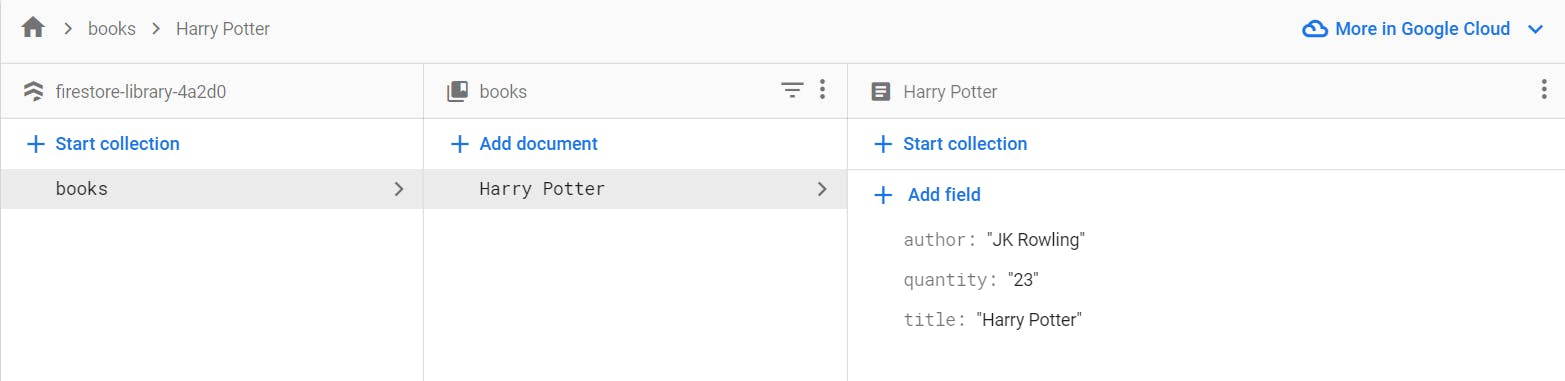
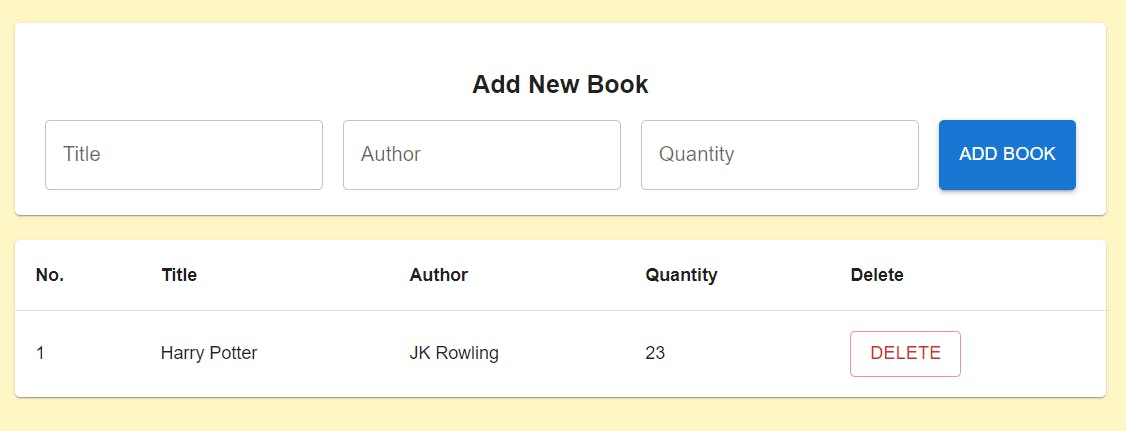
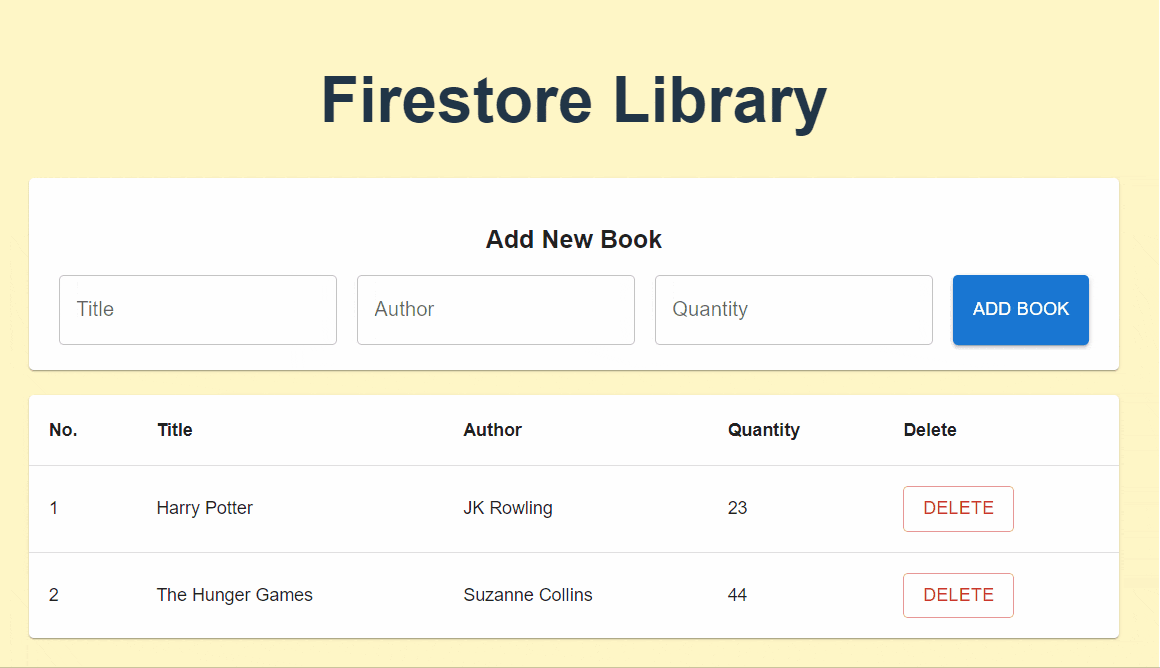
If we restart our app, we should see that it has immediately fetched the Harry Potter book data we just added in Step 1.
Let's Test!
We can also further test to see if it displays the data in real-time. Let's add another book and watch the app displays the information immediately.
Step 3: deleteBook function
To wrap this up, we need to learn one more useful function we can do with Firestore: deleting documents.
In our Books.jsx, add doc, deleteDoc in our existing import statement.
import { /*add these*/ doc, deleteDoc, collection, query, onSnapshot } from "firebase/firestore";
Then, write the deleteBook function, which will delete a book from the books collection by its title, as shown below:
const deleteBook = async (title) =>{
    await deleteDoc(doc(db, "books", title));
    alert(title+" has been successfully deleted.")
  }
Finally, in our 'Delete' button, make sure to add the onClick listener to execute the deleteBook function when it is clicked.
<Button variant="outlined" color="error" onClick={()=>deleteBook(row.title)}>
      Delete
</Button>
Final Test
If we test our app, we should be able to delete our books, and it would be immediately reflected on the table thanks to our attached listener in Step 2.
And that's how we can add books, get data in real-time and remove books for our library app!
To view the code I made for this tutorial, please visit the repo here. Also, feel free to read the documentation in the References section below for more information.
Thank you for reading. I hope it's been a helpful 2-part tutorial to help you get started with using Firestore. It is an easy-to-use, fast and convenient to setup a cloud database.
This library app is a simple beginner-friendly project to get started. If you have any questions, don't hesitate to ask in the comments. Do give a like and share the article if you find it helpful! Till next time, cheers!