


How to Make a React Library System using Firestore #1
Part 1: Introduction to Firestore, Configure + Setup a React/Firebase project


Firebase is a Backend-as-a-Service (BaaS) that provides many cloud-hosted solutions such as hosting, databases and cloud functions without the need to manage servers.
In this article, we will learn about Firebase's flexible and scalable NoSQL cloud database called Cloud Firestore. We will build a library system app with Firestore and React. It's one of the 5 Best Side Projects to Build as a Beginner that I recommended.
This tutorial will be implementing Firebase v9.
Prerequisites
Before we begin, please ensure you have:
- A code editor like VS code
- Basic to intermediate knowledge in React, React Hooks & JavaScript
- Node and npm installed in your machine
What is Cloud Firestore?
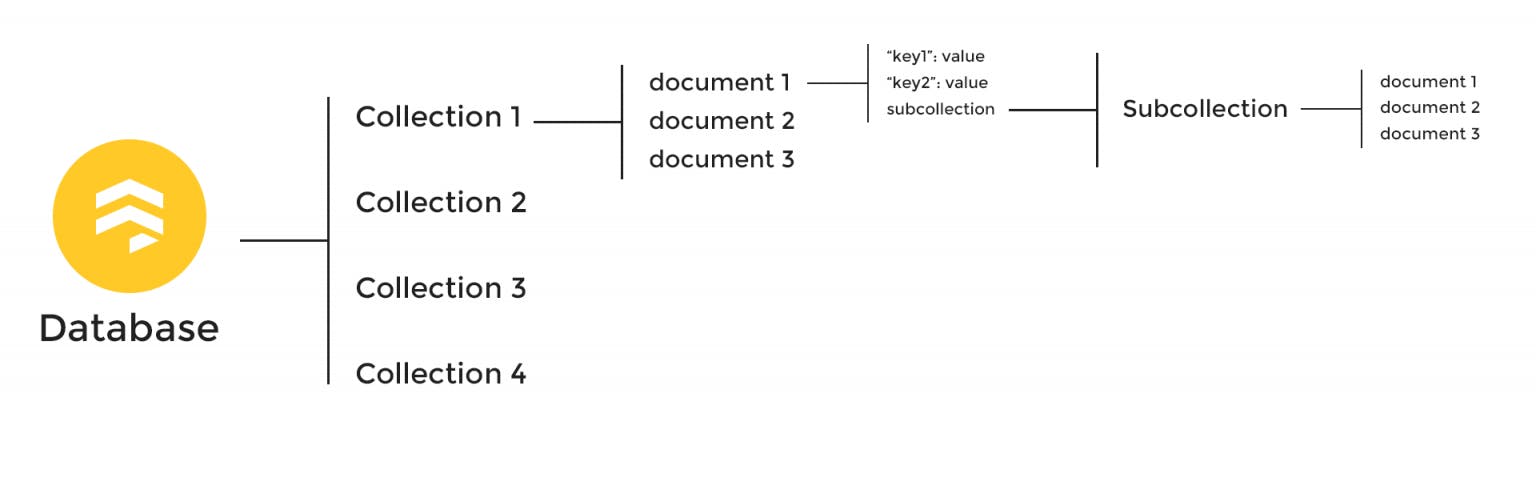
Integrating Cloud Firestore allows your apps to store and get real-time data. The type of data you can store is called documents, which are organized into collections.
Documents are data that contains a set of key-value pairs. They can have multiple levels of hierarchy to contain complex, nested data. Think of it as somewhat similar to a JSON object format.
Now that we learned more about what Cloud Firestore is, let's build our library app. Here's what our app will do:
- Add new book title, author and quantity to Firestore
- Fetch all book data from Firestore and display it
- Delete book data from Firestore
Step 1: Create and set up React app
First, let's create our React app. I recommend using Vite by running this command:
npm create vite firestore-library --template react
If you want to read more about Vite, feel free to read this article
Then, run the following commands:
cd firestore-library
npm install
Finally, let's install the firebase package:
npm install firebase
Step 2: Create Firebase Project
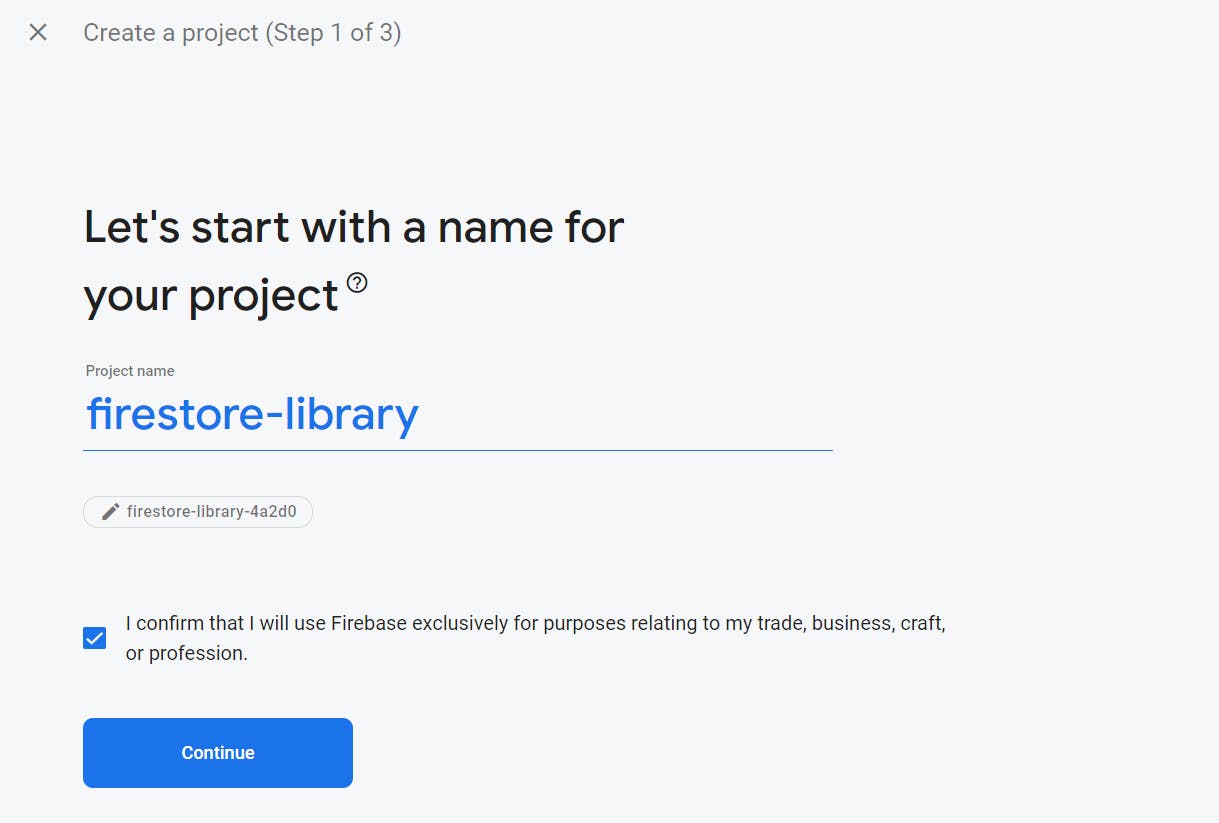
Head over to firebase.google.com and create a new project. Name the project as appropriate.
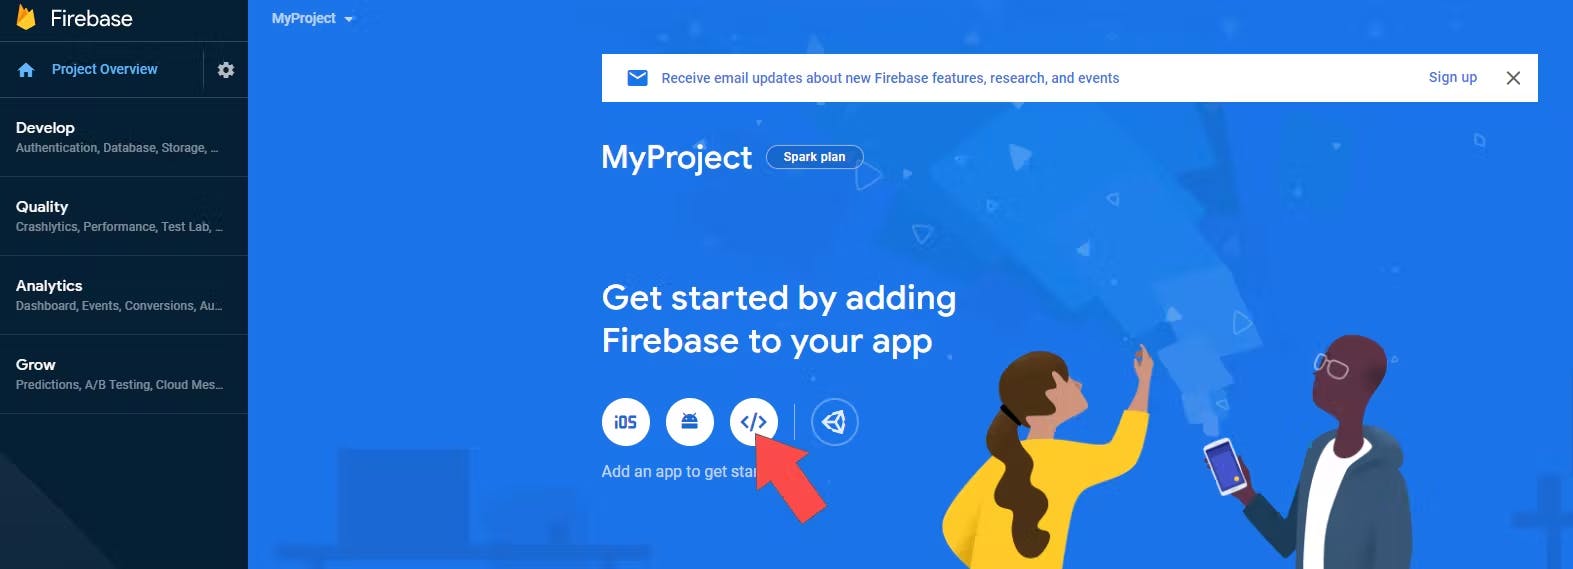
Once redirected to the dashboard, click on the Web icon to initialize Firebase for Web Apps.
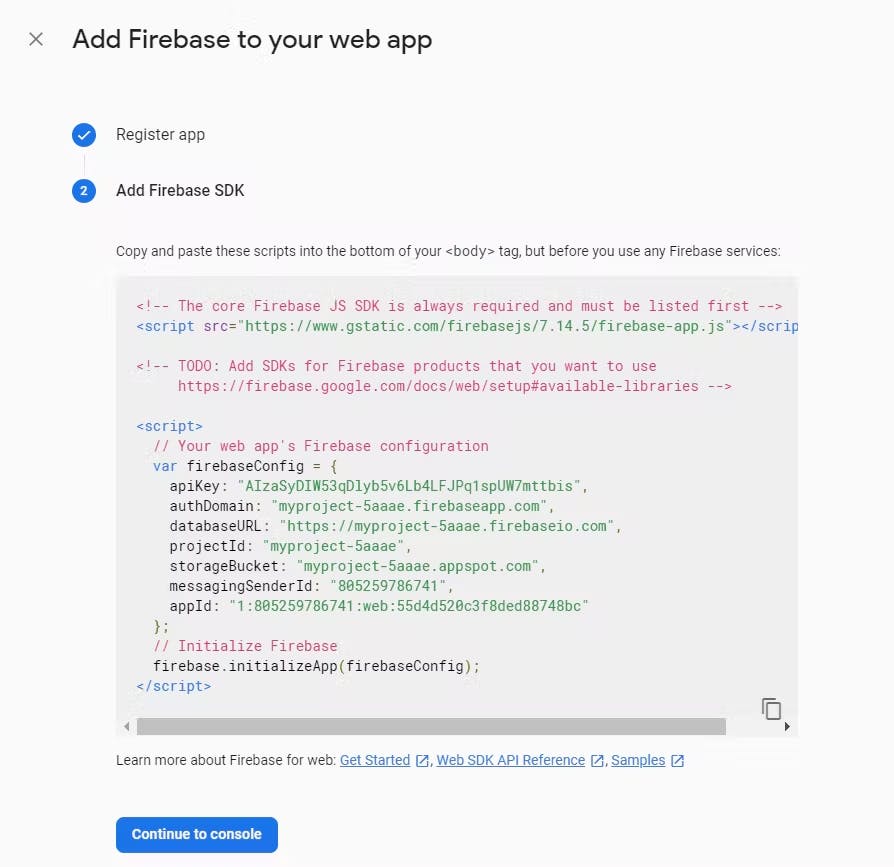
Then register your app and copy the firebaseConfig object as shown in the screenshot below:
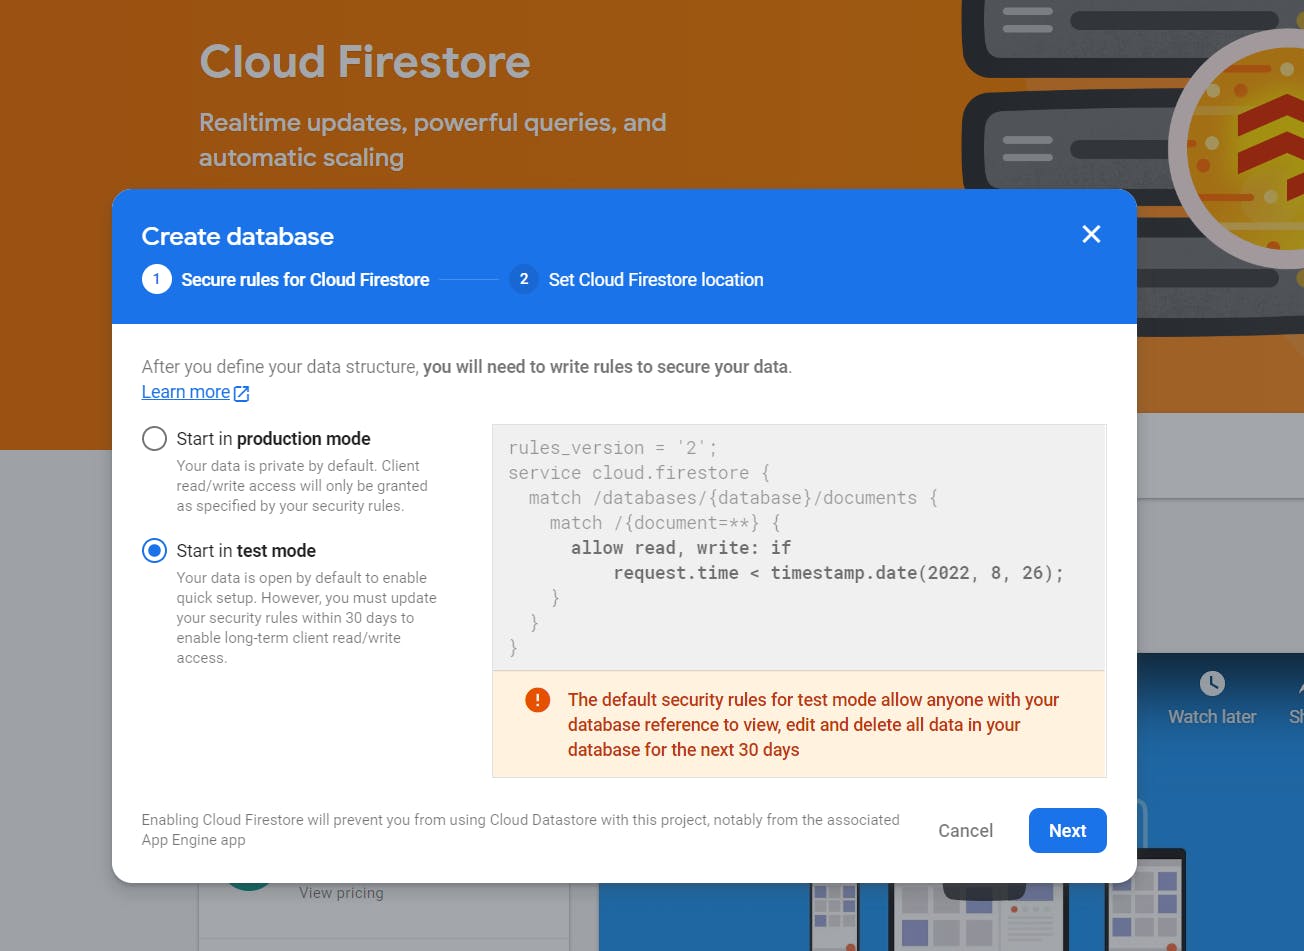
Back in the dashboard, click on 'Firestore Database' on the left navigation panel. Then, create a new Firestore database. This will be where we store all our book information for our library app.

Click on 'Create database' to create our new Firestore database. Select test mode for this tutorial and then click Next to select your region.
And now our Firestore database is ready! We can simply add some data in this console or we can add it via our app.
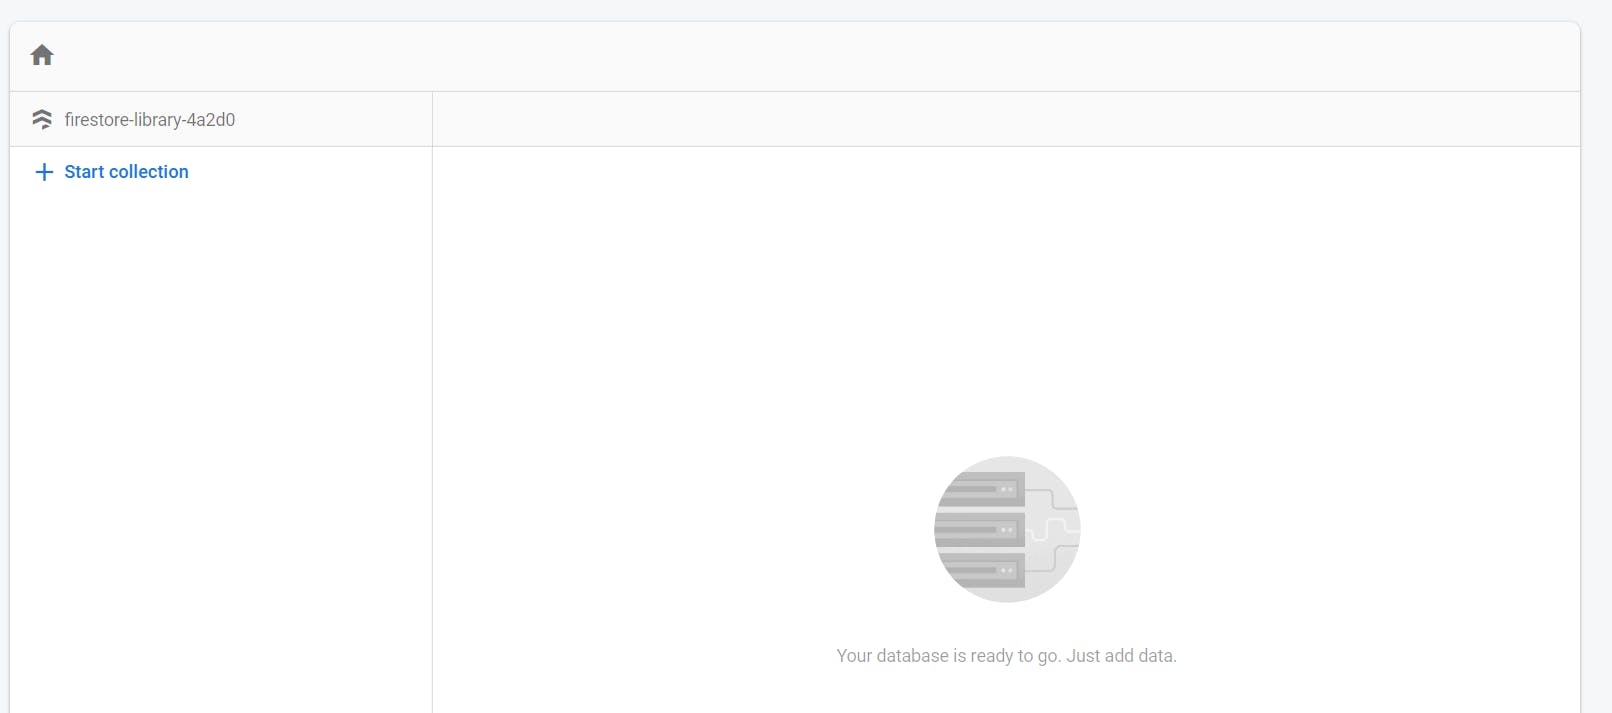
For this tutorial, let's add some book data to our Firestore database via our React app. To do that, we need to configure our Firebase project to the React app.
Step 3: Configure Firebase to React
Create a file called config.js in the src folder to store our Firebase config variables that we copied earlier.
import { initializeApp } from "firebase/app";
import { getFirestore } from "firebase/firestore";

// Your web app's Firebase configuration
const firebaseConfig = {
    apiKey: import.meta.env.VITE_APP_API_KEY,
    authDomain: import.meta.env.VITE_APP_AUTH_DOMAIN,
    databaseURL: import.meta.env.VITE_APP_DATABASE_URL,
    projectId: import.meta.env.VITE_APP_PROJECT_ID,
    storageBucket: import.meta.env.VITE_APP_STORAGE_BUCKET,
    messagingSenderId: import.meta.env.VITE_APP_MESSAGING_SENDER_ID,
    appId: import.meta.env.VITE_APP_ID
};

// Initialize Firebase
const app = initializeApp(firebaseConfig);

export const db = getFirestore(app);

export default app;
Note that I'm securely storing the actual config values in my .env file and accessing them as import.meta.env.VARIABLE_NAME.
If you are new with environment variables in Vite, please refer to their documentation explaining how to use it.
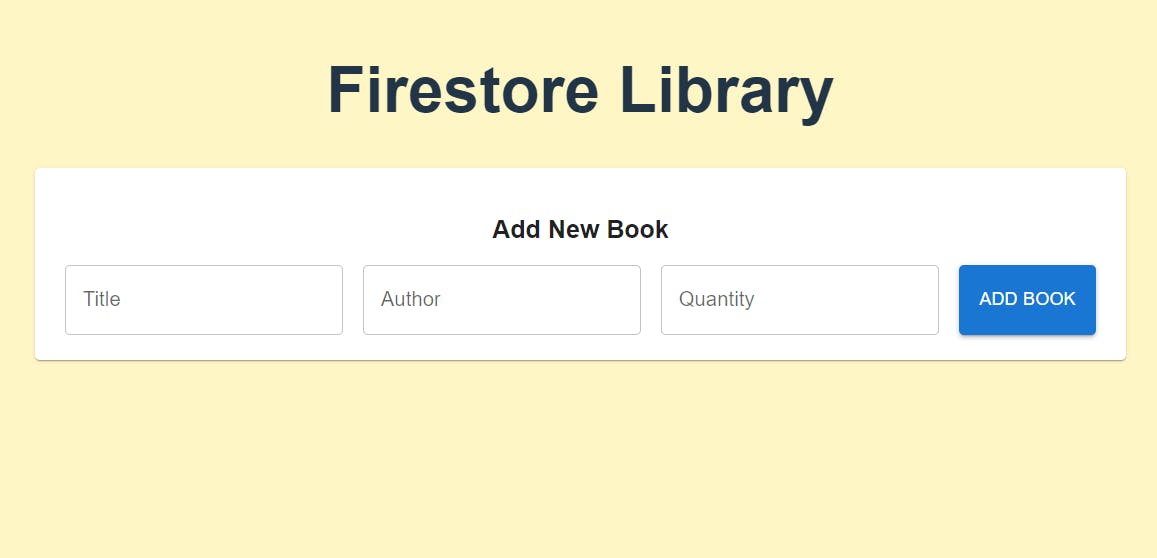
Step 4: Create add book UI
For this tutorial, I'm using Material UI to style the app. Feel free to use anything you want for styling.
If you want to use Material UI too, you can install it by running the command below:
npm install @mui/material @emotion/react @emotion/styled
In our App.js, let's create a simple form for users to add books to the library app.
import { useState } from "react";
import { TextField, Button, Stack, Paper, Container } from "@mui/material";

function App() {
  const [title, setTitle] = useState("");
  const [author, setAuthor] = useState("");
  const [quantity, setQuantity] = useState("");

  return (
    <div className="App">
      <h1>Firestore Library</h1>
      <Container
        component={Paper}
        sx={{ marginBottom: "20px", padding: "20px" }}
      >
        <h2 style={{ fontSize: "20px" }}>Add New Book</h2>
        <Stack direction="row" spacing={2}>
          <TextField
            label="Title"
            value={title}
            onChange={(e) => {
              setTitle(e.target.value);
            }}
          />
          <TextField
            label="Author"
            value={author}
            onChange={(e) => {
              setAuthor(e.target.value);
            }}
          />
          <TextField
            label="Quantity"
            value={quantity}
            type="number"
            onChange={(e) => {
              setQuantity(e.target.value);
            }}
          />
          <Button variant="contained">Add Book</Button>
        </Stack>
      </Container>
    </div>
  );
}

export default App;
Step 5: Display book data
Next, we can create a component Books.jsx to display our book data from our Firestore database in a readable table form.
For now, let's use some mock data since our app has yet to fetch any data from Firestore. The mock data should resemble what our library data will have: title, author and quantity.
For example:
  const data = [
    {
      title: "The Hunger Games",
      author: "Suzanne Collins",
      quantity: 3,
    },
    {
      title: "Learning JavaScript Design Patterns",
      author: "Addy Osmani",
      quantity: 5,
    }
  ];
Then, using this mock data, we use the map function to display each data as a table row. Here's what our Book.jsx looks like:
import {...} from "@mui/material"

export default function Books() {
  // Mock data
  const data = [
    {
      title: "The Hunger Games",
      author: "Suzanne Collins",
      quantity: 3,
    }
  ];

  return (
    <TableContainer component={Paper}>
      <Table sx={{ minWidth: 750 }} aria-label="simple table">
        <TableHead>
          <TableRow>
            <TableCell sx={{ fontWeight: 700 }}>No.</TableCell>
            <TableCell sx={{ fontWeight: 700 }}>Title</TableCell>
            <TableCell sx={{ fontWeight: 700 }}>Author</TableCell>
            <TableCell sx={{ fontWeight: 700 }}>Quantity</TableCell>
            <TableCell sx={{ fontWeight: 700 }}>Delete</TableCell>
          </TableRow>
        </TableHead>
        <TableBody>
          {data.map((row, index) => (
            <TableRow
              key={index}
              sx={{ "&:last-child td, &:last-child th": { border: 0 } }}
            >
              <TableCell component="th" scope="row">
                {index + 1}
              </TableCell>
              <TableCell>{row.title}</TableCell>
              <TableCell>{row.author}</TableCell>
              <TableCell>{row.quantity}</TableCell>
              <TableCell>
                <Button variant="outlined" color="error">
                  Delete
                </Button>
              </TableCell>
            </TableRow>
          ))}
        </TableBody>
      </Table>
    </TableContainer>
  );
}
Import the component in our App.js and we should have something like:
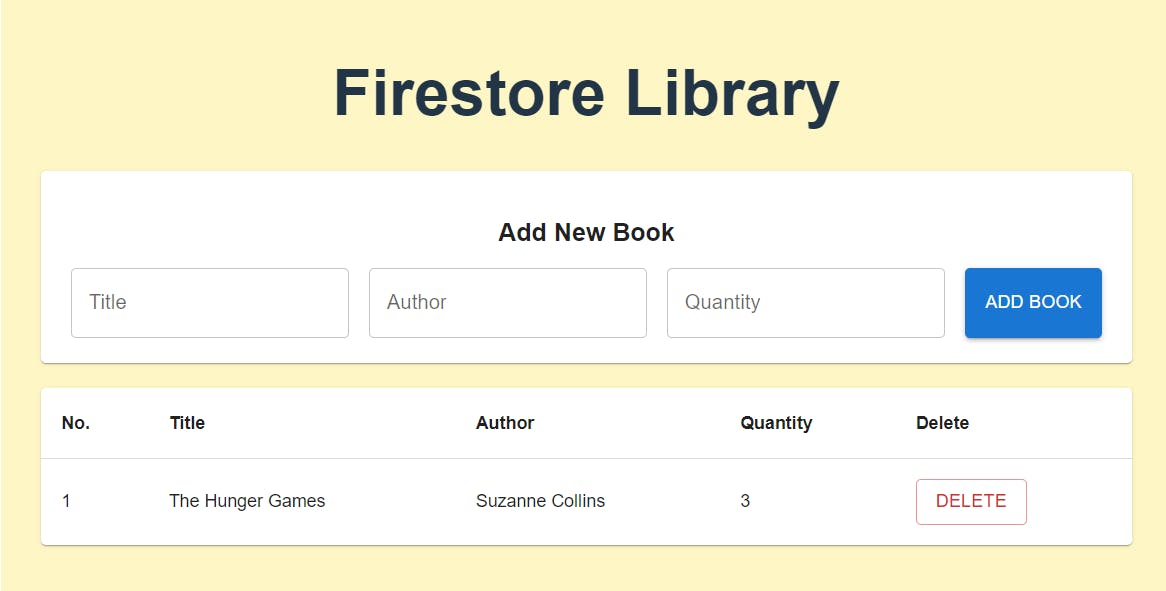
Our mock data is correctly and properly displayed as a table.
Conclusion
Great! In the next part, let's integrate all the Firestore goodness into the app. We will learn how to add data into our Firestore database, how to fetch data from it and how to delete data.
Thanks for reading Part 1! I hope it has been helpful so far in getting you started with Firebase and specifically Firestore. Please don't hesitate to ask questions in the comments below and share the article if you find it helpful. Stay tuned, cheers!