


Curate Top Programming Blogs with React and HarperDB
Let's build a simple React app with HarperDB! A step-by-step tutorial for beginners!


In this article, let's learn about HarperDB, a very simple yet powerful database management solution that you can easily integrate with any app.
To showcase some of its great features, let's build a React app together in this step-by-step tutorial. In this app, we will have a database on HarperDB that stores information on top programming blogs. Our React app will then fetch data from HarperDB and display it as a table.
Prerequisites
In order to follow along, you will need the following:
- Basic React & React Hooks knowledge
- Basic knowledge on JSON
- Code editor (i.e. Visual Studio Code)
- Node.js and npm installed in your machine
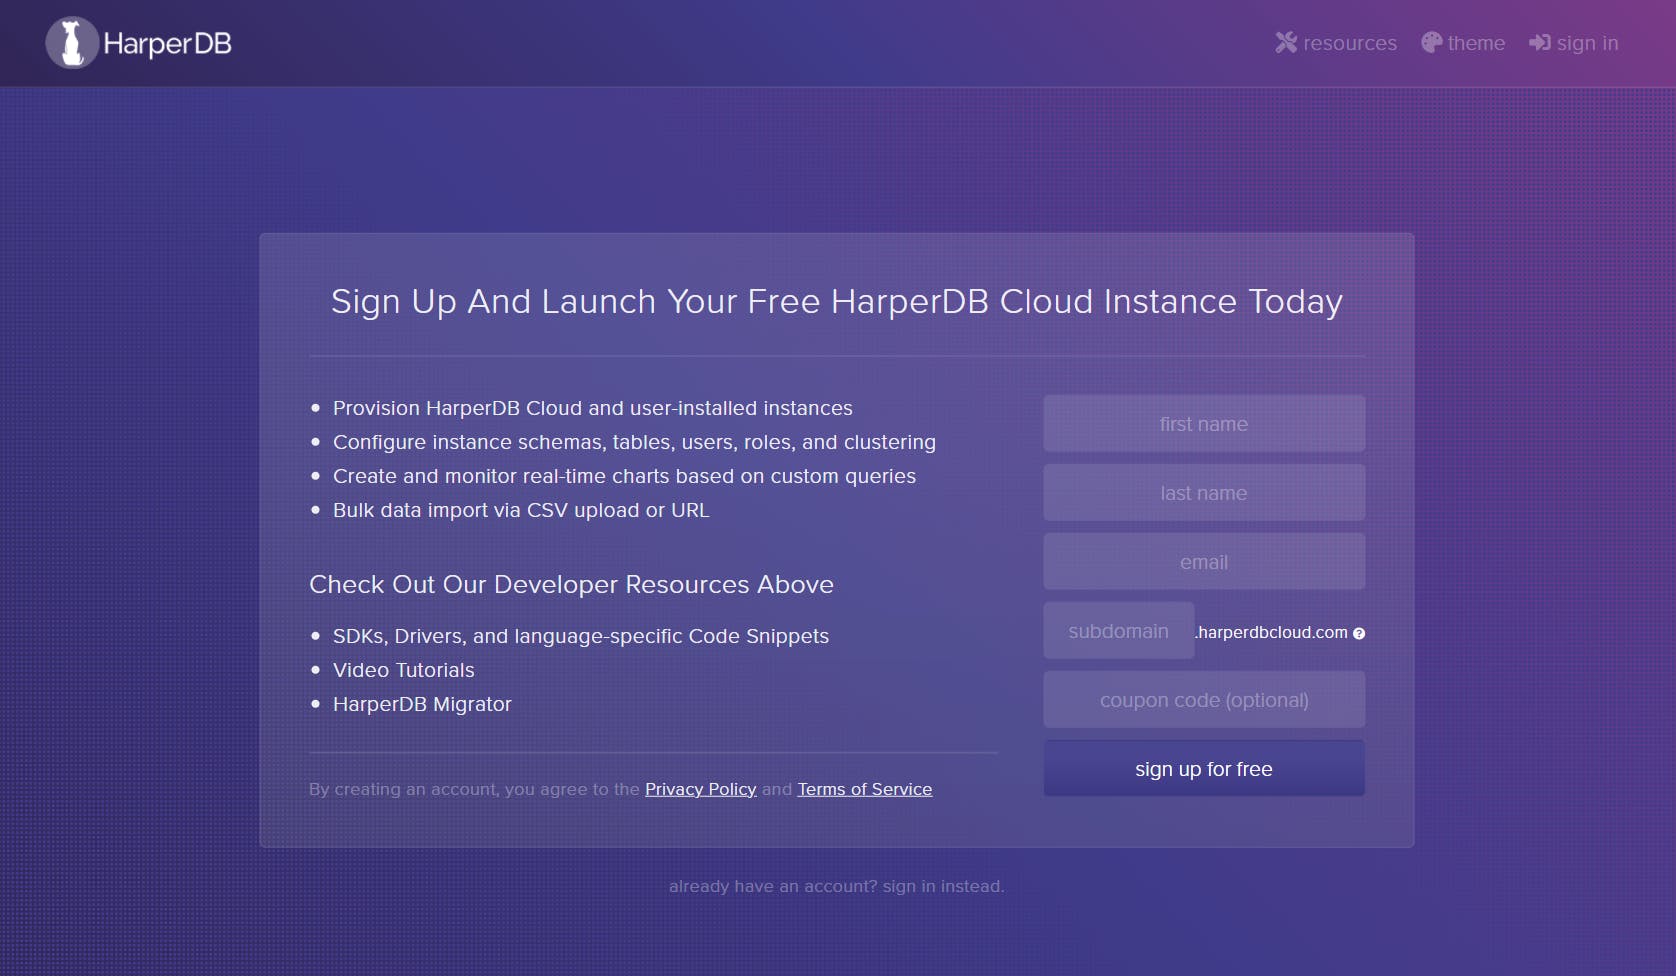
Step 1: Sign up for HarperDB
Sign up for a free HarperDB account at: studio.harperdb.io/sign-up.
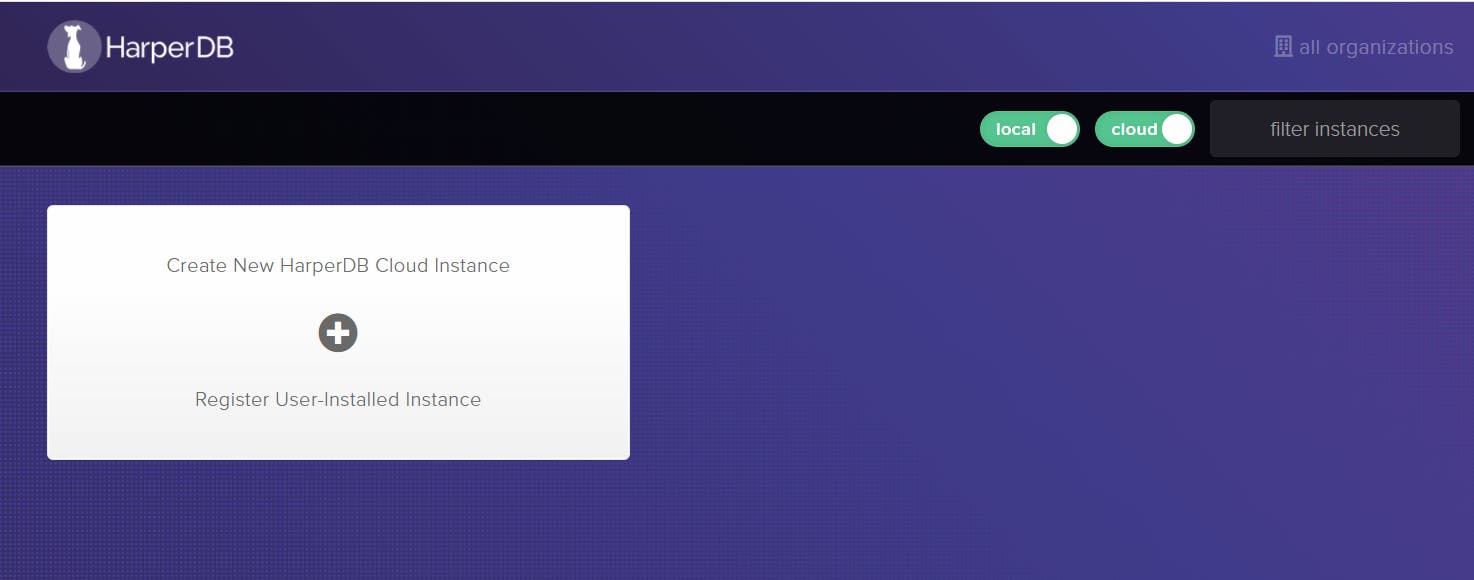
Step 2: Create new HarperDB Cloud Instance
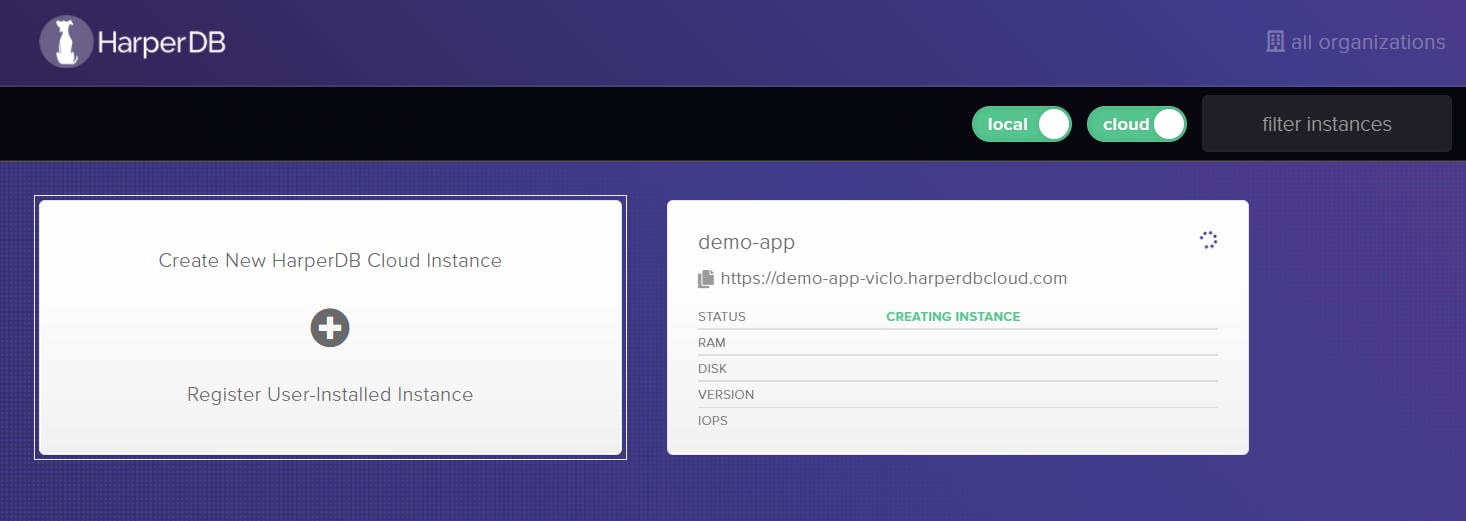
Once you have created an account, you will be taken to your dashboard. Click the Create New HarperDB Cloud Instance to create a new database for our app.
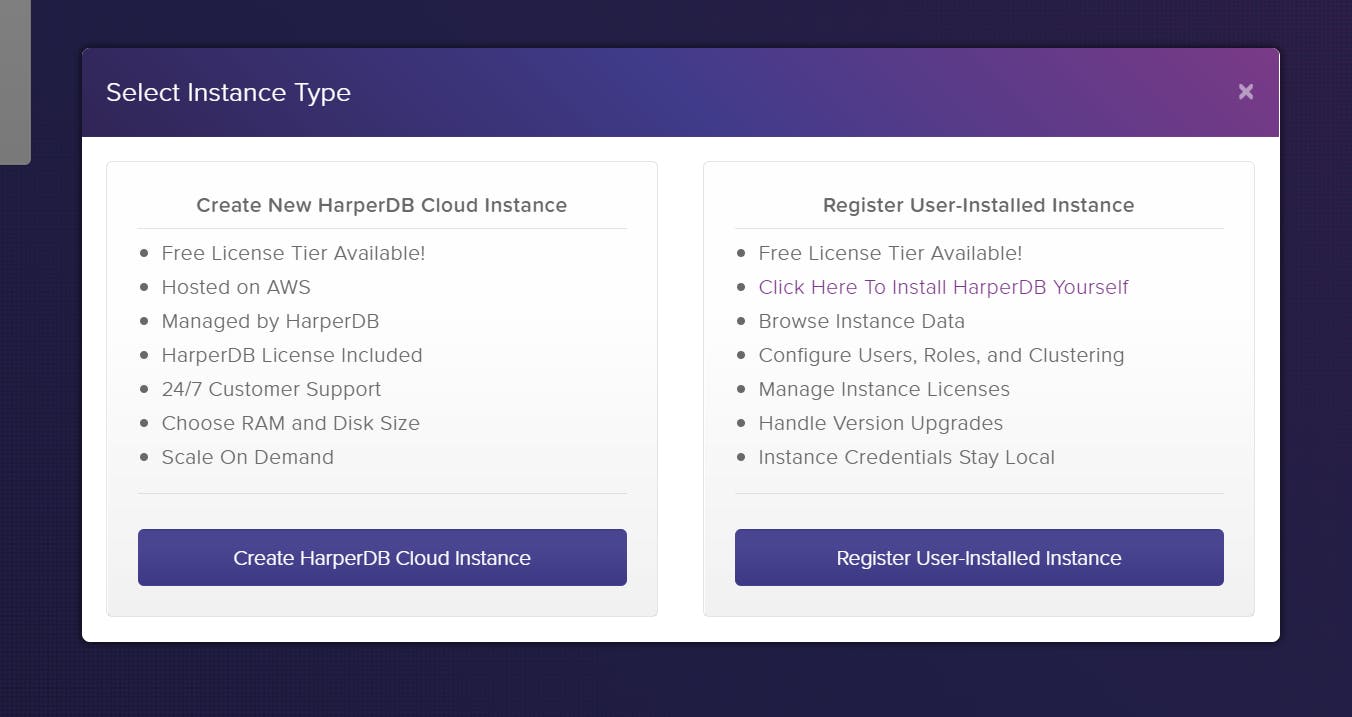
Select Instance Type
A popup window will appear to prompt for your instance type. Select the New HarperDB Cloud Instance type (on the left) to continue.
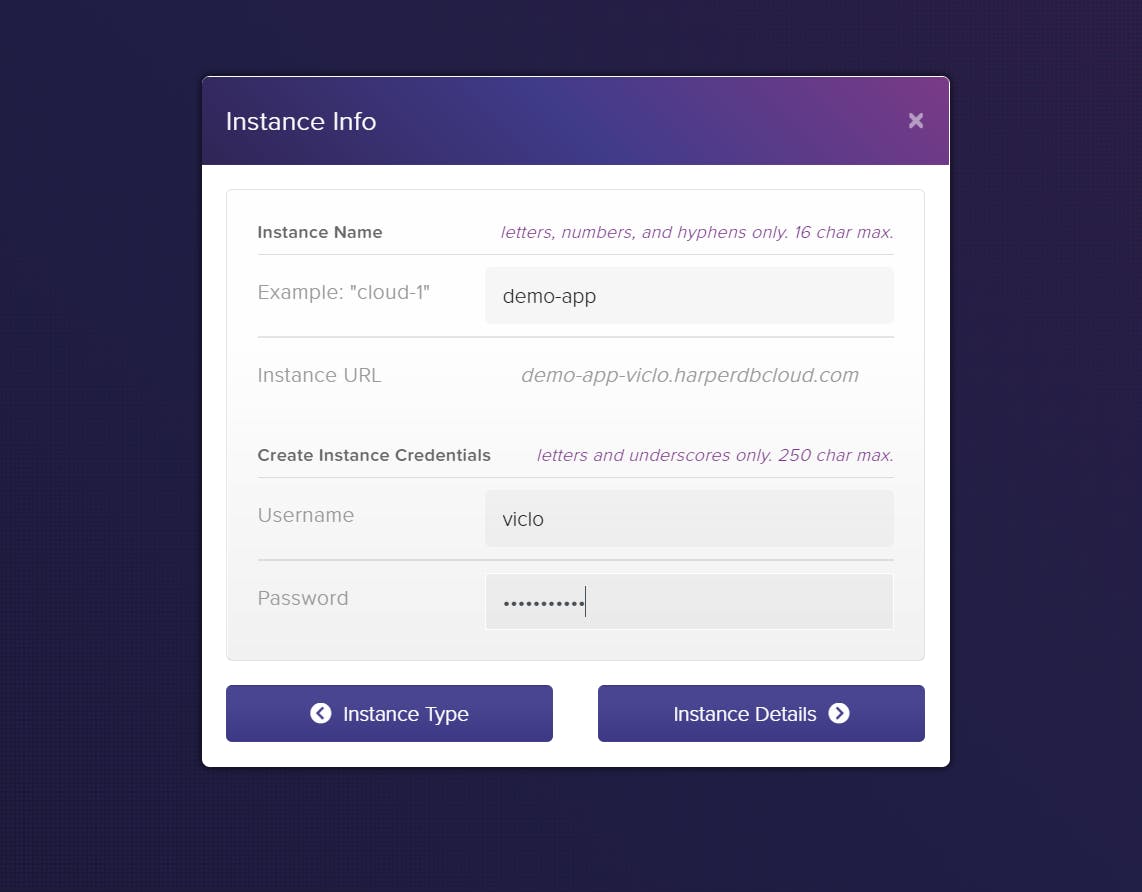
Fill Instance Info
Then, you will be asked to create the instance's name and set a user credential. Name these details as appropriate.
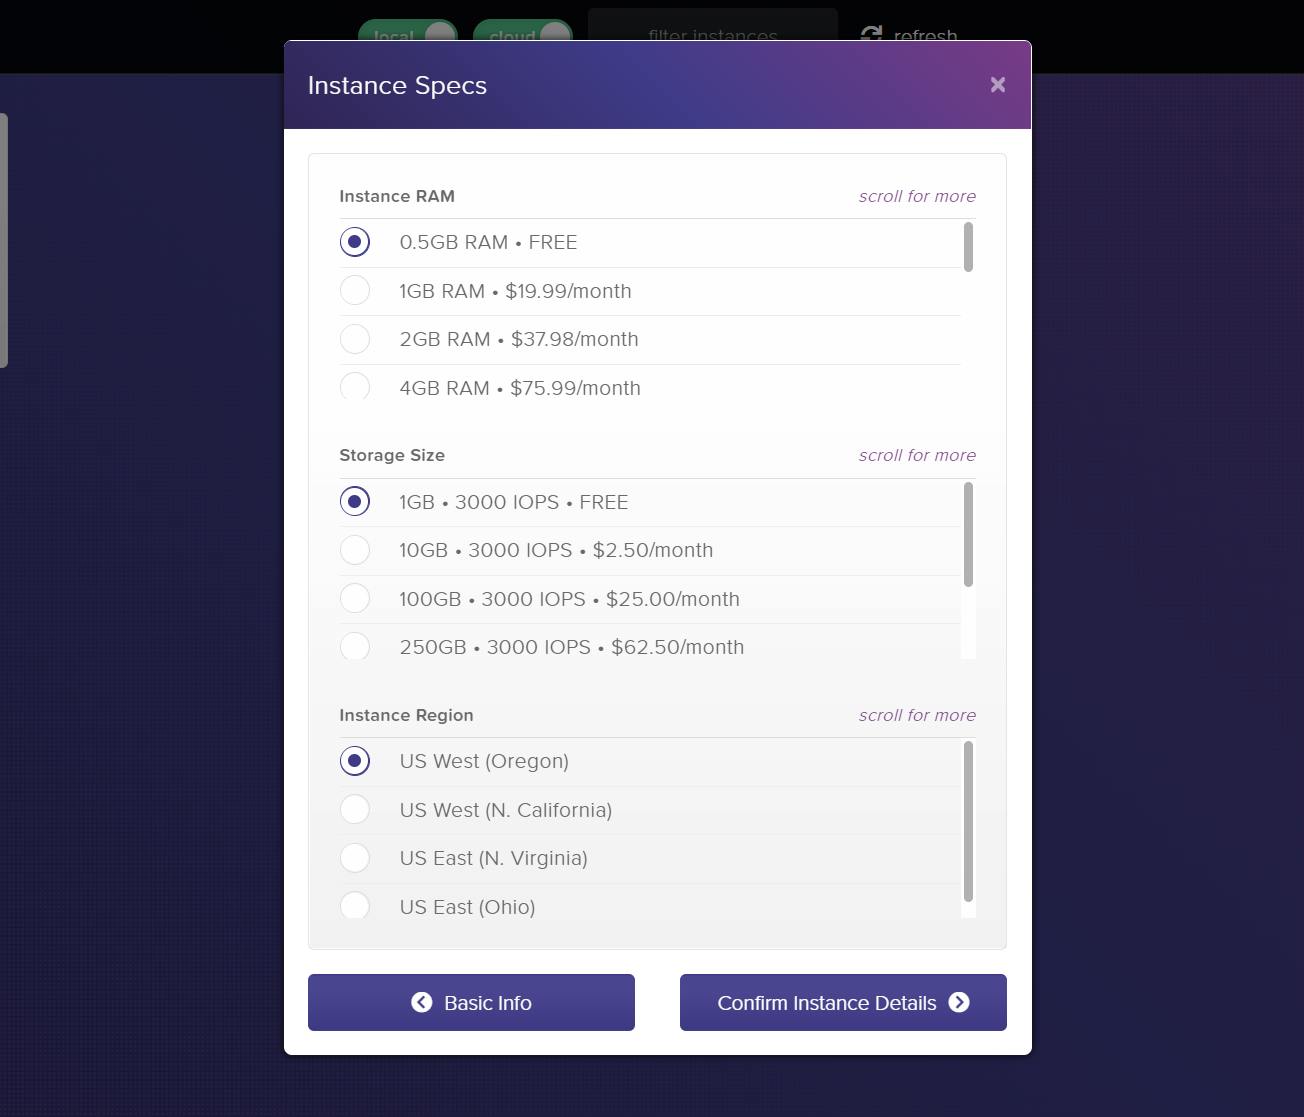
Select Instance Details
Finally, you can select the instance details such as the RAM, storage size and region. If you are not sure which one to pick, you can go with the default chosen options.
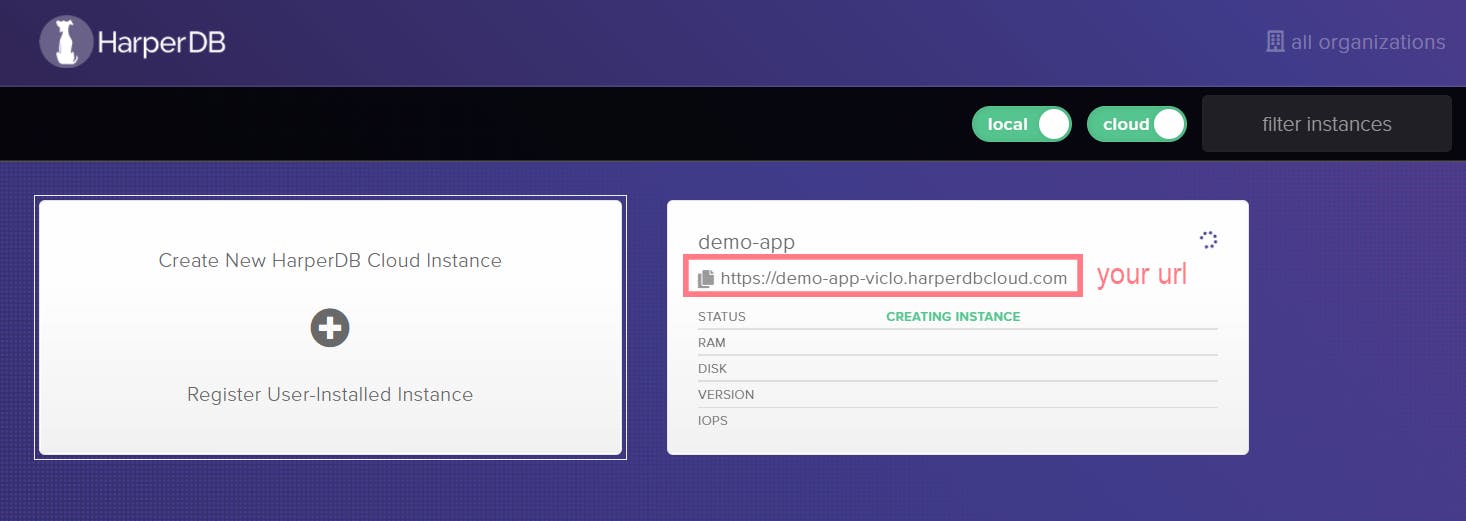
Once you clicked Confirm Instance Details, you will see your new Cloud Instance shown on your dashboard, like in the screenshot below.
Step 3: Populate Data and Configure Roles
Let's now add some data to our database. For this tutorial, I'm adding the top programming blogs according to this article by Laughing Dev.
First, we need to create a schema and table where our data will be stored. Click on the database instance and fill in the schema name, table name and the name of the unique attribute of your table (i.e. id), as seen in the screenshot below.
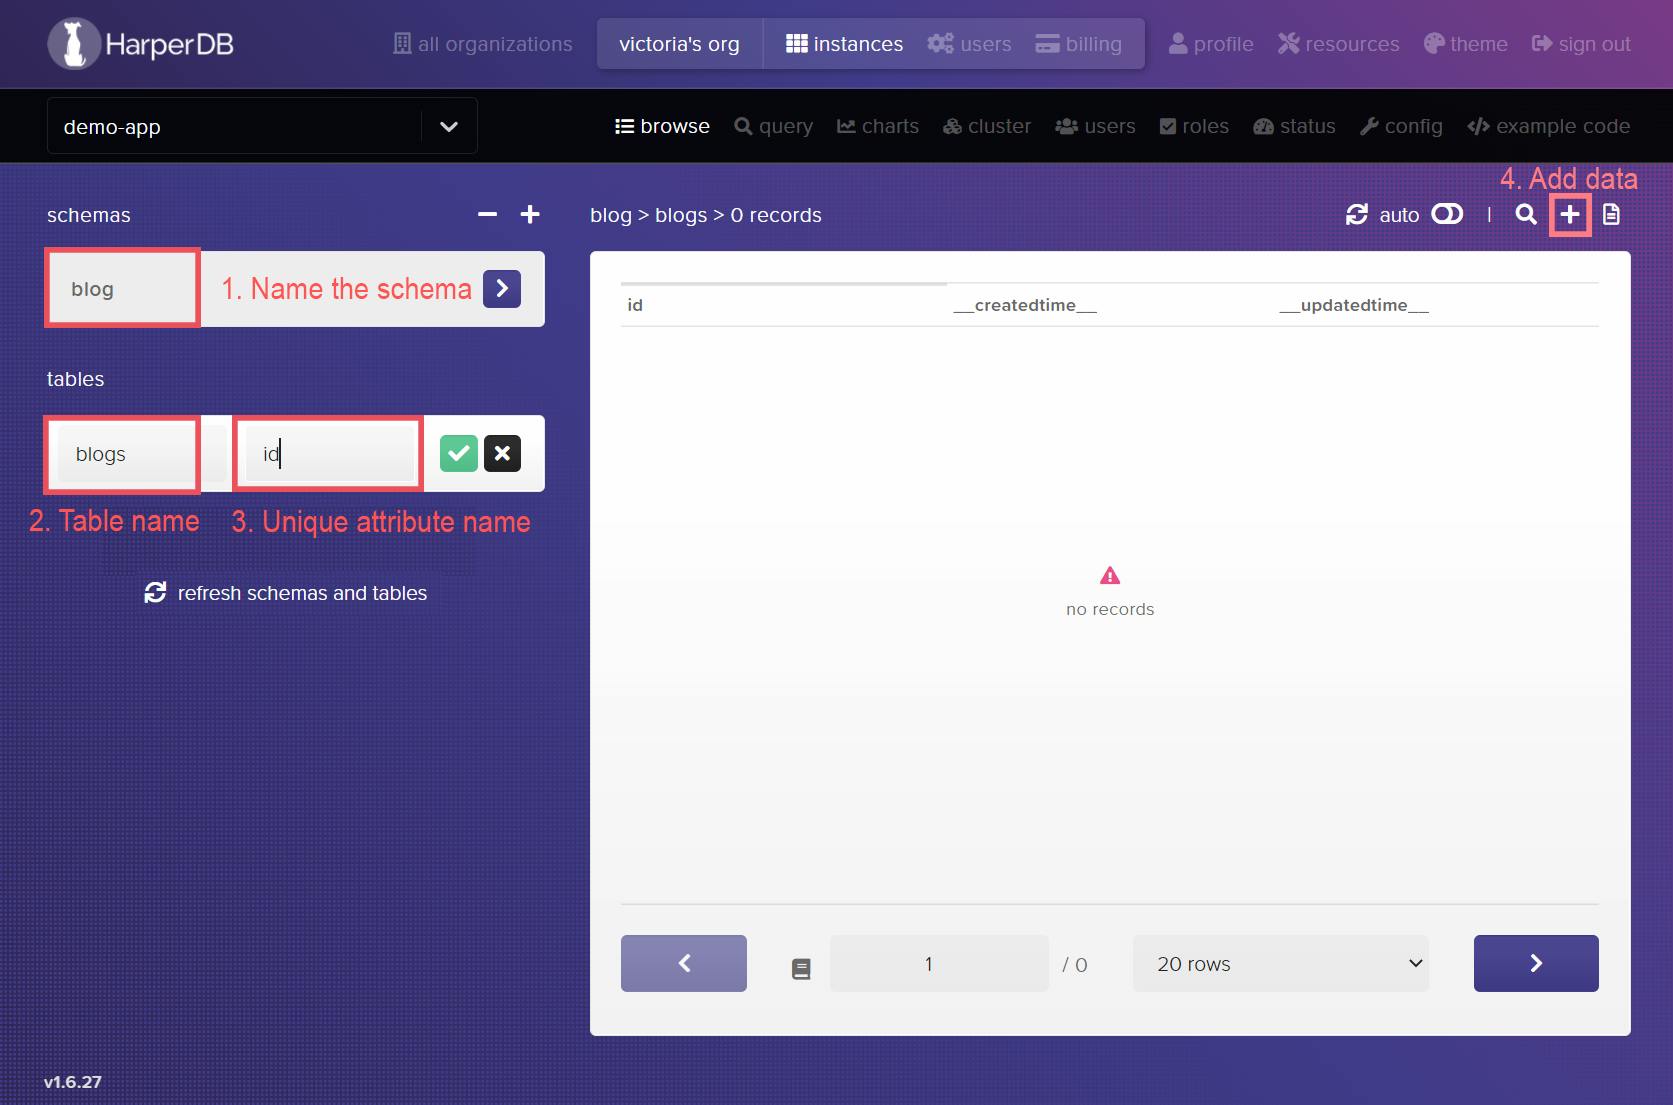
Then, click on the '+' button to start adding data into the blogs table we just created. Once you click on the button, you should see something like the screenshot below. This is where you can fill in your data as a JSON object or an array.
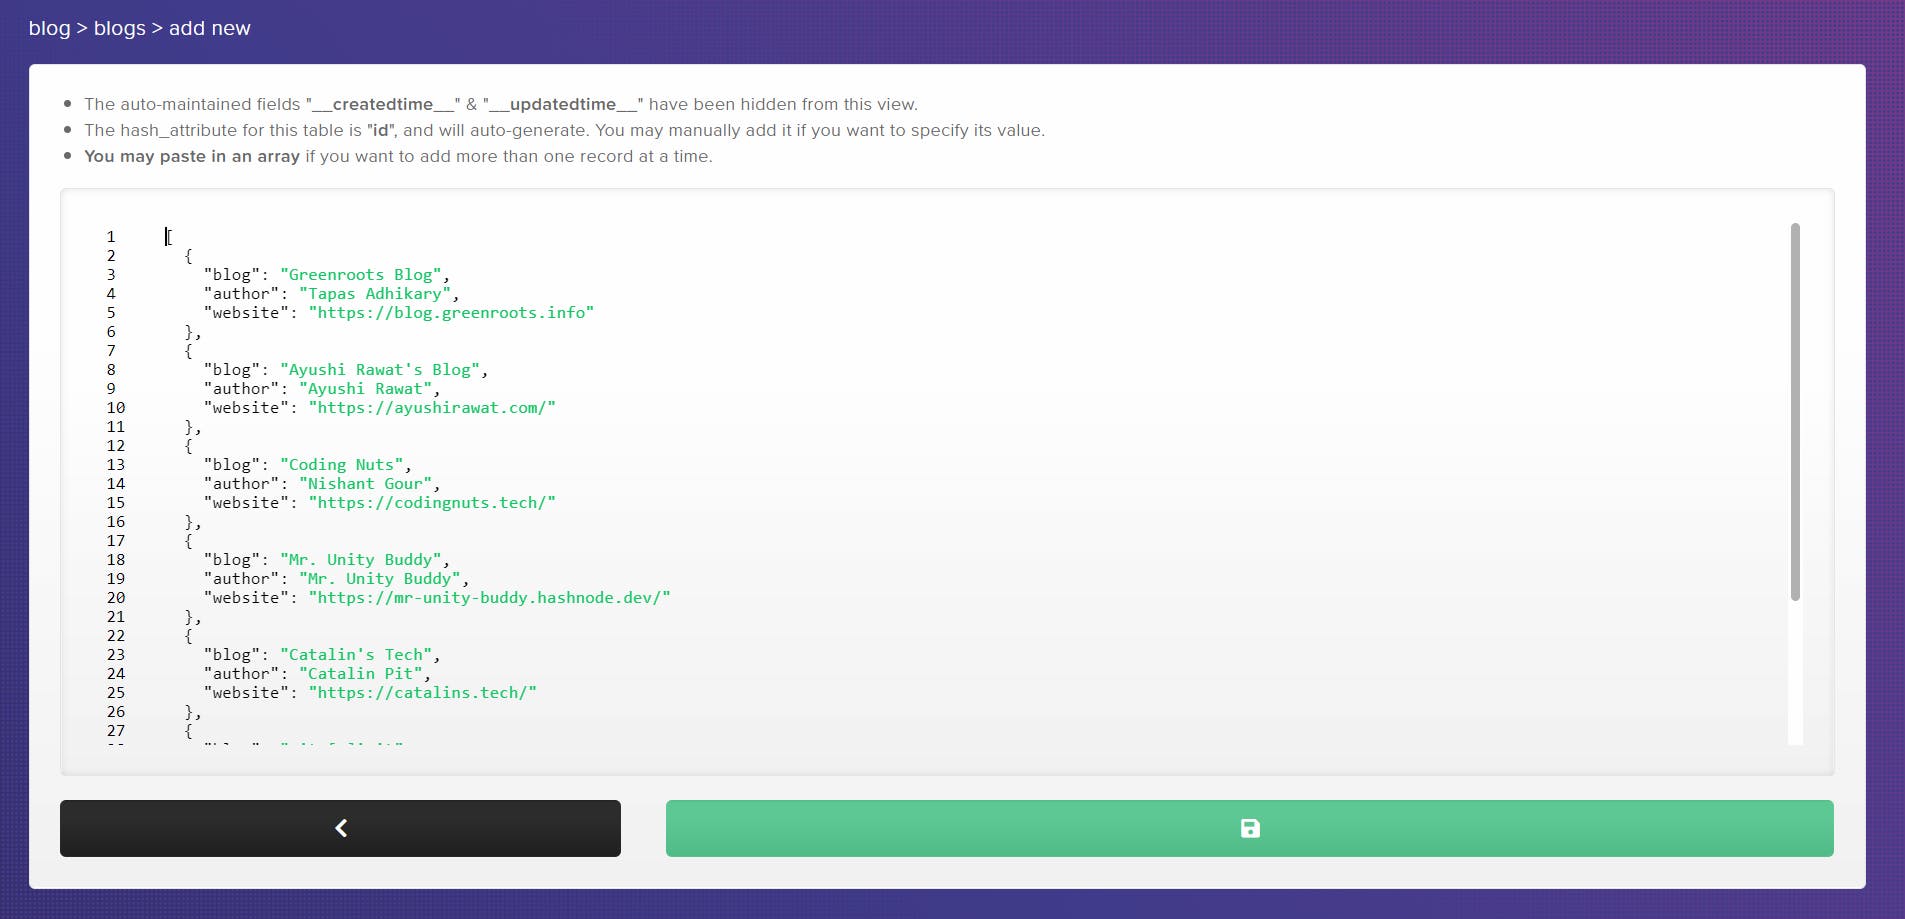
You can use my example data by copying this array and pasting it onto the data field as shown in the image above.
[
    {
        "blog":"Greenroots Blog",
        "author":"Tapas Adhikary",
        "website":"https://blog.greenroots.info/"
    },
    {
        "blog":"Ayushi Rawat's Blog",
        "author":"Ayushi Rawat",
        "website":"https://ayushirawat.com/"
    },
    {
        "blog":"Coding Nuts",
        "author":"Nishant Gour",
        "website":"https://codingnuts.tech/"
    }
]
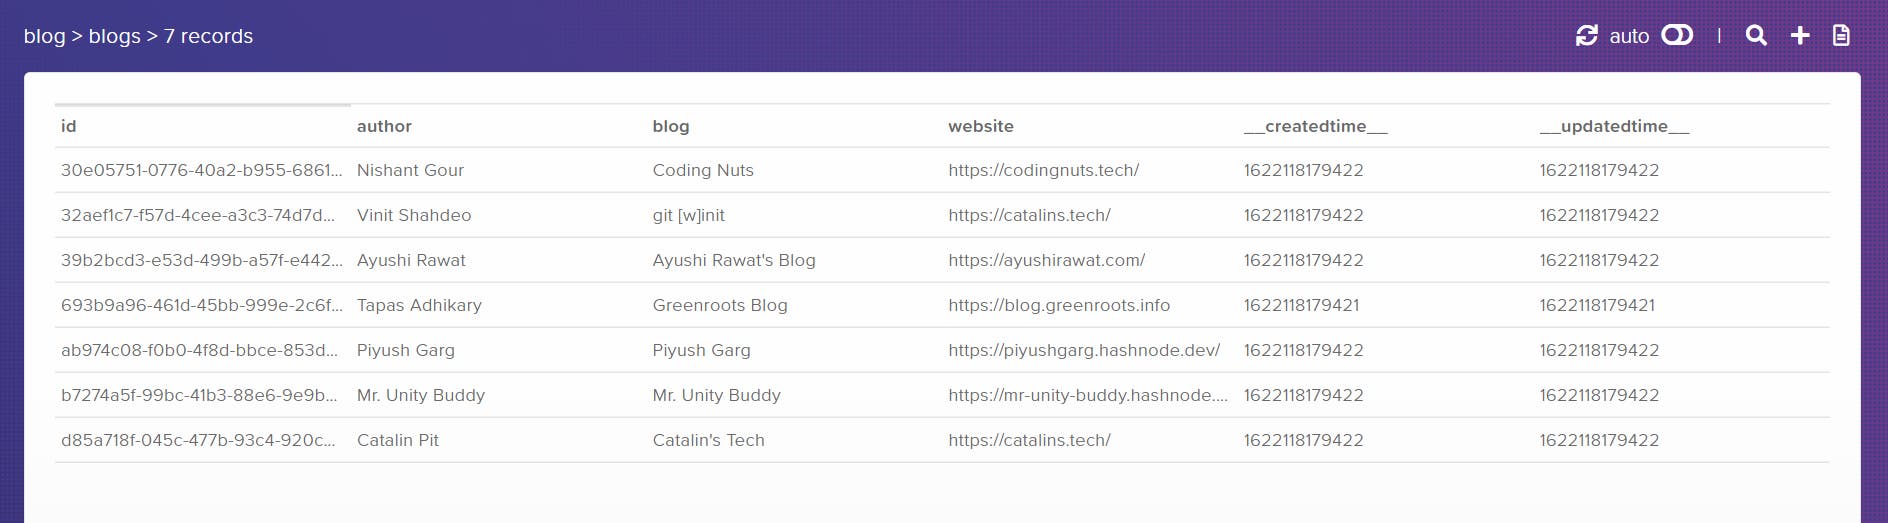
Click the green save button and your database should automatically populate the array in the table, as shown in the image below. Notice that the id attribute we named earlier as the unique hashing attribute of this table is automatically generated.
__created_time__ and __updated_time__ are also automatically generated attributes.
Add client user
Now that we have our database populated with some data, let's manage our user role for the app.
By default, the user that can access this database is called a 'superuser'. A superuser have full rights to create, update and delete data from the database.
If we want our app to be publicly available, we need to prevent anyone from tampering with our database. So let's create a client user, a user that reads our database from our React app and is not allowed to make changes to our database.
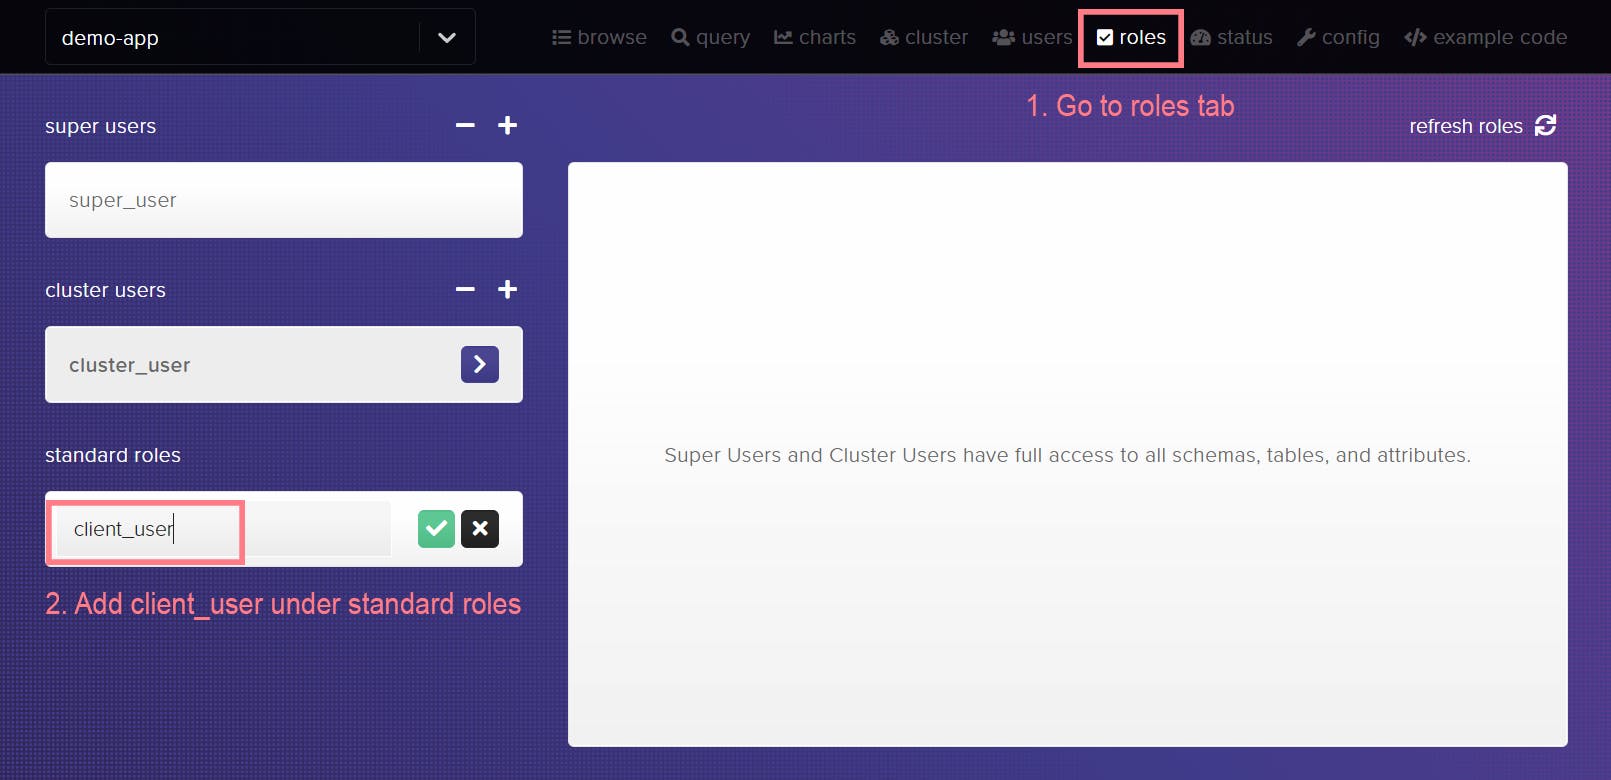
To add a client user role, select the 'roles' tab on your dashboard. Then add the client_user under standard roles. Please refer to the image below.
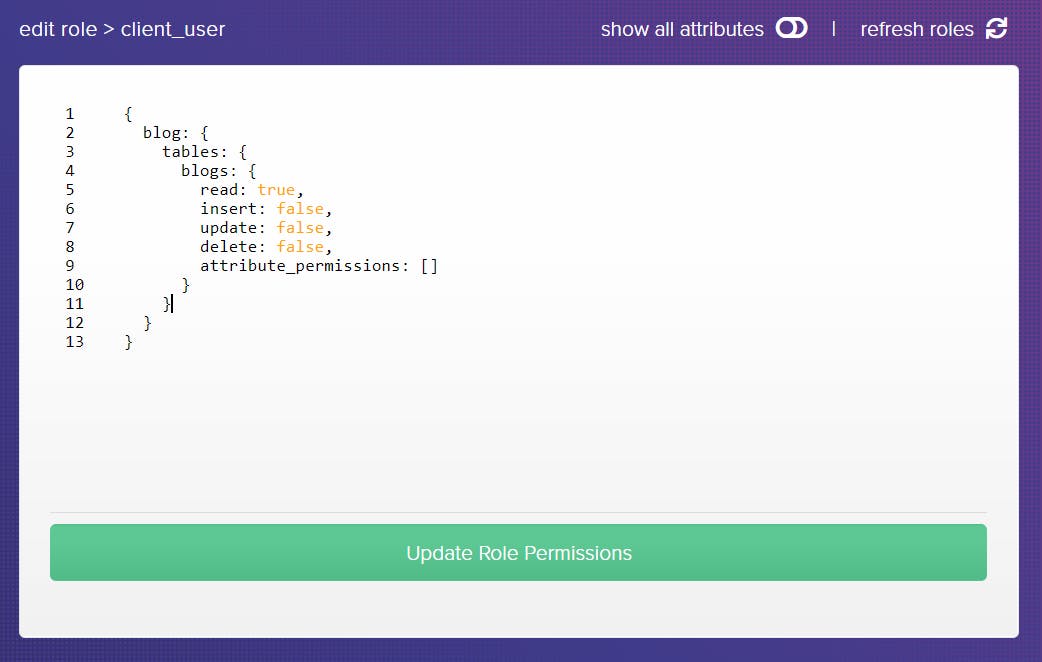
Then, click on the green checkmark button to confirm creating this new role. The right panel will show the default permissions of the client_user. Set all permissions except the read permission to false. Finally, click 'Update Role Permissions'
.
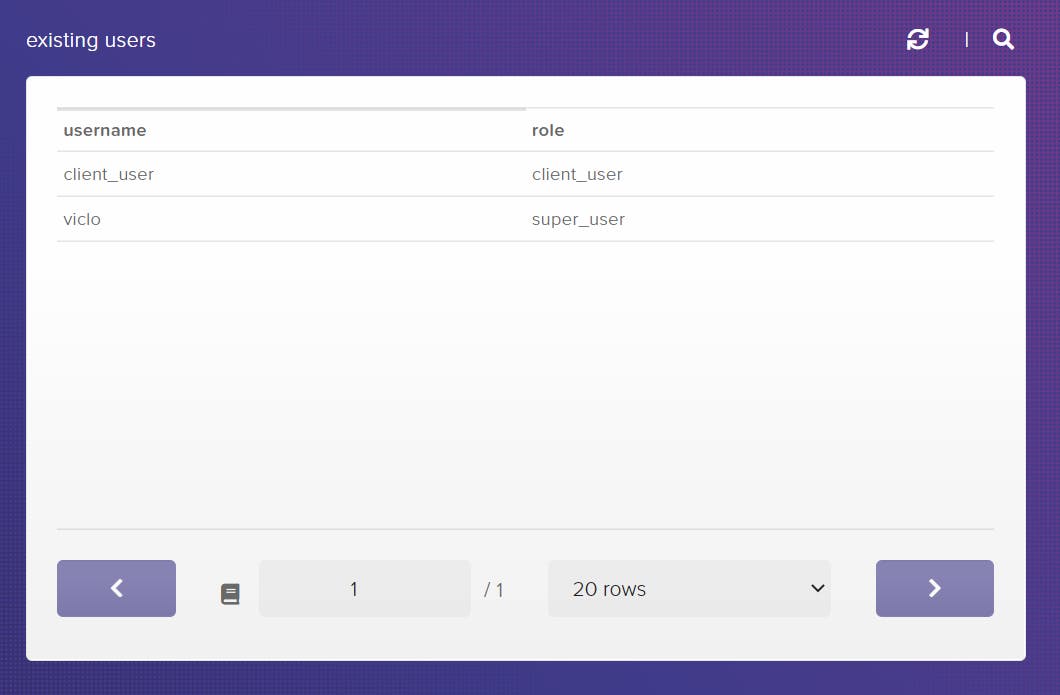
We now have a client_user role with the permissions we want for our React app. So let's add this role as a user. Go to the 'user' tab to add the user as shown in the screenshot below.
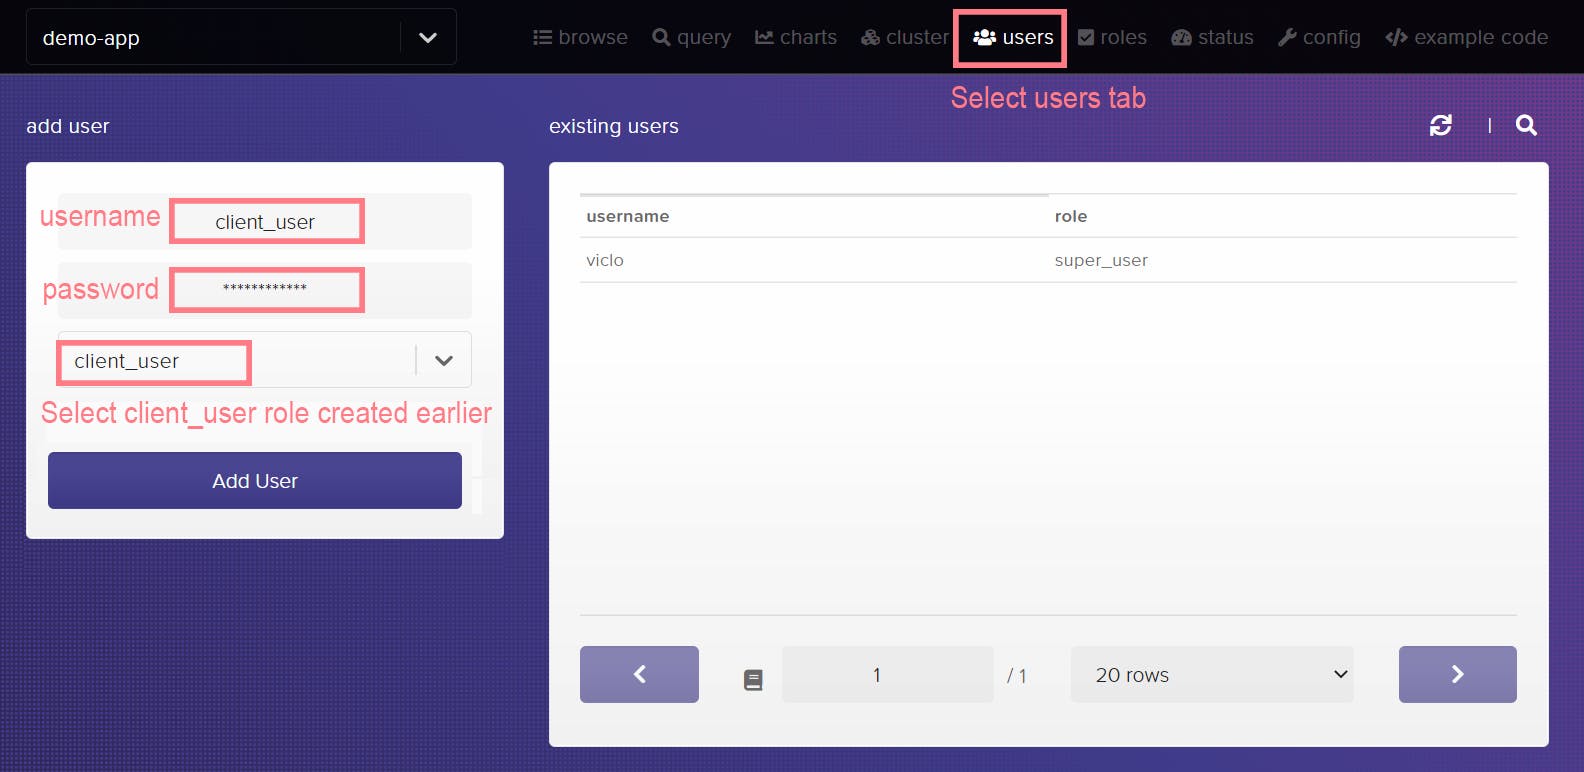
Click on 'Add User' to confirm. The client_user should appear in the existing users panel immediately. Remember the username and password for this user. We will need it later.
Step 4: Create React App
Our setup with HarperDB is now complete. We can now create a new React app using the following command:
npx create-react-app <app-name>
Then, let's install a package called use-harperdb. It is a React Hook that makes it easy to integrate HarperDB with React. Run the command below to install.
npm install use-harperdb
Step 5: Import HarperDBProvider
Now let's import the HarperDBProvider in index.js and wrap it around our <App/> component.
import { HarperDBProvider } from 'use-harperdb';

let url = process.env.REACT_APP_DB_URL
let user = process.env.REACT_APP_USER
let password = process.env.REACT_APP_PASSWORD

ReactDOM.render(
  <React.StrictMode>
    <HarperDBProvider url={url} user={user} password={password}>
    <App />
    </HarperDBProvider>
  </React.StrictMode>,
  document.getElementById('root')
);
Add an .env file to store credentials
We also need to pass the url, username and password of for our HarperDBProvider. The username and password are from the client_user we created earlier in Step 3.
You can find your url in your HarperDB dashboard.
Create an .env file in your app's root directory and add these 3 information in it like so:
REACT_APP_DB_URL=https://your_url.harperdbcloud.com
REACT_APP_USER=your_username
REACT_APP_PASSWORD=your_password
Step 6: Query and Display Data
Let's head to App.js to start using our useHarperDB hook to query and display data from our HarperDB database.
First, we import the hook with:
import { useHarperDB } from 'use-harperdb';
Then, initialize the hook:
const [data, loading, error, refresh] = useHarperDB({
    query: { operation: 'sql', sql: `select * from blog.blogs` },
    interval: 50000,
  })
As seen in the code above, we can query our database using the SQL command:
SELECT * FROM {schema_name}.{table_name}. In our example, our schema name is blog and our table name is blogs.
Then, we can return the queried data in the App.js return function. Here's the final App.js component:
import './App.css';
import { useHarperDB } from 'use-harperdb';

function App() {
  const [data, loading, error, refresh] = useHarperDB({
    query: { operation: 'sql', sql: `select * from blog.blogs` },
    interval: 50000,
  })

  return (
    <div className="App">
      <header className="App-header">
        <h1>Top Programming Blogs</h1>
        <button onClick={refresh}>Refresh</button>
        {data ? (
          <pre>{JSON.stringify(data, null,2)}</pre>
        ) : error ? (
          <div style={{ color: 'red' }}>Error: {error || 'false'}</div>
        ) : (
          <div>Loading...</div>
        )}

      </header>
    </div>
  );
}

export default App;
We can start our React app with npm start and we would see the following:
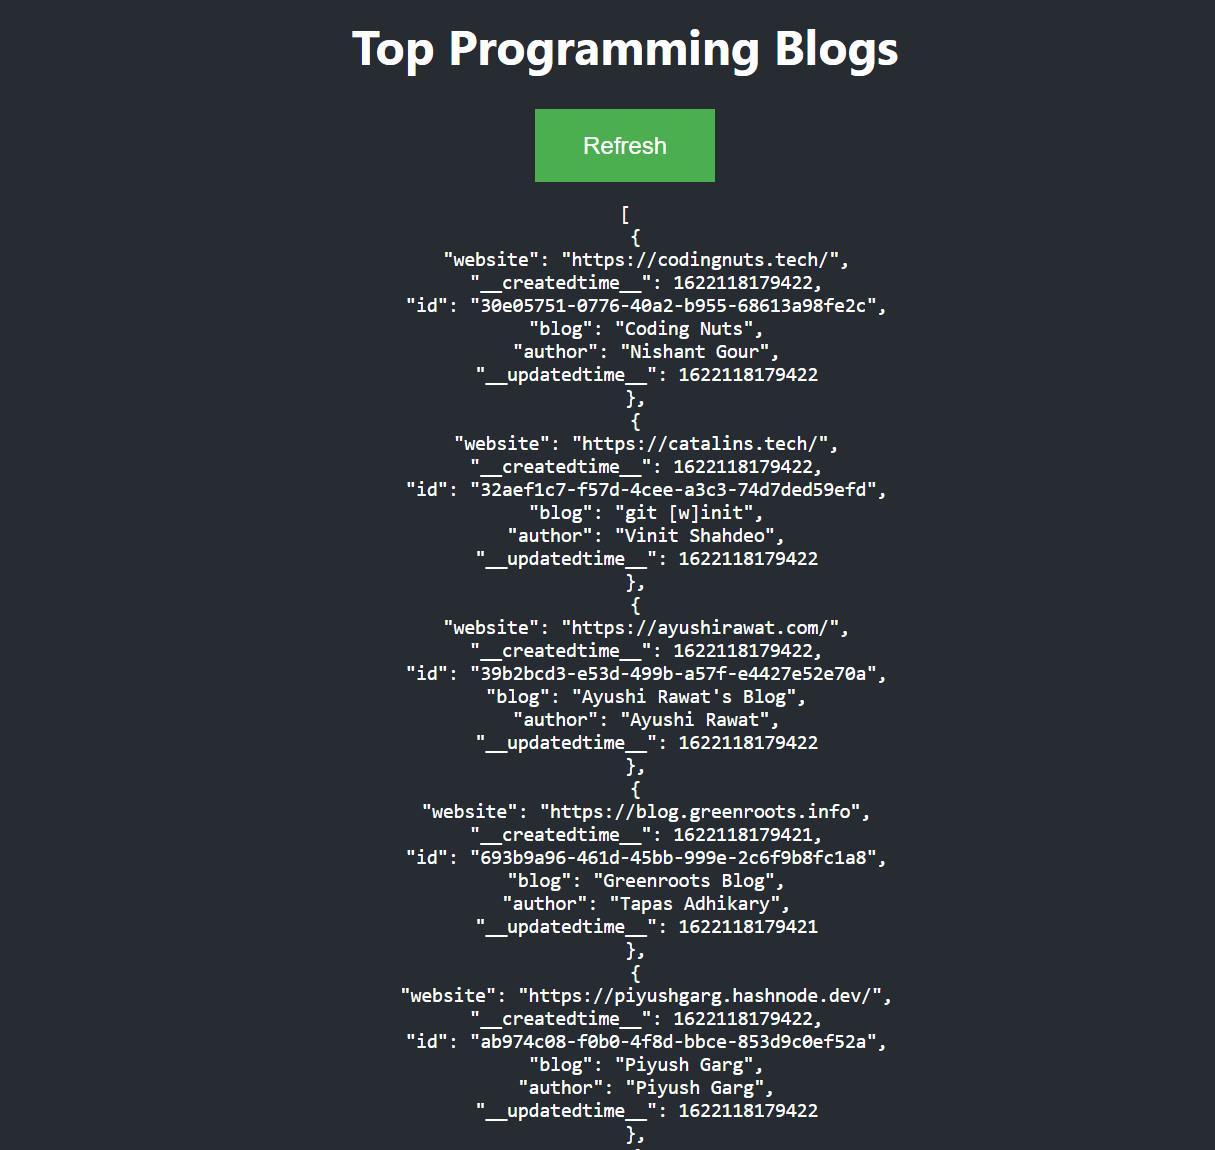
All the data has been fetched and displayed on the app perfectly! The data fetched will be in the same JSON array format as when we populate it. But let's format the data in a more readable format for the app.
Step 7: Add Styling to Data
In App.js, we can replace our <pre>{JSON.stringify(data, null,2)}</pre> element from Step 6 with a table element that returns our fetched data using map(). Let's see the code.
return (
    <div className="App">
      <header className="App-header">
        <h1>Top Programming Blogs</h1>
        <button onClick={refresh}>Refresh</button>
        {data ? (
          <table>
          <thead>
            <tr>
              <td>Blog</td>
              <td>Author</td>
              <td>Website</td>
            </tr>
          </thead>
          <tbody>
            {data.map((row, index) => {
              return (
                <tr key={index}>
                  <td>{row.blog}</td>
                  <td>{row.author}</td>
                  <td><a href={row.website}>{row.website}</a></td>
                </tr>
              )
            })}
          </tbody>
        </table>
        ) : error ? (
          <div style={{ color: 'red' }}>Error: {error || 'false'}</div>
        ) : (
          <div>Loading...</div>
        )}
      </header>
    </div>
  );
Then, we can add some styling to our App.css and our final React app can look something like this:
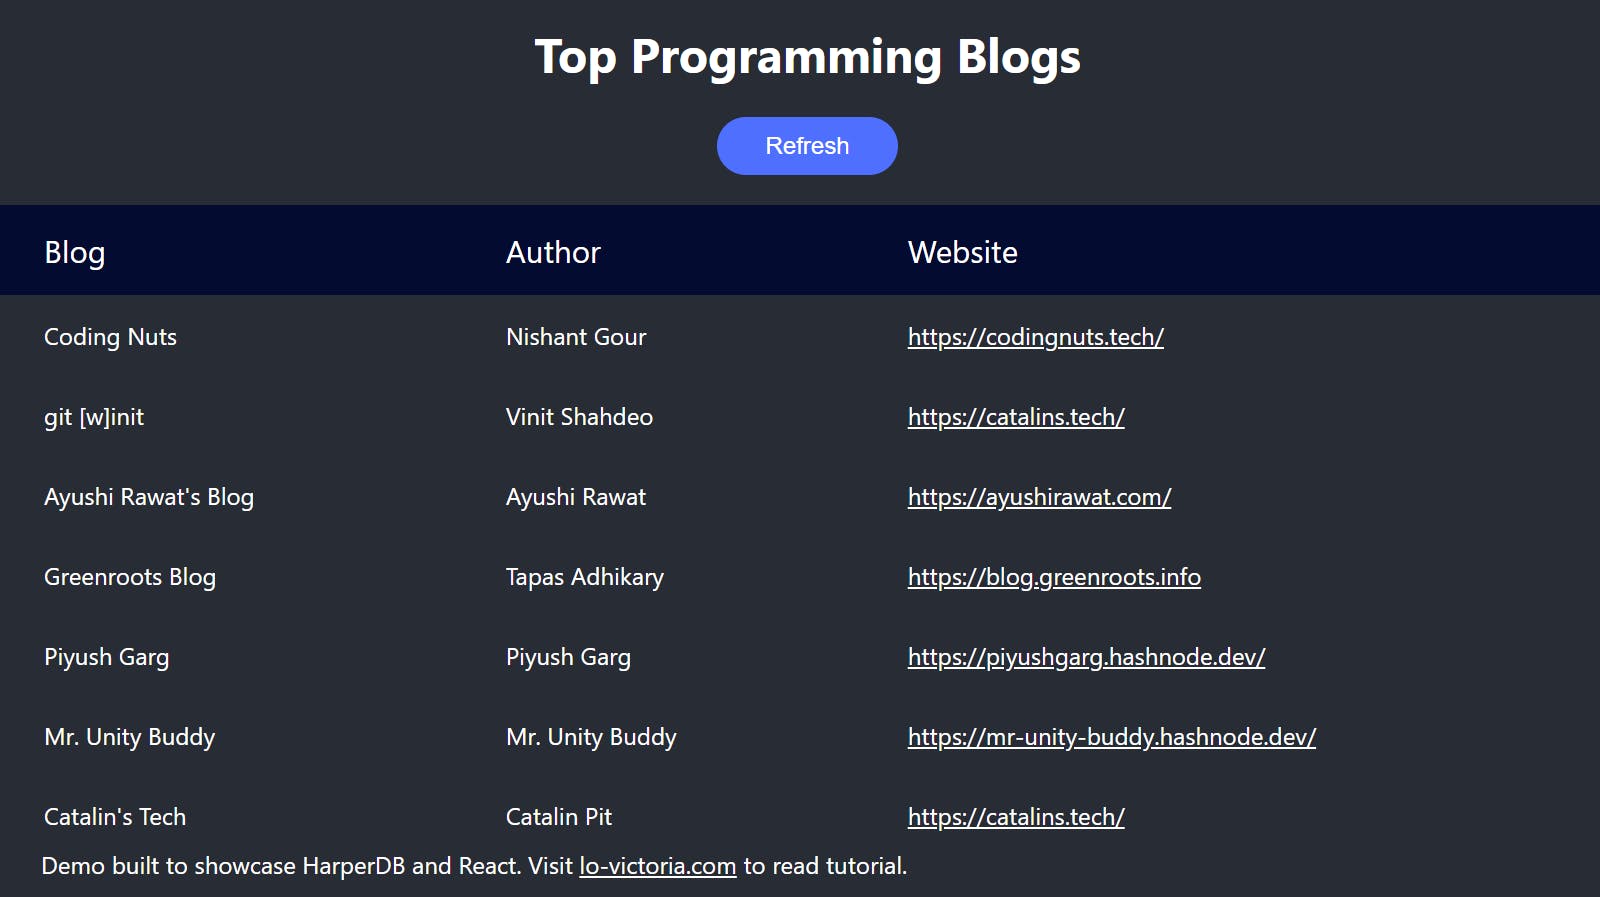
There, doesn't that look better? Our app is now complete! We can fetch data on top programming blogs from HarperDB and display it nicely on our React app.
Conclusion: Simplicity without Sacrifice
HarperDB is an easy to use and intuitive tool to manage your databases on the cloud. It offers plenty of flexibility in terms of database structure, user, role permissions and data storage. It is also able to perform SQL queries using JSON arrays, allowing more rapid app development with simplicity.
To learn more about HarperDB, please visit harperdb.io.
Please check out more related articles on HarperDB by some of the most amazing writers:
- Build a REST API with HarperDB and FastifyJS by Catalin Pit
- Build a REST API with HarperDB and NodeJS by Aman Mittal
- Build a NodeJS CRUD app with HarperDB by Olubisi Idris Ayinde
- HarperDB Instance w/ React by Piyush Sinha
- Create a serverless book library app with HarperDB and Gatsbyjs by Tapas Adhikary
Thanks for reading. If it's helpful, feel free to share and ask questions in the comments below. Please check out the GitHub repo for this project and the References section below for more. Till next time, cheers!