

Automating Tests with Selenium #2: Assertion-based Tests
Learn how to automate testing with Selenium WebDriver! Part 2 - Test Assertions in Web Browsers via Selenium and Node assert module


Hello everyone! Welcome back to Automating Tests with Selenium, a series where I will cover basic concepts and examples of automated testing with Selenium and Node.js. An intermediate knowledge of Node.js is recommended to follow along.
In the previous part, we learned how to make simple automated actions by opening the browser, inputting keys and closing the browser using Selenium Webdriver.
In this part, let's take a look at how to apply some assertions with Selenium. At the end of this article, you will learn how to write assertions in Node.js and perform simple assertion-based testing with Selenium.
Node.js Assert Module
Assertions are used to confirm if a test passes or fails. To test whether an expression is true or not, we can use Node.js's built-in assert module. Let's take a look at some common assert methods from the module (table from W3Schools).
| Method | Description | |
| assert() | Checks if a value is true. Same as assert.ok() | |
| deepEqual() | Checks if two values are equal | |
| deepStrictEqual() | Checks if two values are equal, using the strict equal operator (===) | |
| equal() | Checks if two values are equal, using the equal operator (==) | |
| fail() | Throws an Assertion Error | |
| ifError() | Throws a specified error if the specified error evaluates to true | |
| notDeepEqual() | Checks if two values are not equal | |
| notDeepStrictEqual() | Checks if two values are not equal, using the strict not equal operator (!==) | |
| notEqual() | Checks if two values are not equal, using the not equal operator (!=) | |
| notStrictEqual() | Checks if two values are not equal, using the strict not equal operator (!==) | |
| ok() | Checks if a value is true | |
| strictEqual() | Checks if two values are equal, using the strict equal operator (===) |
I will be using my Bulletin Board App to illustrate writing assertions. If you are following this tutorial, I encourage you to use the same app, but feel free to use your own.
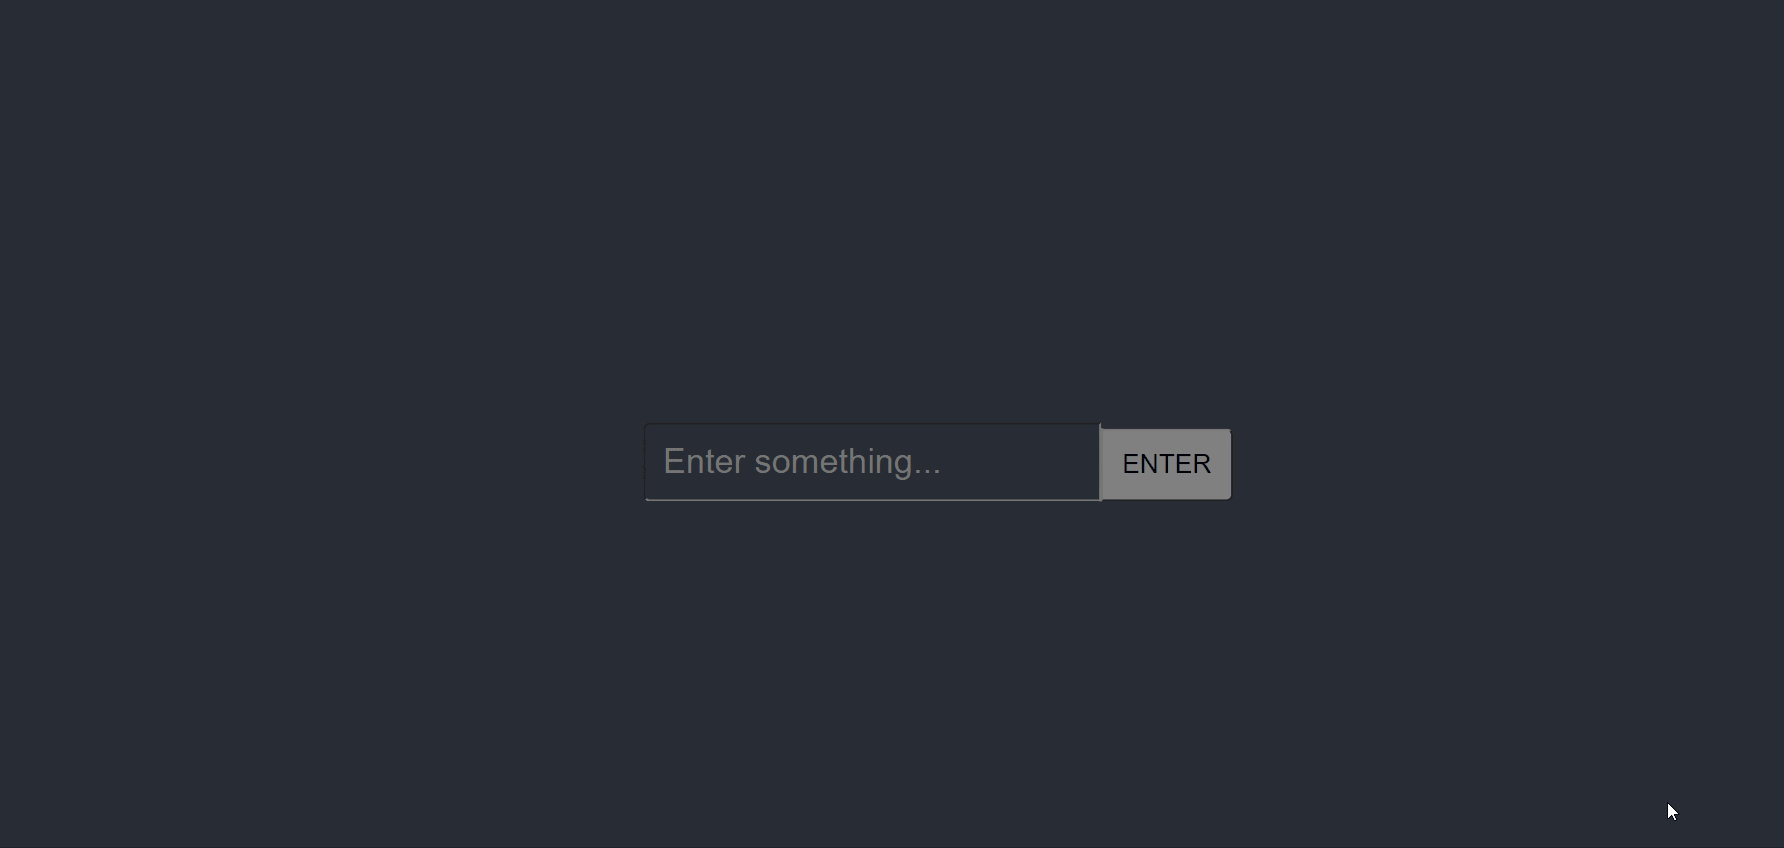
The app is very simple. It takes in an input from the text field and outputs a draggable note. For this example, we will create a simple test to check if the entered input in the text field (i.e. "Hello Selenium") will output a note with the same text.
Step 1: Create test file
We can use the same npm project we initialized in Part 1 and create a new file in the test folder called test2.js for this part of this series.
Let's start with importing the same modules as Part 1 in test2.js. This time, we add the 'assert' module too.
require("chromedriver");
const {Builder, By, Key} = require('selenium-webdriver');

const assert = require('assert'); //add this
Step 2: Test2.js
We will use Selenium to automate the flow:
- Open Chrome window
- Go to my app at victoria-lo.github.io/bulletin-board
- Type "Hello Selenium" in text field and press ENTER (aka RETURN key)
- Assert if the generated item's text is the same as input
If you have followed this series from Part 1, you will know how to implement the first 3 steps. If you need a refresher, please read my Part 1 of this series. So just like last time, let's create a simple example function.
(async function example() {
  //1. Open Chrome window
  let driver = await new Builder().forBrowser("chrome").build();

  try {
    //2. Go to website
    await driver.get("https://victoria-lo.github.io/bulletin-board/");

    //3. find the input elem and enter 'Hello Selenium', then press return key
    await driver.findElement(By.xpath('//*[@id="new-item"]/input')).sendKeys("Hello Selenium", Key.RETURN);

  } finally {
    //close the browser
    await driver.quit();
  }
})();
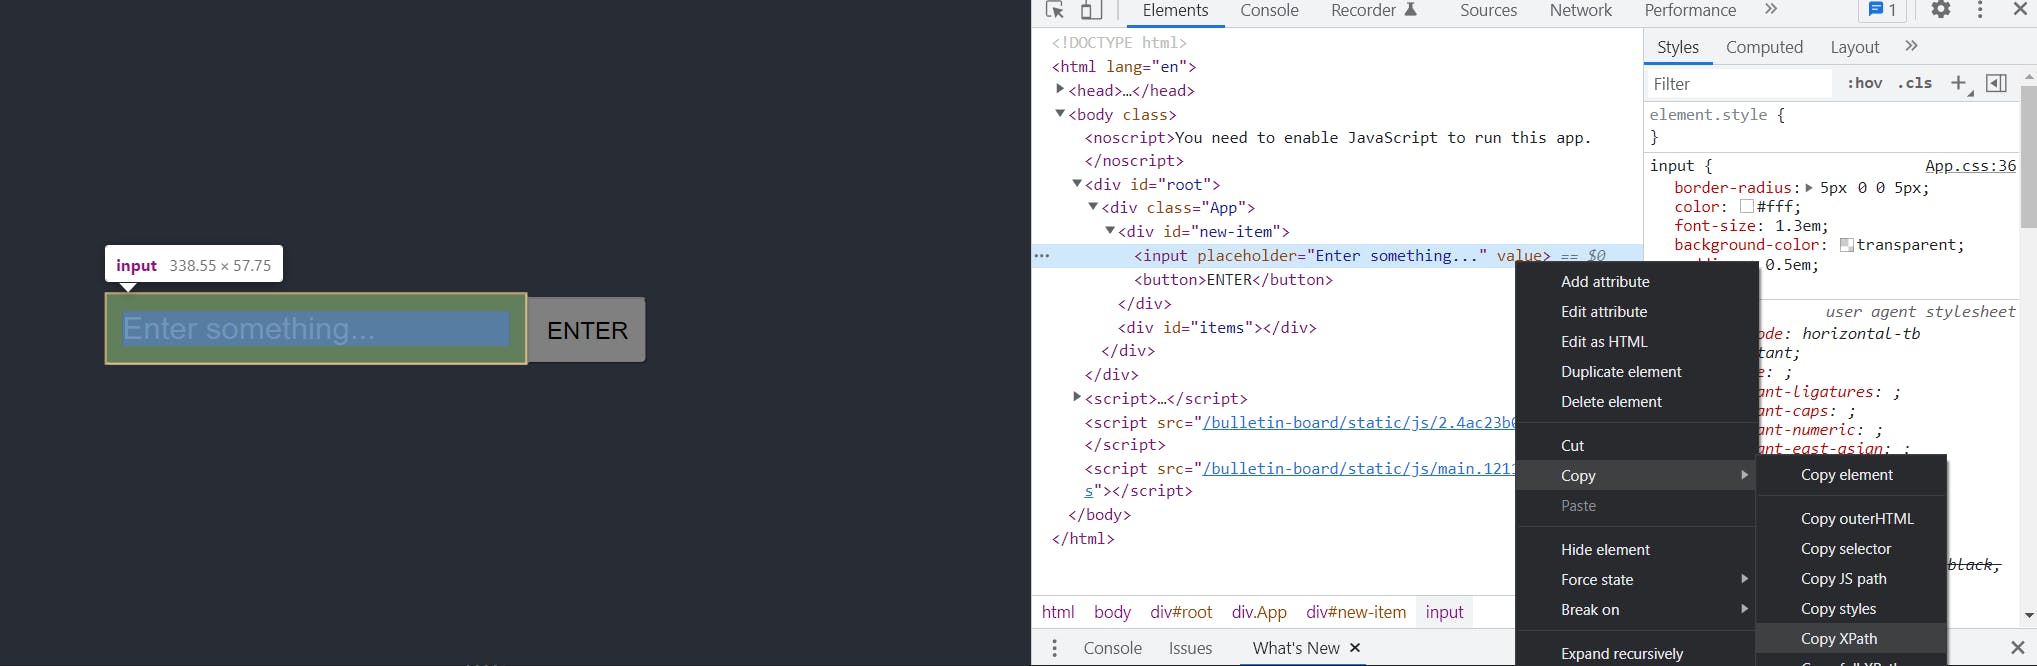
As seen in the code above, in step 3, we need to first locate the DOM element to input text via the sendKeys method. In Part 1, we use the name attribute. Here, we can use the XPath to do so. To get the XPath, simply right-click on the element and select 'copy' then copy 'XPath'. See screenshot below.
Finally, let's learn how to do step 4, which is to assert whether the generated note contains the "Hello Selenium" that was entered in the input field.
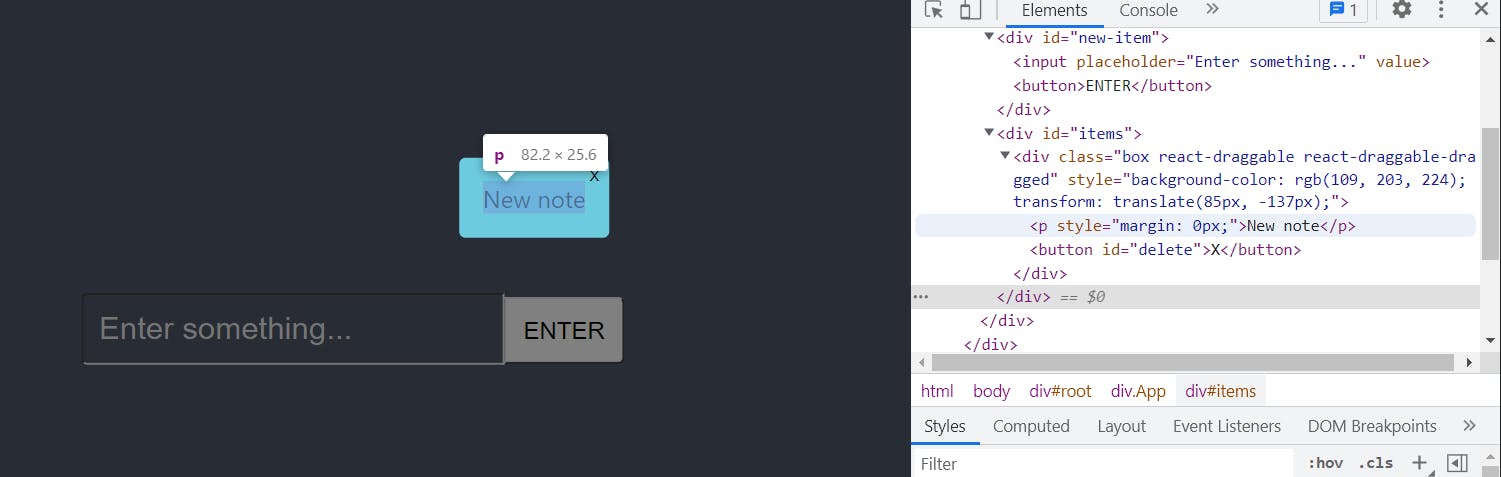
To get the generated note, we can see that the DOM element we want is the p element inside a div, which is a child of <div id="items">. See the screenshot below for a better understanding.
So we can get the note's text like this:
//get the note's text
let note = await driver.findElement(By.xpath('//*[@id="items"]/div/p')).getText();
Next, we want to compare the value of note to the input we entered (i.e. Hello Selenium). So we can use node's assert module's strictEqual method for this.
//assert that the note's text is the same as the input text "Hello Selenium"
assert.strictEqual(note, "Hello Selenium");
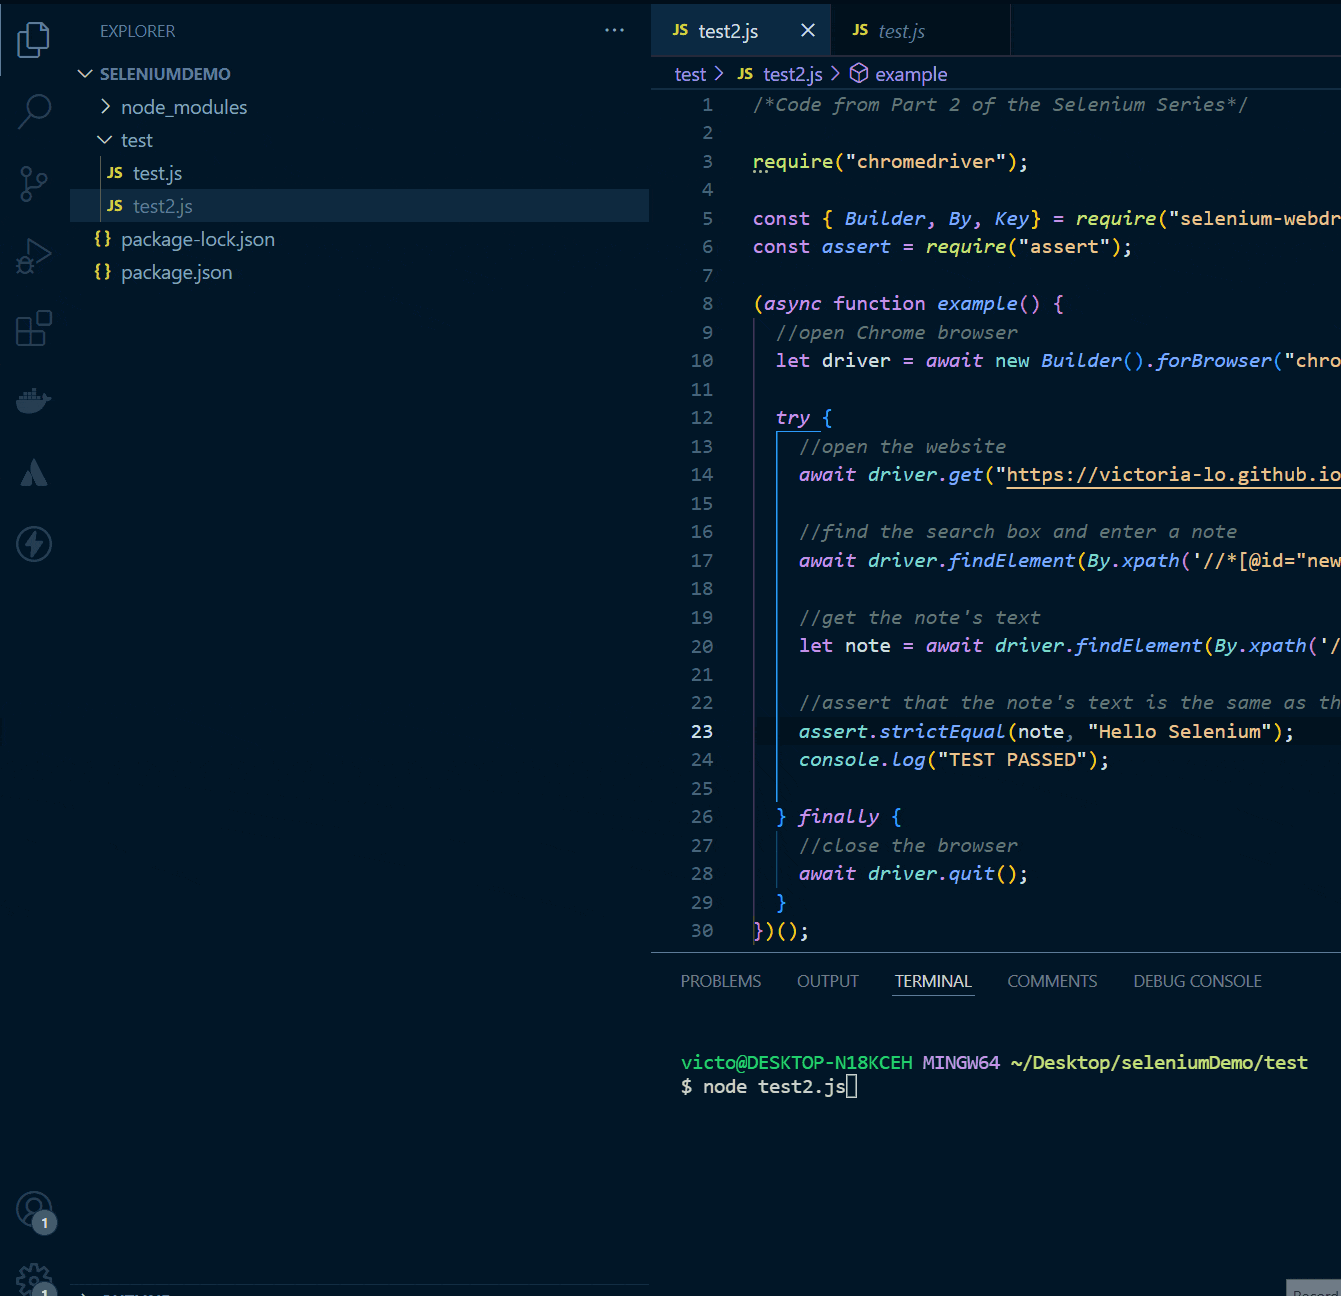
Final Result
Our final code for our test would be:
require("chromedriver");

const { Builder, By, Key} = require("selenium-webdriver");
const assert = require("assert");

(async function example() {
  //open Chrome browser
  let driver = await new Builder().forBrowser("chrome").build();

  try {
    //open the website
    await driver.get("https://victoria-lo.github.io/bulletin-board/");

    //find the search box and enter a note
    await driver.findElement(By.xpath('//*[@id="new-item"]/input')).sendKeys("Hello Selenium", Key.RETURN);

    //get the note's text
    let note = await driver.findElement(By.xpath('//*[@id="items"]/div/p')).getText();

    //assert that the note's text is the same as the input text "Hello Selenium"
    assert.strictEqual(note, "Hello Selenium");
    console.log("TEST PASSED");

  } finally {
    //close the browser
    await driver.quit();
  }
})();
Now let's simply run the script with the following command:
node test2.js
We should see the website being automatically launched and tested in a blink of an eye thanks to Selenium. And of course, the console would indicate that the test has passed.
If the test did NOT pass
Let's say the input text was supposed to be "Hello Seleniu" instead. The browser would close itself and the console would print the following:

Conclusion
In this part, we have learned how to make a simple assertion-based test to run simple automated tests on browser using Selenium Webdriver! It is pretty neat, isn't it?
Thanks for reading! I hope it was helpful in getting familiar with Selenium. Please feel free to ask questions in the comments below, and see you in the next part. Cheers!